

I originally started out by getting her approval on my plan, all designed around the bedding that she had picked out {click to enlarge}:

The funny thing is, that in the end, a lot changed on the board and in the design, however, it was still a crucial inspirational instrument in getting the room done and keeping a common theme and throughout!
The first major step towards getting the room going, was actually by spending a day shopping together, in which we snagged some great finds, such as the media cabinet for under the TV, the curtain panels, cute bowls for her hair accessories and rings and some other accessories.
Next step was a trip for me to help prime and paint the nightstands. During this trip I also noticed that they had begun painting all of their doors and trim a bright white, which was going to be the essential part of lighting up the smaller sized room. We also used this trip to do some additional room shopping, which included picking out some molding for their new mirror!
Since the nightstand project was going to be completed in phases {waiting for paint to dry}, I later returned for part two, in which we added decorative paper and accessories to finish off the look! Here is a reminder of the before and after:


The nightstands were given major beauty salon style makeovers via primer, paint, pretty paper, hardware and accessories {like these lamps, bowls and alarm clock}!


The next visit to Josh and Erin's happy dwelling, had us finishing up some little crafty projects, such as creating some framed monograms:

Wrapping books with leftover pretty paper and cutting out a faux sheepskin rug to top a storage ottoman:

And that is where we left off. So far so good right? Well, some final behind the scenes stuff had happened between my visits, by my good little DIYers, such as a whole new floor installation project!

And assembly of their new mirror:


The mirror assembly went as follows: 1} Measure it 2} Cut it 3} Staple and Glue it 4} Add a Hanging Kit to it.
Those simple steps created such a cute and fresh mirror, giving the room with dark walls and one little window, a lot more natural light!

And hung in front of it is a floating candle-holder, adding a soft ambiance when night falls!

My final visit was all about finishing it up and calling it beautiful!
On the wall flanking the mirror, we added some floating vases filled with cute floral accents!
The bedding was changed out and the cheapo Ikea curtain panels were hung. WOWZERS! The difference really leaves one with lack of breathtaking words! Look at these before and afters!
Before:

After:
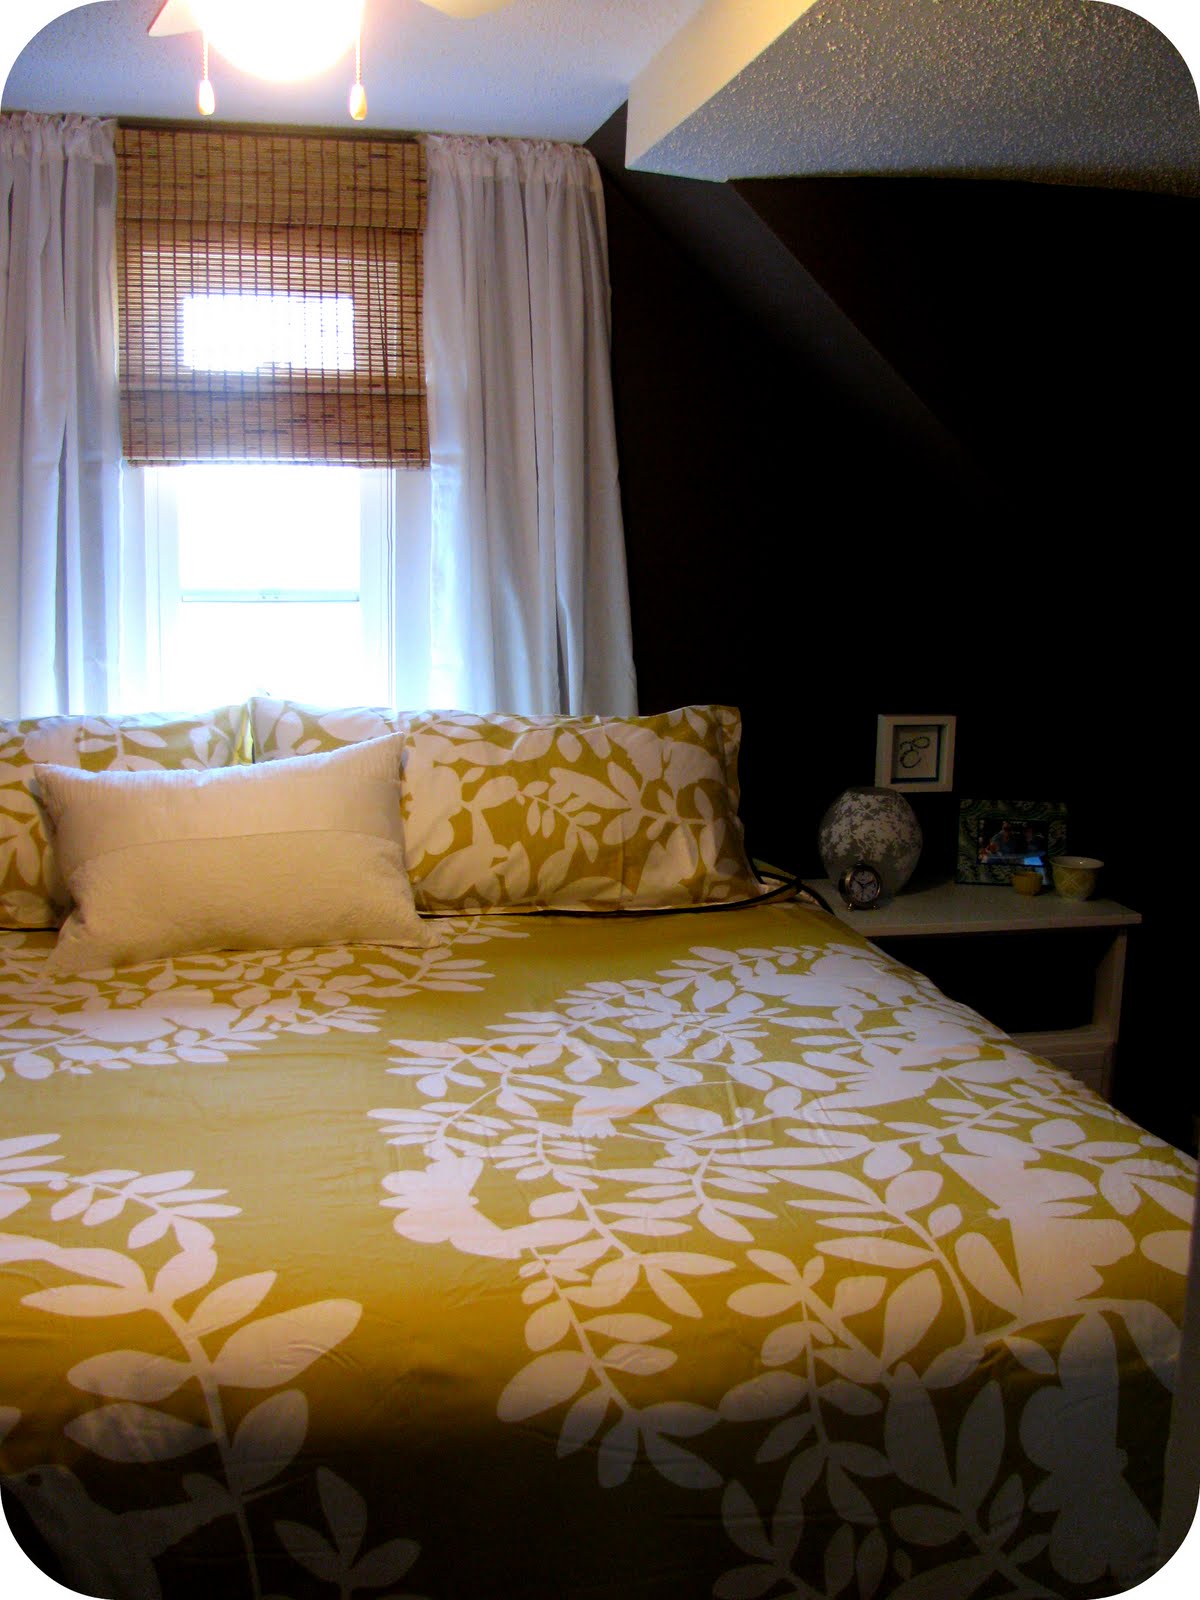

But the real show stopper in the whole space really is the bedding, which she found through Target for a much cheaper price than the original inspiration set from Crate & Barrel!
Another fun side by side before and after shot:


And the last part of the room was devoted to addressing the TV wall. The solution I had was to add a shallow cabinet with a decorative door, that wouldn't take up much floor space, but would not only add additional storage, it would also cover up the cords that ran floor to TV.


On top of the storage unit were some $1 plant pots filled with DIY wheat grass. Too cute for words I tell ya! And really, doesn't the white trim completely make the space? I think it was by far one of the best time investments they made on this whole project, it really made it feel like a whole new room!
And that nearly completed it....
I say nearly, because one thing you may have noticed from the mood board, that I hadn't exactly touched on yet, was the lighting. Originally we were both dreaming of a pretty chandelier to sparkle and glam up the space, taking it to over the top fabulous. So, we snagged a chandelier from Ikea for $40, thinking it was a steal of a deal, only to get it back to the room and realize that there just was absolutely no room to hang that chandelier, or any other for that matter. The ceiling was too low, the bed was too high. Back to the store it went and back into their wallet went forty smackaroos.
I wanted to do something special for my hun since the chandelier wasn't going to work out, and all they had presently was a plain white ceiling fan. So, I went on Etsy to browse for a cute wall decal that can be used for both the fan blades and the mirror. Bingo, found the perfect solution.... waited two weeks for it to arrive... excitedly opened the package when it arrived.... frowned upon the color... Uhg, strike two!
Heading to my besties abode, I snagged some leftover white wall flowers from my home office makeover, to share with my love in her new space. And they fit right in, on a blank wall and in the corner of her mirror, pretty cute!


And that wrapped up the space! I will still be on the lookout for some fresh ceiling fan decals to add down the line, and when that happens, of course I will share that with you all as well! But until then, she has been sleeping soundly and joyfully in her new Master Suite.....
Again, the befores:

And the afters:


Paint & Primer for Doors, Trim, Nightstands and Mirror: {Primer received free from dad} White Paint $20
New Laminate Floors: $150.00 {On sale from Menards}
Bedding: $99.99 {Target - now on clearance in store!}
Throw Pillow: $14.99 {Ikea}
White Curtain Panels: $9.99 {Ikea}
Curtain Rod: $5.99 {Target}
Decorative Paper: $8.98 {Container Store & Hallmark}
Drawer Pulls: $10.99/2 {Target}
Alarm Clock: $9.88 {Walmart - Free Site to Store Shipping}
Ring Bowls: Large: $5.95 Small: $1.95 {Crate & Barrel}
Nightstand Lamps: $16.99 x2 {Ikea}
Shadow Box Frames: $4.99 x 2 {Ikea}
Hanging Tea Light Candleholder: $3.95 {cb2}
Floating Wall Vases: $4.95 x2 {cb2}
Storage Ottoman: $26 {On sale, Walmart - Free Site to Store Shipping!}
Rug: $9.99 {Ikea}
Media Cabinet w/Door: Cabinet: $24.99 & Glass Door: $35 {Ikea}
White Planters: $0.99 x3 {Ikea}
Grass Seed: $3.50 {Petsmart}
Mirror: $7.99 {Target, white frame removed, molding added}
Mirror Molding: $8.99 x2 {Menards}
Grand Total: $524.94!!!
Now I would totally love to know what you think! What's your favorite part? Was it worth the torturous wait I put you though? Any inspiring ideas found that you are thinking of giving a try in your own space? Do tell!

I am seriously in awe here Jen! What an awesome transformation for an even awesomer price! I seriously cannot wait for you to put your touches on our new home! Congrats on a job well done!
ReplyDeleteLooks great, good job!!
ReplyDeleteLOVE IT!!
ReplyDeleteI love it. I noticed the grass is from Petsmart. My cat eats everything living, (chewed my bamboo down to sad nubs). Is the grass meant for cats? It looks like it could be fun for Connor to trim on his own.
ReplyDeleteVery cute but that paint color really closes in the space. A lighter hue would really top it all off!
ReplyDeleteI completely concur with your opinion.
DeleteGreat job! I bet they're enjoying every second spent in their new cozy nest!
ReplyDeleteI love it! I'm not worried about the dark brown color, or my room looking bigger exactly. I just love the bright yellow bedding and all the fun pops of white! Perhaps one day I'll change it up, but for now, we're 100% satisfied!!! Love you! xoxoxo
ReplyDeleteWow! WTG on such a tight budget. It looks way pricier. Lovely job girls!
ReplyDeleteheather
Looks fantastic, love it!
ReplyDeleteWow! That looks fantastic! Way to go, Erin & Jen! All that bright white really makes the room feel larger and much more fresh. And I LOVE that bedding! Question: Where did you score the hanging vases from? I spied something like that a while ago in a PB mag, but I haven't been able to locate any knock-offs anywhere else.
ReplyDeleteFab job! The remodel looks spectacular!
~Chelsea
Hi Chelsea!
ReplyDeleteThe wall vases were from CB2: http://www.cb2.com/family.aspx?c=583&f=2906 {$4.95 each with is a steal of a deal!}
Thanks!
xoxo,
Jen
what type of rod did you use to hang the curtains i dont see a curtain rod? Room looks great
ReplyDeleteHi queenbee!
ReplyDeleteThe curtain rod was a simple cheapo rod {around 5 or 6 bucks} from Target. Because we were mounting the curtains at the ceiling, it wasn't necessary to buy anything expensive or super pretty, because it wouldn't be seen.
Thanks for stopping by! I hope that helps!
xoxo,
Jen
Wow, I already have the frosted/white lamp and the white cabinet with the glass door! I got so excited seeing those :)
ReplyDeleteMy cabinet is in my bathroom though. Great idea with the window, it really opens the whole thing up!
Hello Jen,
ReplyDeleteI love your blog I am delighted. You did a great job (as always). I just have a question about the monogram. How did you do to put a picture in the letter? I'm not very good with microsoft excel, but I like to know how to do things.
thank you
Odile.
ps: sorry if my English is not good ... I'm French))