


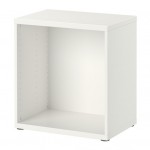
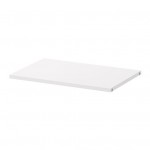
Unfortunately, I purchased the box to the cart so long ago; I can no longer find it online. It was an item that IKEA carried for quite a few years, so I am not sure why I am unable to source the exact cabinet with the correct depth, but for reference it is from the STUVA line and is 19 1/4" deep by 23 5/8" wide by 25 1/4" tall. I have also used IKEA's BESTA cabinets and I believe they would also be a viable option for this type of setup. When I purchased the box unit, I also picked up two correlating shelves. And then things short of just sat for a bit (as seen in the last post)...

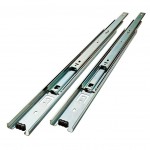
The box was assembled per IKEA directions and was a great size for fitting under my desk, it even left a little wiggle room above and below for moulding. The printer fit the cabinet great as well, however, there were times when it was difficult to access. I knew it would be much easier to utilize with the help of a pull out shelf. There were a variety of drawer slide options at Home Depot, however, I wanted something that could manage the weight of my large printer. I selected these heavy duty Liberty rails in the 18" length, and I also appreciated that they offer a full extension slide.
We began by attaching the glides to the inside of the cabinet with some simple screws, right at the bottom edge.
We then measured the total width of the glides and cut down one of the shelves to fit between them. Although I didn't photograph that step, we do recommend using a painter's tape to tape off your cut line and to prevent any fraying of the wood finish.

To attach the rail to the shelf, Bryan used the hardware to mark the appropriate location on the shelf edge and then pre-drilled holes along each side.


The next step was to attach the rails to the shelf with some wood screws; we went with a longer screw to ensure the shelf would be sturdy and strong when paired with the glides.

Then we just snapped the pull out shelf into place!

To help with the cord management, we used a hole saw bit to create an opening for printer and scanner cords in the back of the cabinet.


The weight of the printer was no problem for the new heavy duty pull out shelf!

I did quickly realize that the weight of the printer did make it a bit challenging for me to quickly and easily pull the printer shelf out, especially while sitting in my chair.
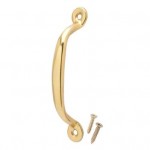
Because the front of the shelf doesn't have an open back to affix hardware the way a typical drawer would, I had to find a front mounting drawer pull. There were a variety of options online, but I found this one for under $3 locally and it worked just as well!

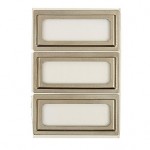
I have two types of paper that I print on frequently; a regular bright white paper and a cardstock weighted paper. To differentiate the two, I created some simple labels that I printed on clear sticker paper to affix to the stacking paper trays (font style Bromello).


At this point, I thought we were done, until I took a step back. I was not very happy with how my eye went straight for the gaps between the floor and the underside of the desk.

We are super fans of the crystal white foam moulding sold at Home Depot, and have used it throughout our entire lower level. It is all on mega sale right now (which makes me worried they will be clearancing it out), and I purchased a piece for the floor of the cabinet for around $1. It is easily cut with a simple miter box and I affixed it with a brad nailer at the base. I also attached some door/window casing at the top of the cabinet.

Moulding is always and instant game changer in any project, and this was no exception. Prior to adding the moulding to the top, we wedged a piece of wood between the printer cart and the top of the desk to provide additional support above.

The moulding gave the cart a polished "built-in" look and feel, without actually being built-in at all.

I contemplated having the upper shelf be a pull-out option as well, but for the added expense of the glide in comparison to the frequency I use my scanner, I didn't feel like it was necessary for now. The cool thing is that I can always easily change that down the road should I ever feel differently.

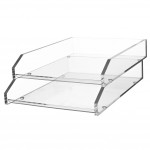
There was a lack of color in this little area (and we all know how I feel about that), so I lined the front of a clear magazine file with some leftover gift wrap and tucked my paint decks inside.

Steps like this make the office feel more legit and complete, and also increase the overall functionality. I am getting closer and closer to adding some decorative touches and then calling this space finito!


For easier reference, below you can find a quick round-up of the products used in this post:
 |  |  |  |
 |  |  |  |
* affiliate links used
What a pretty and simple solution! I may have to steal it for myself!
ReplyDeletethat's a great idea!
ReplyDeleteGreat job! And so appealing to the eye...
ReplyDeleteUau! Fantástica a ideia, vou colocar em prática aqui.
ReplyDeleteAdoro seu site!
:* from Brazil!
I love the POW of your big room reveal posts, but posts like these almost feel more important. Well, not important, but I hope you catch my meaning here! They're simple, anyone-can-do things that make your home more functional, more livable, more beautiful. They are small, but improve the quality of your day in big ways. I love reading things like this!
ReplyDeleteThank you Devon! I would agree, it is all of the smaller elements that make up a space (and help days run smoother) that really make a space sing. :) I appreciate your comment.
DeleteLooks beautiful! I really love the trays you have for paper and cardstock. I have mine facing different directions (one portrait, one landscape) in the drawer under my printer but that doesn't work so great. And it's not nearly as pretty as yours. Thanks for the idea!
ReplyDeleteAbsolutely gorgeous! I wish you would come over and decorate for me! I love your ideas!
ReplyDeleteAmazing the difference a little molding can make! Really steps up an already great scenario.
ReplyDeleteStunning as always. You're attention to detail amazes me!
ReplyDeleteCould you post a link to the moulding that you used?
ReplyDeleteHi Amy,
DeleteI couldn't find an exact link to the piece I purchased for the floor, but I believe it is part of their white composite moulding selection: http://www.homedepot.com/b/Building-Materials-Moulding-Millwork-Moulding/Composite/N-5yc1vZara1Z1z0uk32
Looks absolutely fantastic Jen! I'm in the middle of setting up my new office so this is inspiring. Love your level of attention to detail <3
ReplyDeleteThis looks really clean and convinient. I like it.
ReplyDeleteThis is really beautiful and such a great idea! I may have to make one for my office because my printer's just sitting on the floor. #notcute
ReplyDeleteThanks for the tips Jennifer! I bought the same paper sorter, but made labels with Avery mailing labels instead. Wish I knew how to upload a photo to show you how you inspired me.
ReplyDeleteI would love to see your photo, you can email it to me at iheartorganizing@gmail.com. Thanks Kellee!
DeleteHello,
ReplyDeleteThanks! Saving this page for my future project.
Building a pull out tray into my existing desk.
Do you think a shelf from Ikea can be cut cleanly (at home depot?) down? My space is 17" wide and 18" deep, probably need to account a bit for adding rails? It looks like i can use the exact rails you used...18:. Thanks!
I definitely think an IKEA shelf can be cut cleanly, if it is a solid shelf. I just don't know Home Depot's policies on cutting items from other retailers. I also know our Home Depot store always warns us that their cuts may not be clean or exact because of their equipment/blades. But otherwise, yes. :) And yes to also accounting for the size of the rails, as they do add width.
DeleteI would love to know the size of your craft room
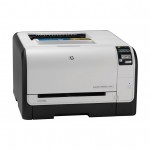
ReplyDeleteI LOVE this project and I am thinking of tackling the idea. But first I need a new printer. I was wondering how you like your printer. It is aesthetically appealing, but does it print well and do you use wireless printing?
ReplyDeleteSecond, what is the other printer looking device you have on the top shelf? So curious.
I absolutely love my printer, I have had it for years and it has always produced beautiful colors and print. It is a laser printer, so ink is very expensive, but it lasts me quite awhile and does produce a crisper print than typical ink jets. It is also wireless so I don't have to be plugged in to print. (HP LaserJet Pro CP1525nw Color Printer )
DeleteThe other device is a Neat Desk document scanner.
xoxo!
Thank you Jennifer. I just purchased then newer version of your printer and look forward to trying it out. I'm also going to investigate our need for the Neat Desk scanner. We have been using an app called TurboScan and that seems to do the trick for now.
DeleteI also just ordered the Ikea items to attempt to make the cart. I love the idea and can't wait to try it. I think it will be great! Thank you for sharing all your ideas and products!
Where is your desk from that you put the printer cart under? Great idea, we just built an office and it has limited space.
ReplyDeleteHello,
DeleteThe desk was created with a combo of LINNMON tops from IKEA: https://www.ikea.com/us/en/catalog/products/80251141/ and https://www.ikea.com/us/en/catalog/products/00251135/ and attached to the wall with ledger boards. I also added a couple legs for additional support.
Jen
Hey Jen, my question is actually about your printer. I have the same one and LOVE it. I too have had it for years. My question is where do you buy your ink? Have you noticed the price going up exorbitantly? Luckily I only have to buy about once a year, but I have noticed it went up about $100 (for the 3 pack of color) this year on amazon. Any other suggestions?
ReplyDeleteHi Rebecca,
DeleteI have been running into the same issues with ink prices. I still purchase all of my ink on Amazon, just try to use it sparingly and make it last as long as I can. I hope I don't have to look into alternative printers, I sure love the quality of an HP laser!
Jen
The Stuva Ikea cabinet shelves are now hollow. 😭 Hubby just did the nicest cut to find it hollow and no where to screw the rail into. Hopefully can find something similar that we can work with.
ReplyDeleteOh no! That is always such a bummer when companies change a good thing. We have recently repeated the shelf/rail setup in another area of our home using basic white melamine board from Home Depot, so that might be an alternative and inexpensive option for your project also.
DeleteBest of luck! ♥
Have you buy your desk at ikea too? I search a model like this!!
ReplyDeleteHi, how do you ensure the cabinet doesn't fall due to the weight if the printer, when the printer shelf is open?
ReplyDeleteHello,
DeleteThe cabinet itself is very stable, however, we also have the cabinet acting as additional support for the desk as well, which sits on top of the cabinet and is also attached to our wall. The cabinet isn't mobile or able to tip.
If your cabinet is floating, you may have to do some weight testing, or be sure to purchase rails that can sustain the weight of the items you are placing on the shelf.
Jen
What i don't realize is actually how you're no longer really much more neatly-appreciated than you might
ReplyDeletebe right now. You are very intelligent. You realize thus considerably
in relation to this subject, produced me for my part imagine it
from so many varied angles. Its like women and men don't seem to be involved except it is something to do with Woman gaga!
Your individual stuffs great. At all times take care of it up!
Can you tell me what you used for the desktop? I love it all and i'm trying to do a similar project for myself?
ReplyDelete