

I am back again to share another step in the BFF master bedroom makeover. As you may recall, my absolutely bestest gal pal asked me for some assistance in giving her master bedroom a fresh update. So that's what we have been up too, from planning, to shopping, to priming and here we are now. This past weekend I returned to my bff's abode to find that her and the hub have been REALLY busy getting stuff done! My jaw dropped in awe seeing how much had gotten accomplished, they should be extremely proud! And I have to say, it's so much fun passing off the dirty work {assembling a mirror & molding, painting and priming trim, installing the nightstand hardware and media cabinet}, while I sat home and ate bon-bons. OK, OK, totally kidding! Y'all know that I wouldn't pass up the fun to get my hands dirty as part of any DIY project!
First I have to mention what I arrived too on Saturday morning. It was a beautiful sunshiny day, and I was already in excited spirits for a fun day of room assembly, but my bff sure knows how to brighten my days even more. She always does all those key things that besties do, however, on Saturday she went above and beyond to make my heart smile. She had the most adorable gift bag of goodies waiting for me! Can you believe this generous gal? I mean really, she knows me as well as she knows herself, the gifts inside couldn't have been more fitting! First off, the bag was one I had been eying up at Target for some time now, but hadn't found the perfect reason to splurge on one yet. So even just seeing that had me jumping up and down!

I really heart the pattern it is flaunting, totally up my alley!

And inside the bag sure didn't disappoint either! From a bag of my favorite treats, to a set of Thank You cards sporting pears on the front {pears are by far my most favorite decor accessory}, to a little box that got my squealing like a baby piglet! That's right, you would too! Who doesn't when they see that classic black and white Crate & Barrel box!! And inside, a little white "love" bird, from my bestest to me.

But the most amazing part of it all, was the sweet words from her heart to mine, it got me all mushy gushy inside!

Smiles all around! Thank you my bestest! I am having a blast working on your space with you!
So after we hugged, A LOT, it was time to get to work!
If you recall, the nightstands started out looking like this:

And then I spent a day with E, sanding, priming and painting! And after I left, she put her man to work, installing the new drawer pulls! And of course, taking some pics for me along the way!
He started by measuring:

And and marking:

And then drilling:

So when I returned to help finish, they were looking pretty amazing already!

Although I have done it a trillion times, every single time a little prime/paint combo is involved with old furniture, my jaw drops at the transformation it makes. So easy, and so fantastic!
So what was left? They are already pretty fab, but now we are going to make them shine!
I had seen a project on YHL that sparked some thoughts. They did a Modge Podge dresser drawer project, in which they lined their dresser drawers with decorative wrapping paper! Looks AMAZING right?

{picture courtesy of YoungHouseLove.com}
Our plan was to use their idea as inspiration found, turned into our own. The plan, line the top and inside of the nightstand with decorative wrapping paper, using the same process.
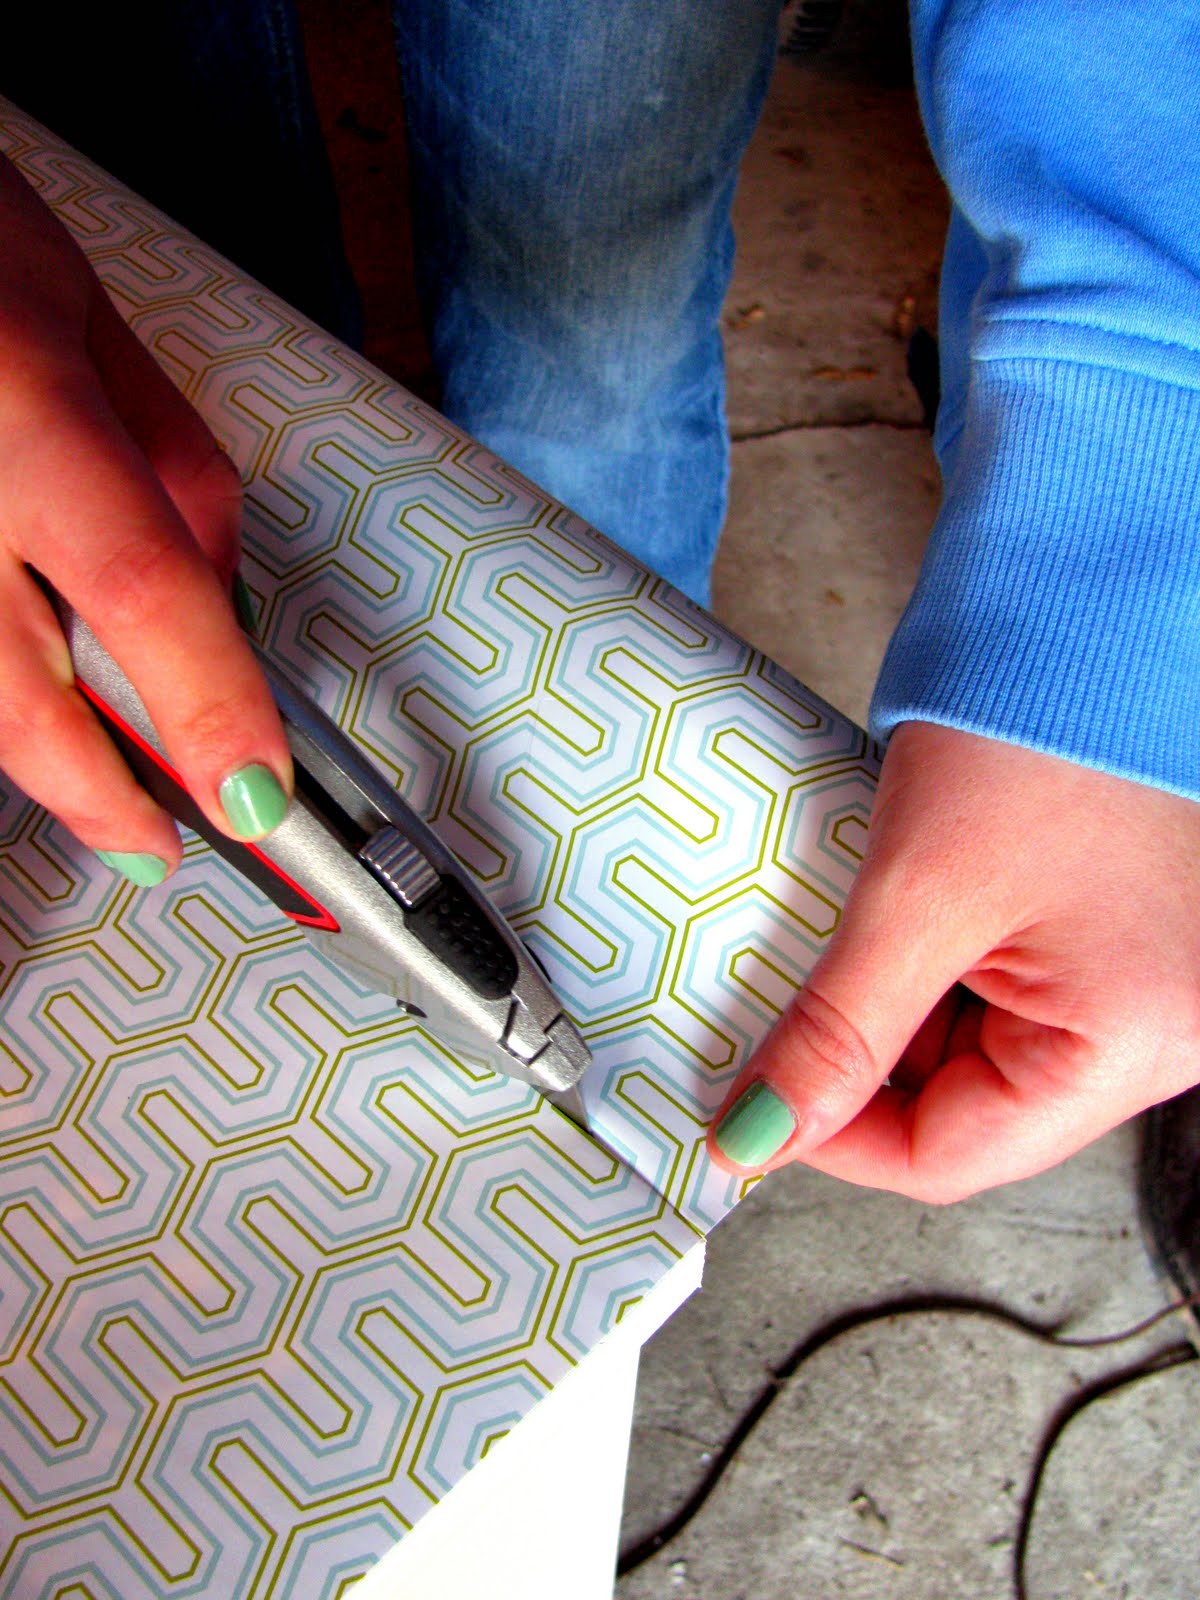
So we started by cutting the paper to size:

And then applied Modge Podge quickly to the top of the nightstand:

And then just as quickly, laid the paper along the top and began smoothing it out:

However, IT WASN'T WORKING! The paper was bubbling... and not sticking well. We tried and tried again... no success for us. Of course, this is our very first time using the stuff, so who knows what we were doing wrong. It was time for plan B.
Thank goodness there is a hardware store in her little itty bitty town of residence. It has saved our day a couple of times now! We ran there to quickly snag a quick can of spray adhesive. I have used this stuff before so I knew that would get the job done!

Again, working quickly, we sprayed the surface with the spray adhesive and quickly placed down the paper, pressing out any wrinkles. This worked wonderfully, so we repeated for all sections of the nightstand! Giving a pretty amazing finished look!!

But backing up a step! When we removed the top drawer, it left a little dip inside, so E's hubster cut some boards to size, that we actually covered, and then used some Power Grab to glue them down inside, making everything nice and level!

And that was all we did with the stands for the day! We were going to Modge Podge over the top of the paper for a protection coat, however, were pretty afraid to do so after the first battle with the stuff. So instead, we decided that she would just have some glass fitted to avoid any wear and tear to the now uber glamorous nightstand tops!
So it was now time for the absolute best part of any DIY project! Seeing your hard work put in place and accessorizing!
Ready for the absolutely jaw dropping mouth watering before and after? You might want to make sure you are sitting for this one!!
Again, the BEFORE:
And the amazing AFTER:

I am pretty sure both of us were beyond satisfied with the end result! And of course, accessorizing was a ton of fun!
We added adorable lamps on each side of the bed, along with a decorative yet completely working alarm clock:

Along with an adorable Liberty photo frame {from Target}, and two decorative bowls, one for hair ties, and the other to hold her rings safe and sound through the night:


And remember, we actually had added paper to the tops and the new shelf created when we removed the top drawer:

A basket was added to the space, which now gives her the option to stash her lotion, chap stick, remotes, and other miscellaneous goods.
I just gotta swoon one more time at the incredible side by side:
Of course there is SO much more that went on that day when I visited her. I have a couple of more projects to share before the final reveal, so stay tuned for more fun to come!!
What do you think of the changes? Anyone else tried the Modge Podge project, with success? Any ideas where we may have gone wrong with the stuff? How about any fun projects in the works using decorative paper to dress up an old piece of furniture or something new that needs a little personalization? I would heart to hear all about it!!

I get excited just reading this, and it's in MY house!
ReplyDeleteLove, love, love it, and I love YOU!
Wow! What a transformation! I love it, and the basket adds just that extra touch to keep it slightly informal and not-too-rigid. It adds more character and charm (can you tell I love woven baskets?). Anyways, it looks super! I can't wait for the final reveal. :)
ReplyDeleteI am new to your blog thanks to YHL, what a transformation! Fantastic job and can't wait to read more. Spray adhesive rules (especially for papering bookcase backs)!
ReplyDeleteHey! I am new to your blog also. You have such a lovely home. That is an awesome before and after pic! Thanks for the inspiration! :)
ReplyDeleteThat came out great!! I only use decorative paper for my scrapbooks right now, but who knows..I may be inspired to use it elsewhere now.
ReplyDelete-heather
Oh and I'm digging on that green nail polish!
ReplyDeleteHi, I am also new to your blog - thanks to YHL.
ReplyDeleteSo far I am loving it. This furniture makeover is amazing.
I think this is a fantastic DIY make over. Very creative and resourceful! I love me a great DIY and organizing blog - so I added you to my blogroll. Nice job!
ReplyDeleteI am also new to your blog, because of YHL, and let me just say I am the MOST unorganized person on the face of the planet. I always want to start DIY projects but never do because my place is so unorganized. I always say "I'll start this project when I get this organized" but am never able to because I get overwhelmed. You have filled me with excitement and right after discovering your blog yesterday I cleaned out the pantries in my kitchen, and threw out so much old stuff. Today I went to the store and got a few containers and I was going to start organizing my kitchen tomorrow but couldn't wait, and started as soon as I got home from work. Basically I just wanted to thank you so much for your inspiration and showing me I can do it too!
ReplyDeleteKathleen! What an awesome note! I am crushing on your new found enthusiasm! And quite often, it just takes getting one project completed and reaping the rewards, to keep you on the organizing track! Feel free to share any before and after pics, I would heart to share your success story on the blog! :O)
ReplyDeletexoxo,
Jen
Girl, I am not even kidding you that I can't even find my digital camera because my place is so unorganized. Maybe I'll take a few with my not so awesome camera phone until I find it. One room at a time! I am off to the container store today, know you are jealous. LOL :)
ReplyDeleteWhen you used the modge podge did you also apply it to the top of the paper as well? After you apply it to the bottom, you smooth all the bubbles out but then you also have to apply another coat but to the top of the paper. Thought I would ask since it didn't mention you applying any to the top, that might have been the reason it didn't work.
ReplyDeleteHi! Your blog is amazing! The nightstand looks great. I am also redecorating our Master bedroom and we are using the same color pattern. Where did you find the adorable bowls??? Great job!
ReplyDeleteHi Amy!
ReplyDeleteI found the bowls at Crate & Barrel, and let me just say, they are the most adorable bowls for corralling small things of importance! IHeart them oh so much, the patterns they sport are fantastic!!
http://www.crateandbarrel.com/family.aspx?c=14378&f=36606
xoxo,
Jen
Hi Sarah!
ReplyDeleteWe actually did not apply the Modge Podge to the top of the paper, as it was bubbling and wrinkling too quickly, we didn't want for it to remain in that condition permanently. Would it have removed the bubbling?
Thanks for your help!!
xoxo,
Jen
Hey! i am working on a similar project with a large dresser. I want to do the same basket idea but there is a dip where my drawers were to. So i was wondering what kind of board you used to even it out.
ReplyDeleteThanks
Alaina
Hi Laina!
ReplyDeleteI will check with my bff's hubby on that one! I believe though, that it was just a 1/4" thick plywood scraps that he happened to have hanging out in his garage.
xoxo,
Jen
Hi Jen,
ReplyDeleteDid you cover the paper with anything special to help protect from wear and tear?
We did not initially, however, she was planning on having a piece of plexi cut to place on top and to protect it once the bedroom projects were finished.
Deletexo!