

Mind blown.
I know I am a nerd and I girl crush gush about my contributing team all of the time, but they just inspire me so much! For example, Jen has inspired me to pick up power tools. Because of her, I am no longer afraid of their sharp edges or sounds. I may not be quite as good as using the tools as she is, but I am using them!
After you check out her latest building turned organizing project, you may be inspired to grab for a tool or two as well. And if not, maybe you will at least want to clean out a closet or two.

Hi friends! Jen Woodhouse here, from The House of Wood. I’m happy to be hanging out with you guys, sharing my latest organizational DIY project. The last time I was here, I shared my family command center as I dreaded the start of the school year with a Kindergartner. I also moved my sweet girl into her first big girl bed when I built her West Elm-inspired queen bed. You guys. I am trying to keep it together – the days are long, but the years are way too short. Am I right? Now that my daughter has a pretty bed on one side of her room, it was time to focus my attention to the other side.
Brace yourselves.
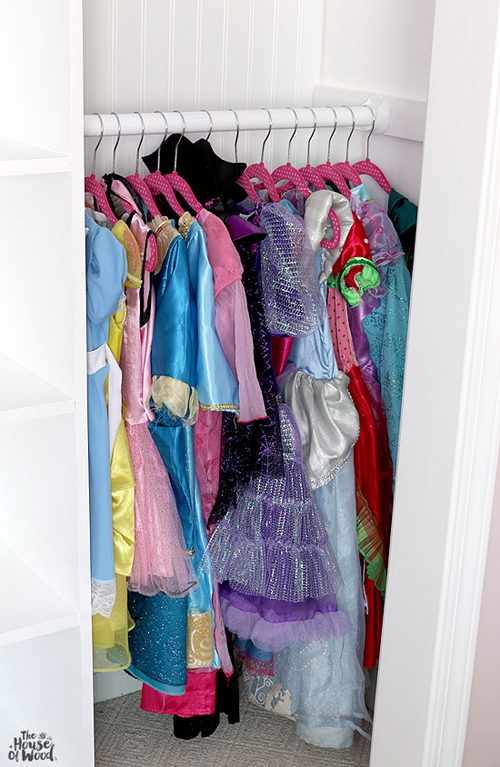
This is her very disorganized and dysfunctional closet. We moved into this house back in June and those moving boxes have been there ever since. #motheroftheyear

The bi-fold doors took up valuable space in her small room and those wire shelves were just not practical. I’m not very tall, but I am adult-sized and I could hardly reach the top rack. Having a clothing rod hung that high made no sense for a little girl’s room, so I decided to give her closet a bit of a makeover.
Here’s how it turned out:

This DIY project may look intimidating, but surprisingly, it only took a couple of days and less than $100 to complete!

First, I cleared everything out of her closet and removed the wire shelving. The wire shelving left gaping holes and unsightly tears in the walls because they were installed using large anchors instead of being screwed into the studs in the wall. After realizing I’d have to do a substantial amount of spackling to repair the walls, I decided to cut my losses and just cover it up. I picked up a bead board panel from The Home Depot and used construction adhesive and brad nails to attach it to the wall.

Then I moved onto building the center shelving unit. I used a single sheet of 3/4″ plywood and constructed the box using pocket hole joinery.


I picked up a few packages of these wood pole sockets and an 8-foot wood dowel for the clothing rods.

After painting the shelving unit, pole sockets, and rods with white latex paint, I brought everything into the house to install. I located the studs in the wall, then attached the shelf by screwing directly into the nailing strips with 3″ spax construction screws. The nailing strips are the three boards right under the top, fourth, and sixth shelf (the bottom one isn’t visible in the photo below).

Can you believe you can create a custom closet with plenty of practical storage out of a single sheet of plywood? I just love that.
I placed the clothing rods low enough so that my five-year-old can hang up her own clothes. Gotta start ’em young, right?
Of course, I had to make space for her many, many princess gowns. I think my little girly girl owns every single Disney princess dress except Pocohontas’ (because hers “doesn’t twirl”). #priorities

Finally, I hung up a tension rod and this pretty ruffled curtain, slipped some baskets on those shelves, and called it a day. I hung her dresses on the top left rod, her school uniforms underneath, and her princess gowns on the right.
Didn’t I tell you about those princess dresses? My daughter has more costume changes in a day than Whoopie at the Oscars. Alice, Belle, Merida, Aurora, Ariel, Cinderella, Rapunzel, Jasmine, Elsa, Anna… you name ’em, they’re in there (except poor non-twirly Pocohontas – womp womp).
My favorite one, however, is Maleficent. My daughter insisted on wearing her Maleficent gown on her Daddy/daughter date, which I thought was super awesome and hilarious. Can she please stay this little always?

I picked up the baskets from Michaels (they have the best deals!) and they hide toys, shoes, and other miscellaneous items.


After getting everything installed, I decided I wanted to add a long shelf that ran across the entire top of the closet to store extra blankets, quilts, pillows and such. I rummaged through my scrap wood pile and kept on building. I also added another clothing rod to hang her coats and raincoats.


So there you have it – my daughter now has a functional and organized closet that makes the best use of her small space. Thanks so much for hanging out with me today, IHeart readers! I hope you find this project useful and inspiring. If you have a free weekend and about $100 to burn, you can build your own custom closet out of a single sheet of plywood. Happy building and organizing!
______________________
 Hello friends! I’m Jen Woodhouse, the author of The House of Wood blog, my creative outlet for all things DIY and design. By trade, I am a performing songwriter based in Nashville, TN - I’ve released three albums, toured the world, and licensed my music to national television shows and films - but more recently, I've added ‘DIY Blogger’ to my eclectic resume. The House of Wood is where I document my adventures in woodworking, interior design, and life as a musician, military wife, and mother of two unbearably adorable babies. When I’m not writing, recording, or touring, you’ll usually find me in the garage building furniture! I’m pretty freakin’ excited to join the iHeart Organizing team and I can’t wait to share a few organizing DIY projects with y’all!
So cute! I'd love to try my hand at making some shelves for my kids' closets.
ReplyDeleteA gorgeous closet!
ReplyDeleteHer Heartland Soul
http://herheartlandsoul.com
This is gorgeous! I love range of princess dresses... there's absolutely nothing wrong with multiple costume changes in a day!
ReplyDeletexx Miss Ali
AllKindsofFabulous.blogspot.com
Love this closet makeover - and your confidence with building if! I rely on my husband completely but often wish I had the skill & patience to do it myself! We recently made-over our daughters room and our just putting the finishing touches on the closet space... Fairy princess space essential!
ReplyDeleteYou can do it Jo! I have to warn you, though, once you start building, it's so addictive, you won't stop!
DeleteHi! Even for grown-ups in need of a wardrobe this is a very handy idea! I have similar space in my hallway where I am going to organize a much needed wardrobe. It must be the simpliest wardrobe ever and cheapest as well - but what else do you need in this case? Thank's a lot for making it so clear to mee.
ReplyDeleteWhat an awesome DIY! I recently became a huge fan of pocket holes and now every project on my 'to-do' list, I look to find ways to use pocket holes! YIKES! LOL
ReplyDeleteThank you ladies for sharing and I'm on my way to check out 'The House of Wood'!
Eboni || buildingournvhome.blogspot.com
Thanks for visiting, Eboni!
DeleteLove it! I need to do something similar with my son's closet (minus all the pink touches, obviously). Oh honey, I use that expression about long days and short years daily! I don't remember my life without my precious children but it seems that they should still be a toddler and a preschooler when in reality they are a kindergartener and a 3rd grader! My 3rd grader is quickly becoming a young man who's "too cool" to dress up for Halloween this year and it breaks my mama heart! Sigh...
ReplyDeletePinning this for sure for my Big Girl Closet. Don't have as many twirly princess gowns... #twirlygownenvy.
ReplyDeleteThis is so perfect and adorable!! Your daughter is lucky Jen! I wish I were a kid again!
ReplyDeleteThis is beautiful! What a great job you did!
ReplyDeleteNicely done! Any chance you can provide a source for that pretty pink curtain?
ReplyDeleteThanks Karen! I've included a complete source list with links on my blog.
DeleteSTOPPPPPP. I can't even with the costumes. How absolutely adorable!
ReplyDeleteThis is a great closet makeover! I did the same thing when my kids were little for the same reasons. It seems silly to have a single rod for clothes up high where they can't reach it. Plus, if you make it more child friendly it's much more attractive and functional. I took the top rod out and bought separate pieces - the cubes that you put together and ready made rods and hardware. Stil looks great even though they're not little anymore!
ReplyDeleteOh my...I love this...on the list for our next house. Thank you so much for sharing this!
ReplyDeleteA pretty in pink closet indeed! I love it. I bet my SIL would love it too for her daughter.
ReplyDeleteOh my I love this! Now I'm wishing my kids rooms had closets just so I could do this.
ReplyDeleteLove it! a wonderful closet for a little girl! I've made my custom closet similar, actually...we're all little girls, aren't we? :)
ReplyDeletehttp://shehlagrr.blogspot.com/2015/02/turning-dusty-attic-into-bedroom-suite_27.html
So cute! Is it weird that I'd love an identical one for myself? I'd adore a place like this for my nice clothes!
ReplyDeleteYou did a great job for a your daughter's closet. Seeing that you took the folding doors out from the closet, made me smile because when I bought my condo, the doors to my closet were missing and there were hanging two curtains. I put the curtains down and I have to order custom door for this closet. It cost me $600 to have them made and installed. I suggest to you to keep the doors from the closet if you plan to sell the house in the future. Otherwise you would throw away really good money. Keep it up with the good work! All the best.
ReplyDeleteHow pretty! Love the inspiration for my new little gal's closet! :-)
ReplyDeleteElizabeth
thislittlehomeofmine.com
Lovely :)
ReplyDelete