

I had a tall wall to fill next to the tree, so we built an adorable little ladder to help display decor and even add a little storage. The best part? Is it only cost around $10 to make. The other best part? It is so very versatile and it can be used all over the home!

To get started, we took a trip to Home Depot to pick up a few pieces of wood. We had everything else on hand to do this project, here is the supply list:

We decided to go with a six foot ladder, but you could make it any size. We placed the top dowel 3" down from the top, and then continued to space them about 12" apart, leaving 9" at the bottom.

Using a drill bit that is the size of your dowel, the next step is to drill through your markings on each side rail. I didn't want to see the ends of the dowels on the outside of the ladder rails, so Bryan went to his dad's workshop to use his drill press. The press has a stopper that allowed him to only drill halfway through the side rails.


Testing 1, 2, 3....

Back home, we set up a staining station in the garage on some cardboard.

After trying out a few shades on scrap wood, I landed on Varathane's Provincial. I love the warmth it offers and that it is a nice medium shade (not too light, not too dark).

I used a foam brush to stain each piece of wood and let it sit overnight to dry.
The following evening, we used wood glue and pieced the ladder together. We recommend staining everything first, as any glue that gets on the wood will not take the stain after.

After waiting a bit longer for the glue to cure, I played the styling game!

We are hanging the boy's stockings on the fireplace, so Bryan and I decided to hang ours near the tree (you know, so Santa doesn't get confused). I also added a small over-the-door cabinet basket to hold Christmas cards.

The final basket holds a special gift I need to give, our Christmas books and a soft throw blanket.

Once Christmas is over and we take down our decor, I haven't exactly decided where this little gem will land. I have a feeling we will try it in a few different spots before we settle on somewhere permanent. The options for where and how we can use it are pretty endless. Most likely it will be used to hold a few throw blankets near one of the seating areas.

I also tried it out in our master bathroom to show another option.
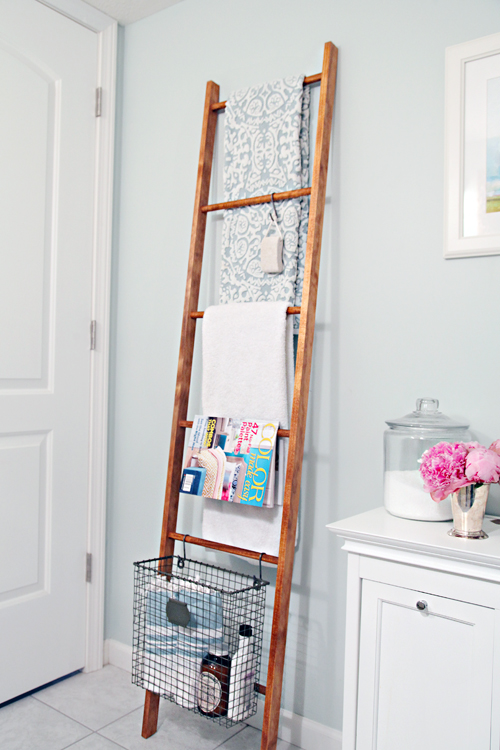
I actually quite liked the ladder in here, and it is a great way to add a bit of storage in a really compact way. I also really loved the wood tone and how it paired with the mirror across the way.

Magazines not only provide reading material, but also add a some color as well (quite literally)!

Ten dollars for fab, flexible and functional storage? Heck yes! When you have the magical combination of dowels, hooks and baskets, the storage possibilities are endless. I am thinking utensils, herb planters, aprons and hand towels in the kitchen. Linens, books and even a way to display decorative art in the living room. A basket of file folders and buckets of writing utensils and crafts in the office. Towels, robes and toiletries in the bathroom. And a place to toss extra quilts and throw blankets in the bedroom or to hang outfit ideas in the closet. My wheels are definitely spinning, we may end up needing to make a few more!
Oh! And to prevent the ladder from sliding, we cut the legs at a slight angle and I added a few rubber cabinet door stoppers to the bottoms.

Have you done any Christmas projects that you plan to keep out and use year round?

Where did you get your stockings? I've been looking for ones similar and have been coming up empty. Love the ladder!
ReplyDeleteHi Catherine,
DeleteThe stockings are from JoAnn a year or two ago. They had red poms on them that I carefully snipped off. :)
xoxo!
Jen, this is great! We've got our stockings hung on the wall with some Command hooks right now because I there wasn't anywhere else in our home to hang them, but our mobile home walls aren't having any of the adhesive so they keep falling! I'm so going to HD on Monday to get the materials for this and slap it together!! That will make it so much easier when Santa fills the stockings.
ReplyDeleteLove this idea Jen. For those without access to a drill press, when we have done projects like this in the past we just use a piece of painters tape to mark the drill bit where we want to stop drilling.
ReplyDeleteGreat tip!
DeleteThis project is amazing and looks beautiful! Would love more cheap DIY posts like this one, one of my favorites!
ReplyDeleteJen!!!!! Oh my goodness, this is so cute. I love the way you styled it for Christmas, then bathroom and bedroom uses too. Your pictures make me want to make few for myself.
ReplyDeleteLove your use of the ladder for holiday display! I used this same idea in my first (tiny) house to store clean bath towels since I didn't have a linen closet. Like you, I'm a "hook" girl for daily bath towels, but the ladder is a great way to store replacements!
ReplyDeleteLOVE this idea and it looks so cute x
ReplyDeleteThis is such a great project for those who don't have a mantle. We will have to do this next year!
ReplyDeleteWhat a great idea - I love it for the bathroom and the little basket is so cute.
ReplyDeleteThank you for sharing
Rose
Love this project. Thanks for the great tutorial. Can you tell me where you got the wire baskets?
ReplyDeleteThank you Lisa! I believe the over-the-door smaller cabinet basket was from Amazin or HomeGoods (I have had it for awhile now) and the larger basket is from Ballard Designs a few years ago as well.
Deletexoxo
Ok this is absolutely gorgeous and I can't say what detail of all the details I like the best, the trick with the magazine hanging or those little door stoppers at the bottom. This is simply a feast for the eyes. Thank you!
ReplyDeleteLove this project! Where did you get the basket for the magazines? Thanks for sharing!
ReplyDeleteHi Sarah! The larger basket is from Ballard Designs a few years ago. xoxo
DeleteLove this idea! Super inspired to use this to organize some areas in the new house we just bought! Thanks for the great idea!
ReplyDeleteOMGOSH I AM IN LOVE. That is the sweetest and cutest DIY I have ever seen. I love how you styled it and I can't wait to see what you do with it after the holidays. Its so versatile and I think ill be making one for my place!
ReplyDeleteLauren Baxter | Lovely Décor
www.lovelydecor.co
xx
By the way...did you paint your walls again - or is this just the more grayish personality of Quiet Moments?
ReplyDeleteLove your blog!!
Hi Amy,
DeleteWe have not painted our walls, this is the color they take on during overcast days.
This paint color truly has many shades and reads so differently depending on lighting inside and out. It's taken some getting use to, that's for sure! :)
xo!
This may be one of my favorite DIY projects this year! It looks so simple (or rather, you make it look so simple :) and the results are mind-blowing! I've been thinking about adding a decorative ladder to my home, too, but haven't stumbled upon the perfect one yet. Maybe a DIY project could be an answer. I just love how versatile it is! Thank you so much for the inspiration!
ReplyDeleteThis is so pretty! Thanks for sharing how to make it!!!!
ReplyDeleteThis is a great project! I have been trying to come up with a storage alternative for the piles of books my daughter is reading in the living room. I think this may be the answer!
ReplyDeleteTHANK YOU for this! I've been wanting to make one but had yet to find instructions that were follow worthy and dimensions too!!!
ReplyDeleteWhat an amazing idea to hang stockings for those of us who don't have a mantle! Genius!
ReplyDeleteNice idea, it's lovely <3
ReplyDeleteLunie Chan - Le Blog
I had to make it! It was so perfect to give Santa easy access to fill our stockings this year!
ReplyDeletehttp://suddenlyasoccermom.blogspot.com/2015/12/can-she-build-it-diy-blanket-ladder.html
Totally adore this Jen. I think I need to copy you and make one. I love how you styled it for Christmas.
ReplyDeleteI love this! I have the perfect spot for it, but I'm a little concerned with my pets knocking it over... has has it stood up (no pun intended) to people hitting it or placing objects on it?
ReplyDeleteNo tipping ladder so far. :) I think it helps to have the rubber grips on the bottom and to find a solid leaning angle.
Delete