


I had an idea in my head of what I was going for, so I went down the DIY or buy route. Any time I am going to purchase something for our home, I weigh out the idea of creating it on our own.
WHY WE DIY
- It gives us creative freedom to customize the storage to our desired dimensions and style
- It may save us a buck or ten
- I enjoy the process; I like to keep my hands busy and always enjoy working on projects big and small
- The completed project provides a sense of excitement and accomplishment
- I enjoy learning new skills, and the more we practice, the better we become
WHY WE BUY
- It saves time/is convenient
- It might save money - materials can sometimes add up to the same or more than just purchasing it from the store
- Quality - we may not be able to emulate the same quality as a store bought piece with our own DIY skills
- The item is perfect as is, we have no need to modify or change it
After looking at a few decorative floor baskets from Land of Nod, the Little Market, Pottery Barn Kids and even Target, I decided I could easily create something just as cute while saving a buck or ten. DIY here I come.
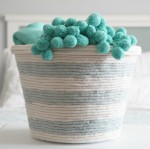
My plan was to utilize rope and sew it into a large 18-20" bowl shape (using this tutorial), and then dye or paint a portion of it to add some color. I gathered my supplies, which included some inexpensive rope I found on Amazon, my sewing machine, a sewing scissors and some pins.

All was going OK, until it was time to begin curving the edges of the basket. It became really challenging to work with due to the large size and the lack of structure in the rope I selected, and ultimately I ended up with a DIY fail.

Well... Unless it is cool to use a completely flat basket as a centerpiece, a floor mat or even a sombrero? If anything we try not to take these projects too seriously.
I get asked from time to time if everything is as easy as I make it look in posts. And I try to be sure to share our fails just as much as our successes, but I am not always great about detailing some of the learning pains. So to answer that question, no, it's not always easy. I think the nice thing about blogs is that we do some trial and error and then share the quick and easy version that got us to the end, so that you don't have to go through the same troubles we did. Over the years I have become pretty good at quickly and neatly lining a drawer, but I have wasted some paper along the way. I can generally wrap a box with ease, but it took doing it a few times to learn the best places to cut and fold. I can edge a ceiling and trim without taping it off with painter's tape, but I went through a few bad brushes to find one with the perfect angle and grip. What I am trying to say is that if I didn't make these mistakes, I wouldn't learn or grow. Mistakes in DIY are good! They are OK! They happen! And I wish that was talked about more on blogs, so I will try to be better about that.
The worst part about this project for me was knowing that I would have to cut and pull the thread out of 50 yards of rope in order to start over. This is when I really just wanted to drive to the store and buy the darn basket, but I had already spent the money on the rope so I wasn't just going to give up so quickly. Hours it took me to pull that thread... I guess it was nice to get in some good Netflix binge watching.
Back to the drawing board, I knew I would need some sort of structure for the rope to wrap around. My mind instantly went back to another rope basket I created years ago, and I decided to follow the same process. This time around I was looking to do something lower to the ground, only about 8" tall, and in a more modern shape. I stopped by a few stores to look for a good basket form after coming up short around the house; I scoped everything from planters to waste baskets but ultimately decided that I needed to make something on my own. Some $5 chicken wire later and I returned home.

Using some thin 1/8" scrap wood, I had Bryan cut me an 18" circle which would act as the floor of the basket. We then wrapped the chicken wire around the base of the wood, a pliers helped to tightly bend the wires at the joining seam.

We bent the lower portion of the wire around the bottom of the wood base and used a wire snips to cut it to the desired height. It was nice having Bryan's help with this part as the wire wasn't the easiest to work with in terms of wrapping it tightly around the wood base.


We bent the lower portion of the wire around the bottom of the wood base and used a wire snips to cut it to the desired height. It was nice having Bryan's help with this part as the wire wasn't the easiest to work with in terms of wrapping it tightly around the wood base.
My sewing machine was going back into hibernation, and out came my handy glue gun. A good glue gun made all of the difference in my sanity during this part of the project, and I can't rave enough about this one I purchased a few months ago.

Starting at the base, I hot glued the rope in a continuous motion all of the way up and around the wire basket form.

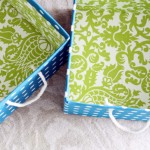
I didn't love that I could see the glue or the rope through the wire cage, so back to the craft store to pick up a yard of inexpensive navy craft felt. I selected felt because I knew it wouldn't fray and would be easy to work with.

I cut the felt to size and hot glued a piece to the very bottom to prevent the wire from snagging the carpet or scratching the floor. I cut two more pieces that I hot glued inside to hide the wire and clean up the overall look.

Knowing that I already had glued the rope to the basket, dying it was out of the question (hot glue doesn't dye and the rope fibers weren't clean after my seam ripping and that would become more obvious with a dye).
I watered down some latex paint and played around with a few pattern ideas on scrap pieces of rope, but ultimately I felt like the paint could ruin the entire project if I wasn't careful or if it didn't dry nicely. It definitely is a great option to consider, especially with certain rope types and if you add some fabric medium or water to the paint.

I watered down some latex paint and played around with a few pattern ideas on scrap pieces of rope, but ultimately I felt like the paint could ruin the entire project if I wasn't careful or if it didn't dry nicely. It definitely is a great option to consider, especially with certain rope types and if you add some fabric medium or water to the paint.
STILL. MUST. ADD. SOMETHING.

Feeling as though the basket was just a bit too boring, I went down to my craft closet to pull out a small piece of check fabric remnant. I hemmed the fabric and hot glued it around the inside edge. This made things better, but the basket was still missing something.
Handles!? Yes, that was it. A quick run to a local thrift store and I had myself a belt to cut. This is the basket that kept on giving taking.

To attach the handles, I had Bryan help me punch four holes in each end of the pleather belt with a nail set.

A simple X stitch out of embroidery thread did the trick, as I didn't have any fasteners and was tapped out on budget and patience.

A simple X stitch out of embroidery thread did the trick, as I didn't have any fasteners and was tapped out on budget and patience.
Holy cow you guys, we have ourselves a basket!!!

And it's absolutely darling. Oops, I mean, so very manly. Ha! Although, I feel like I am probably looking at it through the equivalent of beer goggles just because I am so thrilled it is finally finished.

The final basket is 18" round and 8" tall and cost about $25 after the wire, felt, belt and rope. So in the end I probably could have purchased something almost as cheap, equally as cute, and saved a lot of time, but I am still glad I didn't give up and that Parker has something in his room that is made by his mama. That last part gets me every time.

In fact, I have carried it around a few times in awe that it finally came together and actually looks like a legit, sturdy, usable basket. And yes, those handles are strong enough that I could carry around the basket with some belongings inside.

And when I say it came a long way... I almost used the first version as fashionable sun protection. :D

Moral of the story, buy thicker rope? Or just buy the darn basket? Or how about, if at first you don't succeed, try and try again. I prefer the latter.


I will say, the one thing I have always enjoyed about blogs is that they empower a good ol' DIY project. As we grow older and our budget is a bit bigger, it might be easier to just go out and purchase nicer things for our home. But I really just love making stuff. And I still love finding a deal or saving a dollar when I can, so I don't plan to quit DIY'ing anytime soon. Fails and all.


 |  |  |
 |  |  |
That is one manly looking basket. Thanks for sharing the steps/missteps. Helpful to know what exactly is involved in making something so very special and manly.
ReplyDeleteI think I'll just go to the store and buy the damn basket.
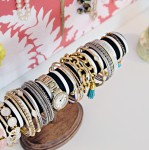
Nice basket. Leather handles pulled it off very well. Off topic, I couldn't stop noticing the acrylic book holders. Can you please share the source? Better yet a post about it, love the blue pompom garland.
ReplyDeleteThanks! The acrylic holders were purchased for my studio years ago, but I think they wonderful for kiddos. I found them here: http://cleardisplays.com/by-use/greeting-cards/clear-acrylic-slanted-shelf-for-wall-8010/
DeleteOoo, I also love that cream/aqua/navy throw blanket!! Or is that a scarf? Where did you find it? :)
ReplyDeleteIt's a blanket and I love it too, I wish I could find one for every room in our home. :) Unfortunately, I found it at a local antique store with zero details about its history.
DeleteThanks!Nice basket
ReplyDeleteTurned out beautiful. I think an easier way might have been to start with something solid like a cardboard hat box and glue the rope around that. Just my 2 cents.
ReplyDeleteA hat box would have worked well also. I think it all comes down to cost and what materials you have available to you, and really just being resourceful. :)
DeleteThat is darn cute!!!!
ReplyDeleteI am glad to see you tackling the sewing machine again, yay for good practice even with bad results! Its no wonder you had trouble with it, the tutorial looks like for 8-10" diameter, and you were going for 18! Id say you did really well, and the fault is just unfortunate pattern/materials/product matchup. Yay again for being determined and relying on your strengths to get the job done! Very encouraging post!!
ReplyDeleteI loved it! Great idea! Thanks!
ReplyDeleteLOVED this post! Side thought about the first round version: It looks like you might be able to make it into a soft rope tote bag? Maybe with a drawstring top or just open and floppy for the beach or something? Let me know what you come up with! :)
ReplyDeleteI probably could have done that, good idea! But I actually removed all of my thread/stitching and reused the rope around the wire frame for the final basket. :)
DeleteDear Jen, thanks so much for keeping it real! I would have given up after the first attempt thinking it wasn't going to happen, so thanks for sharing that even if you muck up first time around that you can restart again using a different approach :)
ReplyDeleteAfter all that it did turn out really nice! Good job for sticking with it!
ReplyDeleteHonestly, I bought a basket very much like this at Pottery Barn to corral shoes and other kid stuff by our back door. It falls in on itself constantly. I ended up moving it to the bathroom to store TP in, but I know that is just one overflowing toilet away from being ruined. I can't think of where to use it, knowing it needs to be "full" to stand upright.
ReplyDeleteYour basket not only looks adorable, but it seems much more functional! Great job!
Cute basket! And I love that you've stayed with the DIY theme on your blog.
ReplyDeleteso cute! can you tell me how much rope this took?
ReplyDeleteMy basket used almost the entire package I purchased on Amazon: http://amzn.to/2k1hU7x, minus some scraps from my attempt at sewing it.
Deletexo!
I’m glad you stuck with it. Turned out gorgeous!
ReplyDeleteI really like how you constructed this tote. Rope basket are so nice. The strength is really important, and you did it perfectly. Thank you I'll be following with your amazingly Brillant diys.
ReplyDeleteThis is so amazing!!!
ReplyDelete