Showing posts with label Clothing. Show all posts

Tuesday, June 5, 2018

41 An Organized Teen Boy Closet

Our son's closet came together even better than I could have imagined! I love every last detail, and the best part is that all it took was some simple DIY and a few off-the-shelf organizers to create a whole lot of storage.


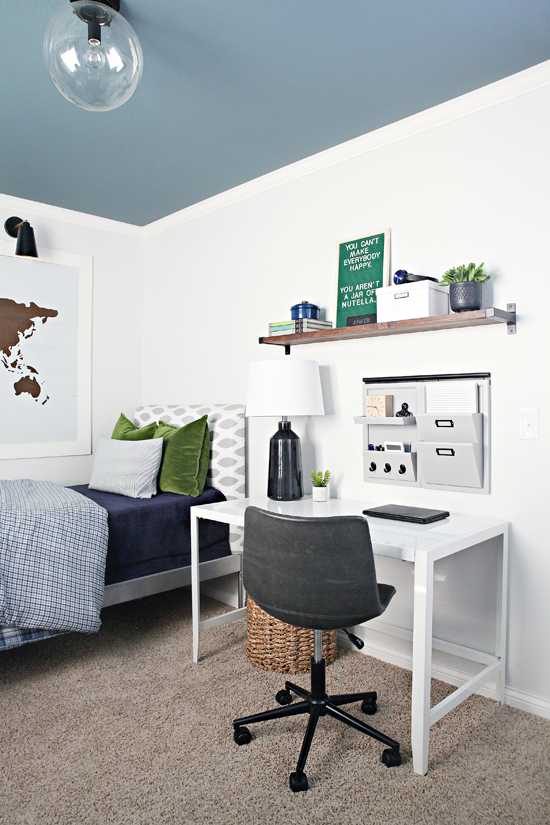
Our almost 14-year-old son currently has the smallest room in the house. But we don't want it to feel that way so we have been making a lot of changes to open it up and add smart storage.


I think two different actions accomplished that feeling of openness we were after; painting the walls a solid light blue-gray (almost white color - Sherwin William's Nebulous White) and widening the closet opening to create more storage that will ultimately live behind a closed door (see that post here).
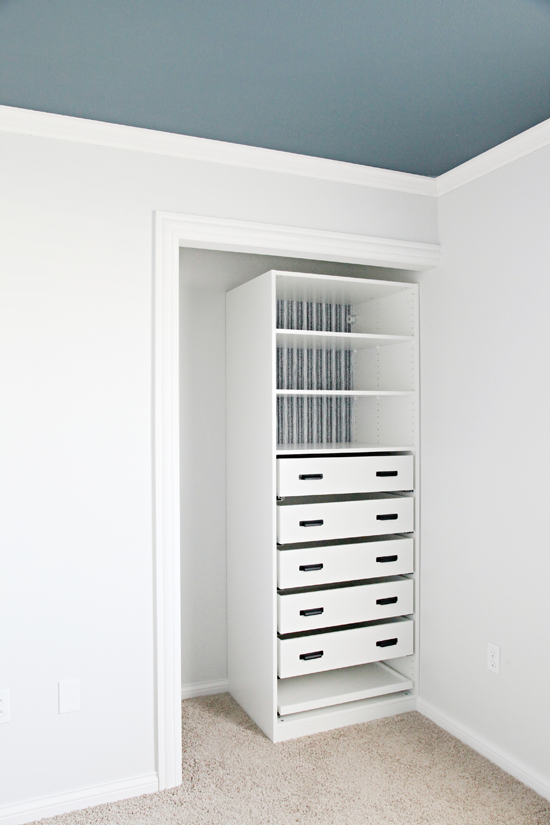

And a quick reminder of the closet the day before we cleared it out for a makeover:
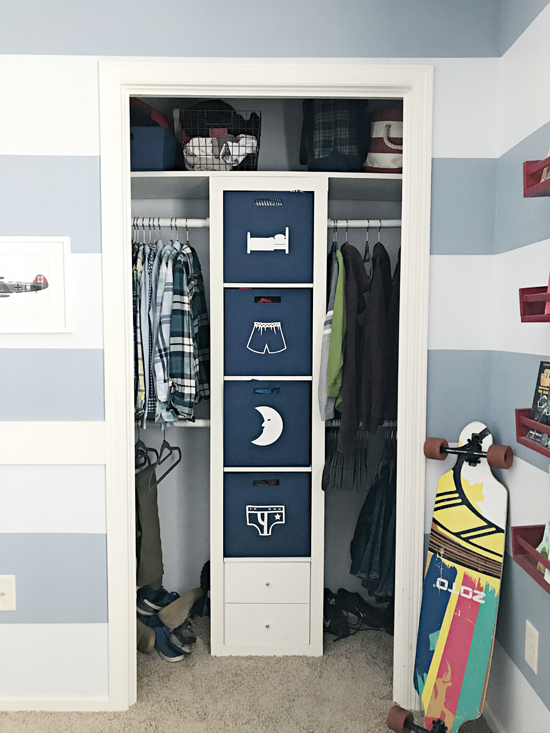

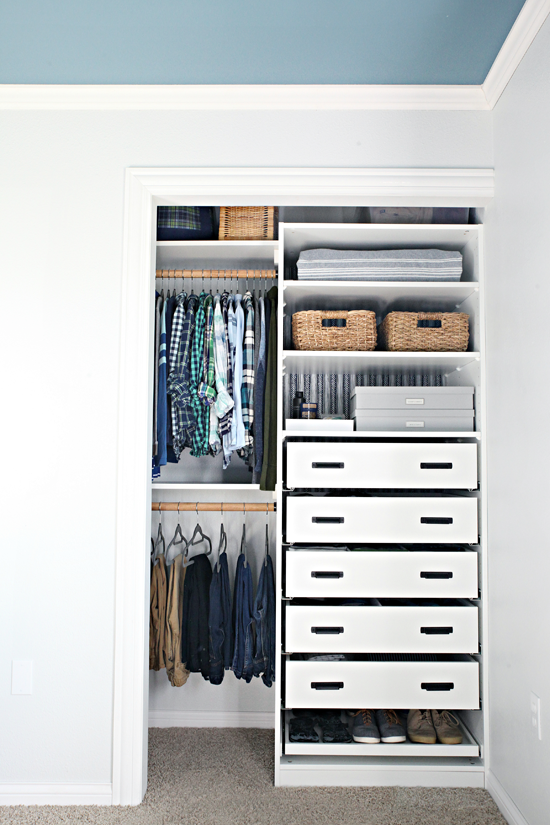
And here it is today!
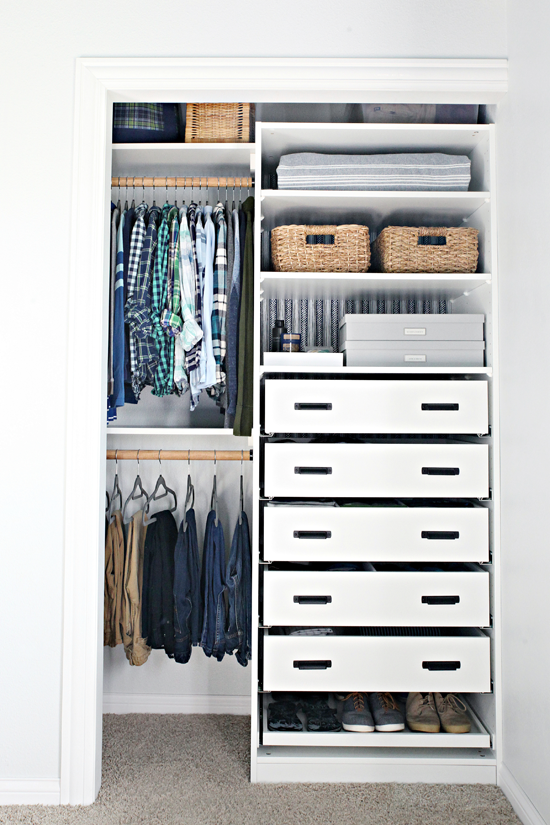

Although the last make-shift closet system served us well for quite some time, the biggest problem we all had is that our son had outgrown the bins and they were literally bursting at the seams. He needed some actual drawers and to keep his bedroom floor area nice and open, we wanted to add those drawers inside of the closet. I also wanted to be sure he had a place for his shoes off of the floor and that we made the most of the 8 feet of vertical space, so after looking at a variety of options, I decided on the IKEA PAX wardrobe frame (measuring in at 29 1/2" wide x 22 7/8" deep x 79 1/4" tall). This unit offers more than enough space and I appreciate that there is plenty of room for him as he continues to grow.
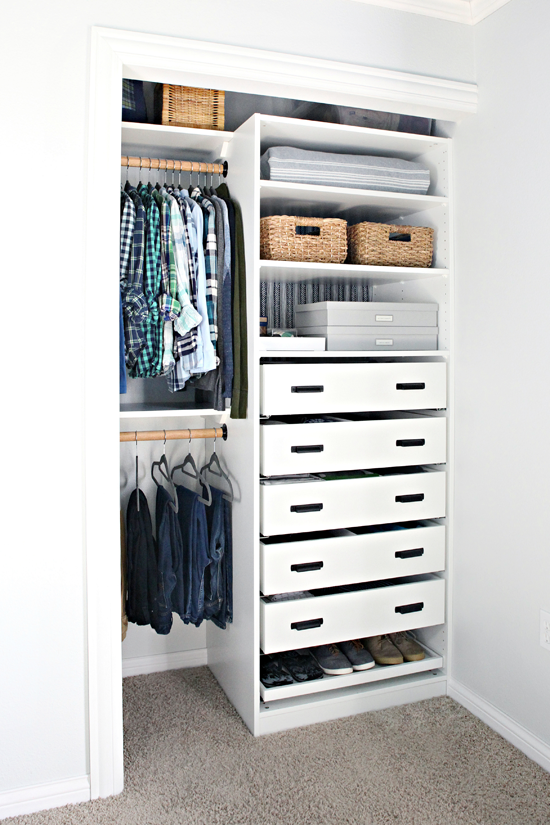

This kiddo is the beneficiary of a lot of hand-me-down items. Not only does he have an older brother that has always taken pretty good care of his belongings, but we have a few friends with older boys that like to pass on their clothes as well. We try to limit the number of clothing items we keep in general, but it is also nice to have some options. The updated closet not only provides adequate storage for his current wardrobe, but also for the plethora of hand-me-downs waiting for when he goes through another growth spurt.


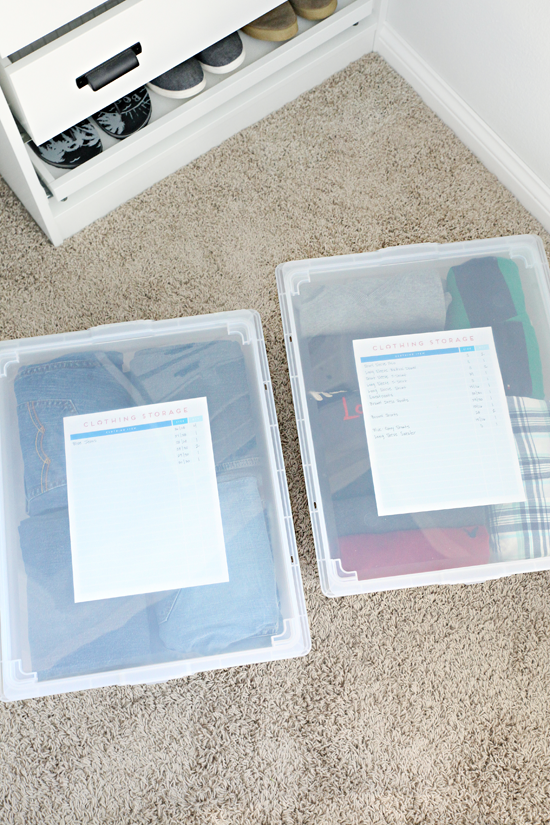
So let's talk about the hand-me-downs for a minute. We have three boys so we do our best to preserve and reuse clothes as much as possible. They grow at different rates and are always different sizes, so there are times we need to store those extra clothes that they just haven't grown into yet. Twice a year we do a quick closet purge and inventory and rotate out their closets (spring and fall). I prefer to keep their hand-me-downs stored on the top shelf of their closets, and in this room, these medium Elfa drawers were the perfect solution. Did you know that although they are meant to be used with the Elfa drawer system, they can also be used as stackable bins? Mind. Blown. I love that they are frosted and sturdy and come with slim lids that clip in. They are a really great size and by using two, we were able to easily fit them on top of the IKEA tower in our son's closet.
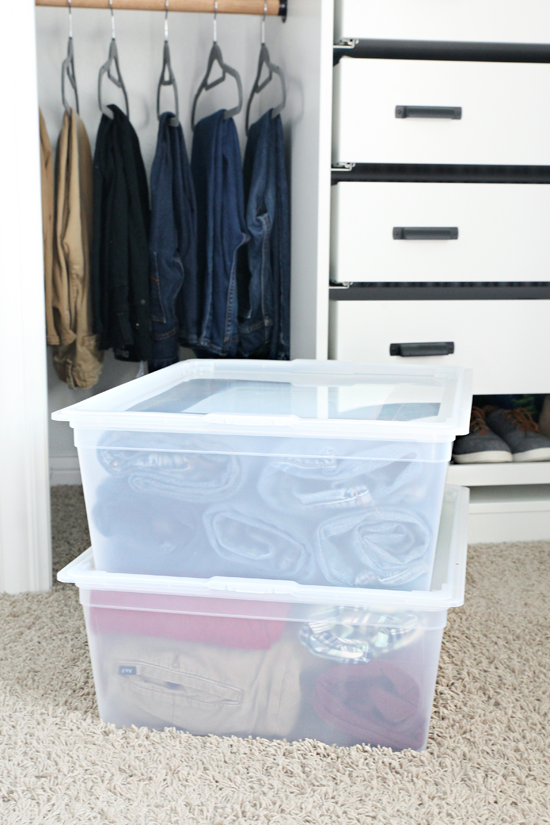

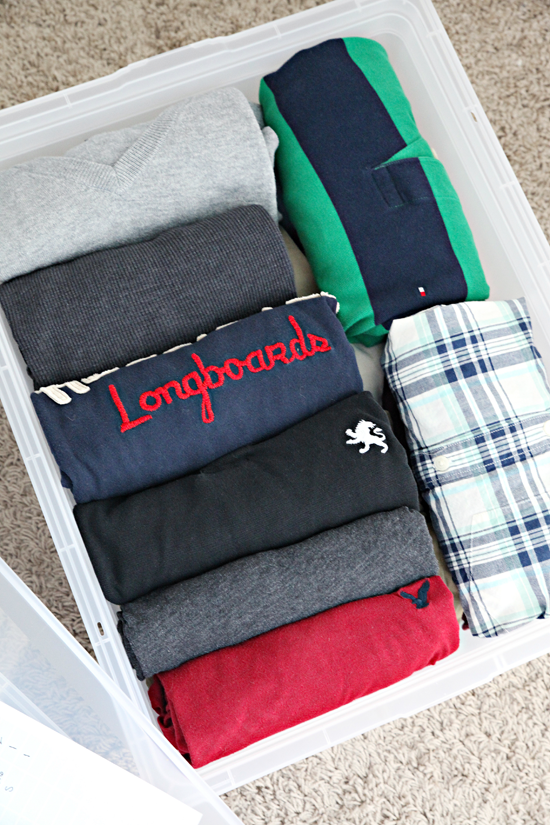
These two bins hold 10+ pairs of jeans in a variety of sizes, as well as dress shirts/pants, shorts, sweats, t-shirts, etc... I found that I had plenty of room to roll and stack the items inside.

To keep track of the contents, I created and printed out a quick inventory tracker that I filled out and tucked under the lid. I am able to see through the lid just enough that this worked out perfectly, but the sheet could also slide into a clear plastic sleeve on top of a solid bin as well.
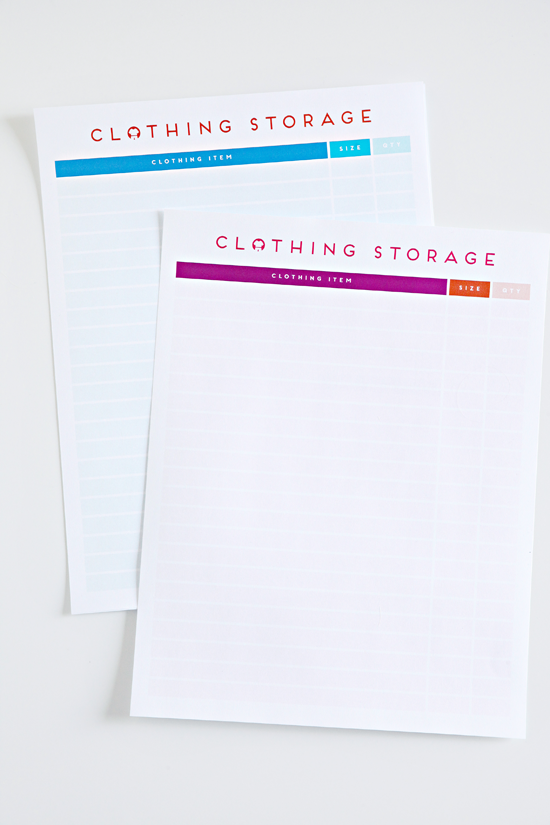

You can also download the trackers for free if you would like!

DOWNLOAD FREE CLOTHING INVENTORY PRINTABLE HERE

DOWNLOAD FREE CLOTHING INVENTORY PRINTABLE HERE


Now, back to his current clothing...

Remember how we DIY'd the easiest custom drawer dividers ever? I can't rave about them enough! They worked out so well in these drawers and offered us a lot of flexibility.
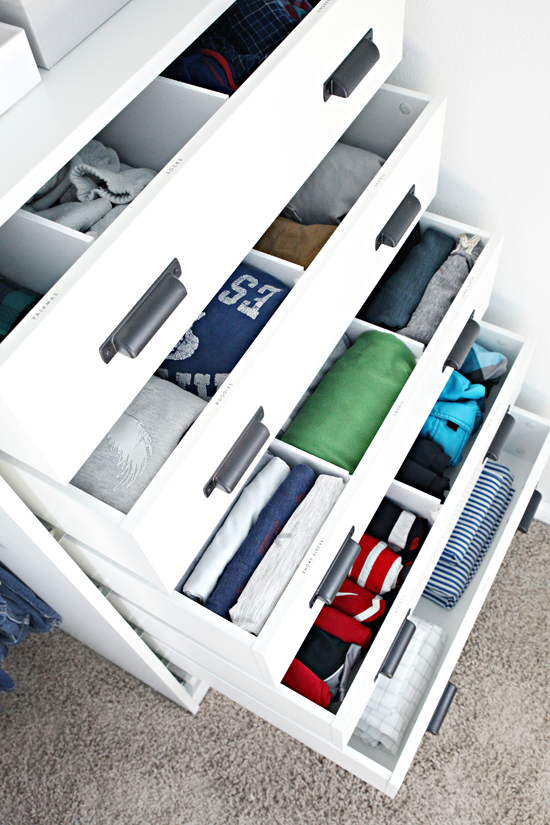

I divided the top drawer into three slots; one for pajamas, one for socks, and another for underwear.
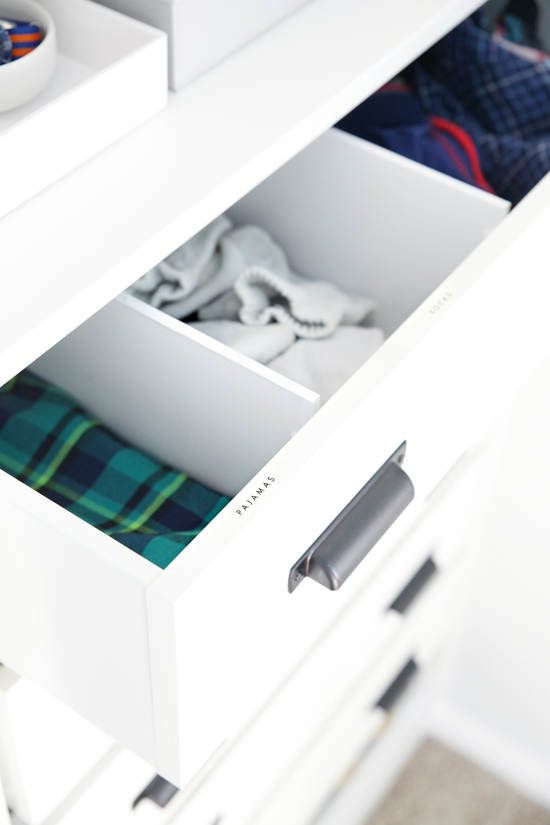

Quick Tip: I typically purchase a different type of sock for each boy, one to two packages of white and one package of black. This makes it easy to identify which socks belong to which boy, and also allows them to just toss their socks into their drawer with no matching necessary. In the past, I have also used colored Sharpies to mark the bottoms which helped in identifying and quickly sorting all of their socks after washes (or when they are laying all over the house).

The next drawer down divides his bulky hooded sweatshirts and shorts.
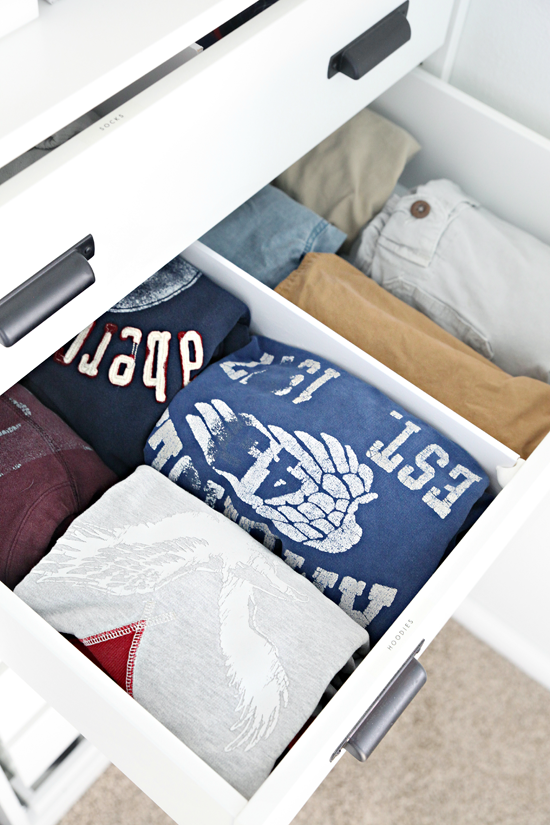

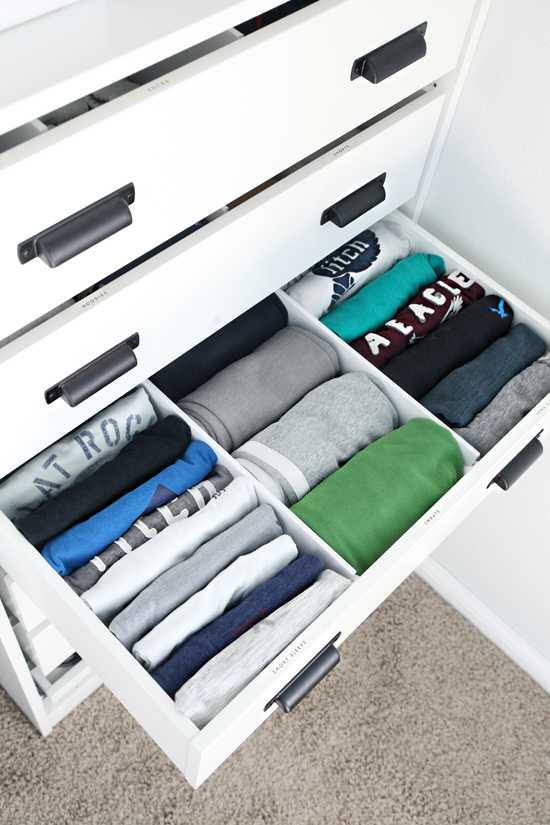
Then his short sleeved t-shirts, sweatpants and sweatshirts, and long sleeve t-shirts are divided into three narrower sections.
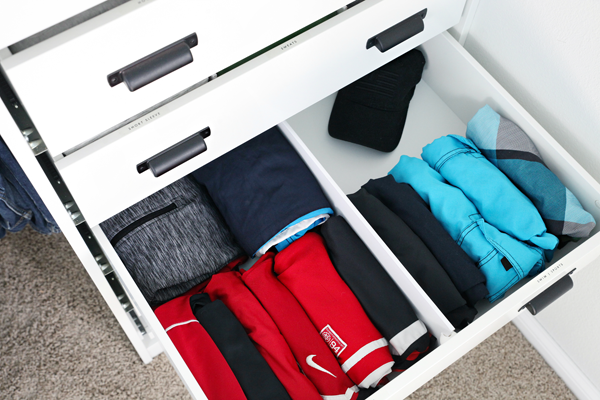
The following drawer is all of his athletic wear, swim and extra space for future sports uniforms.


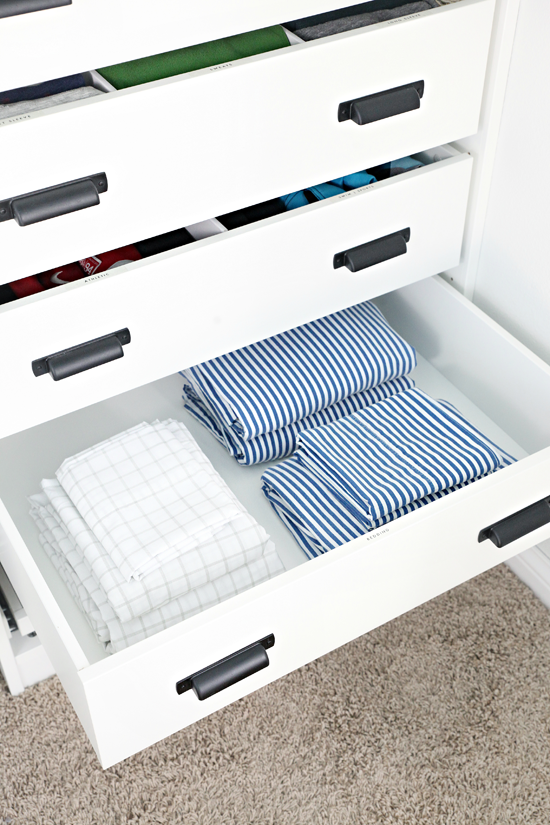
The bottom drawer has plenty of room for sheets and seasonal bedding.

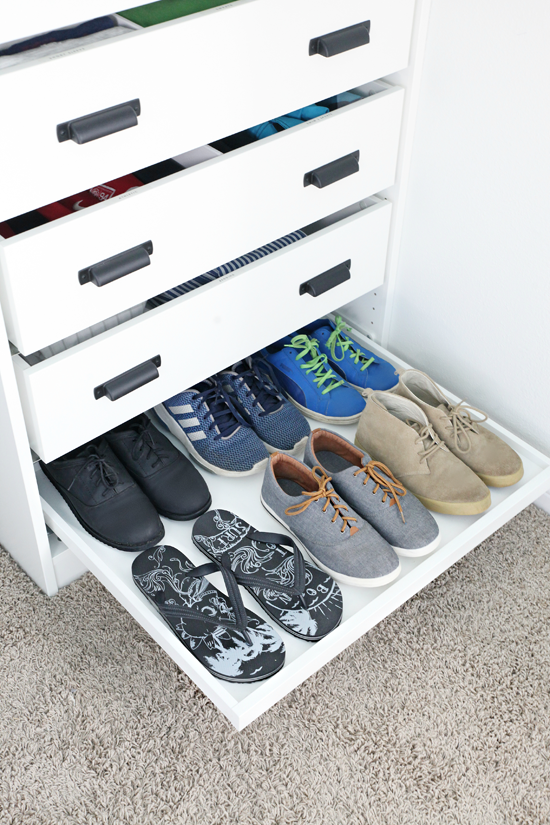
And the smaller pull-out at the bottom holds his shoes.

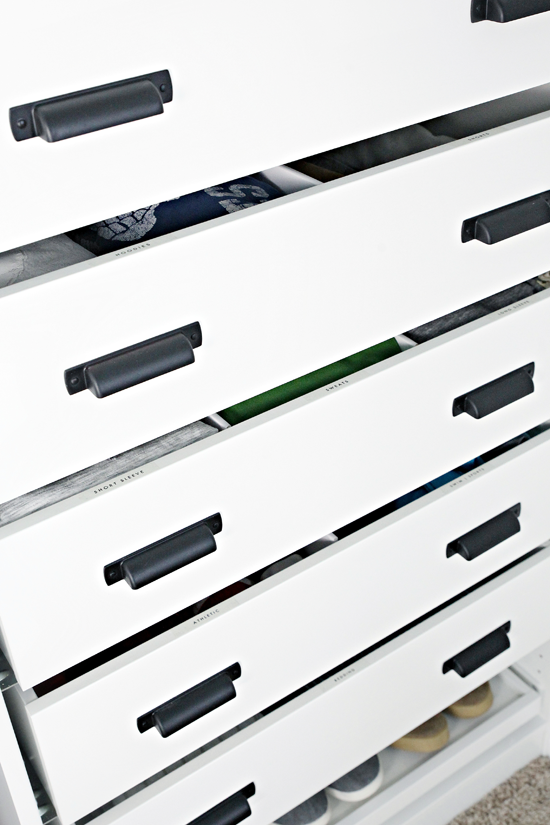
You may have also noticed that I added some labels to the top of each drawer, which can be seen when the drawer is both closed and open. I used this label maker with clear tape.
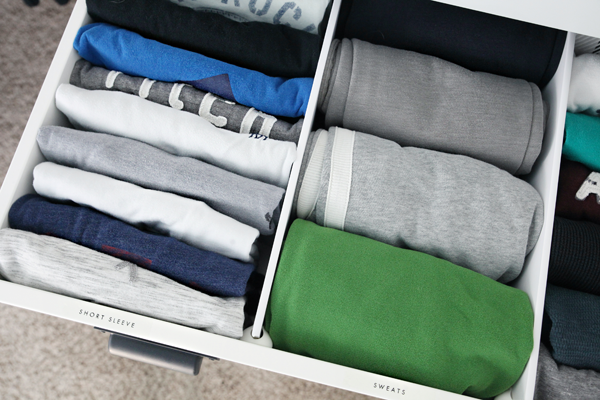

Our son prefers to fold his clothes vs. hanging them, and this folding method was so quick and easy for him to learn. He basically files his clothes so that everything is visible and compact.


Four easy steps, the shirts can be folded in just a few seconds each.
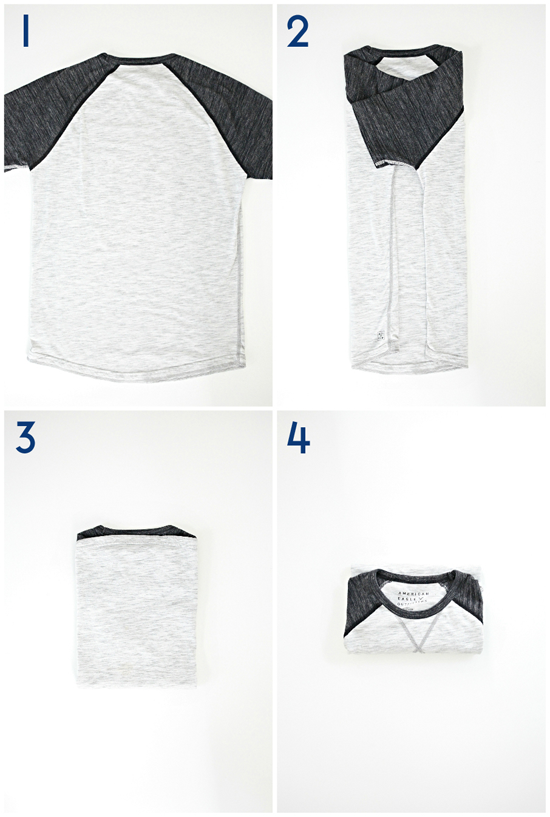

1. Shirt face down

2. Fold in both sleeves

3. Fold bottom up to the top (in half)

4. Repeat and fold the bottom up again (in half)


Everything else is just rolled or folded to best fit in each divided section.


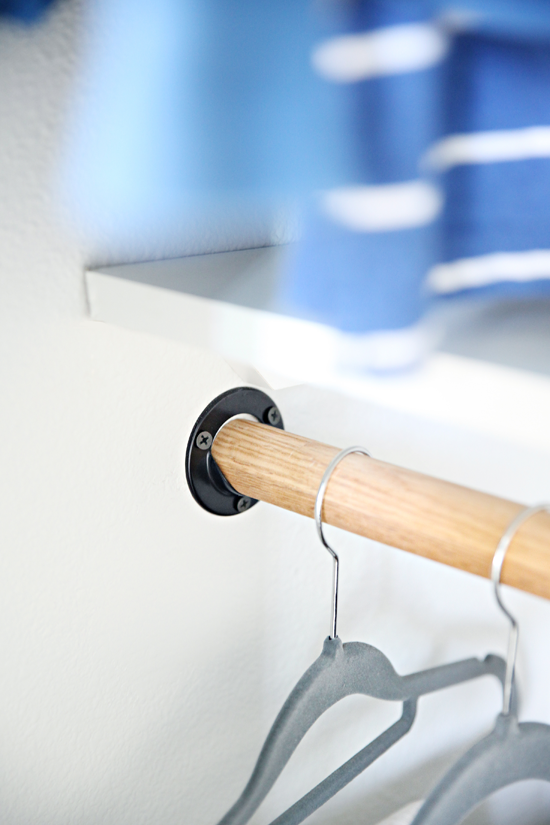
For the clothes that he does hang (essentially anything a little dressier with a collar or buttons), we installed a solid oak closet rod which I stained a warm wood tone. And as always, I recommend doubling up on the rods whenever possible.
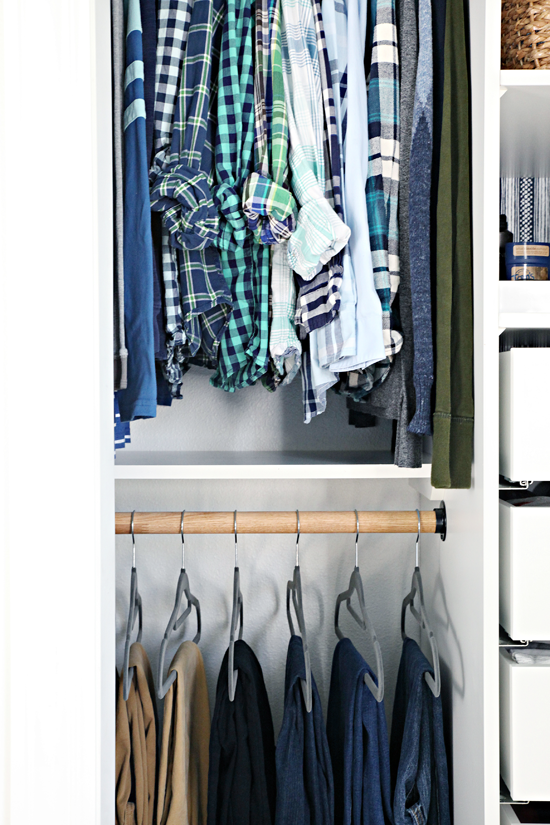

And used black closet rod sockets to compliment the other black hardware in the closet.

We also added two solid white shelves above each rod to offer a little extra storage if needed. We recessed them back a bit so that we could place the hand-me-down bins up top without any issue.
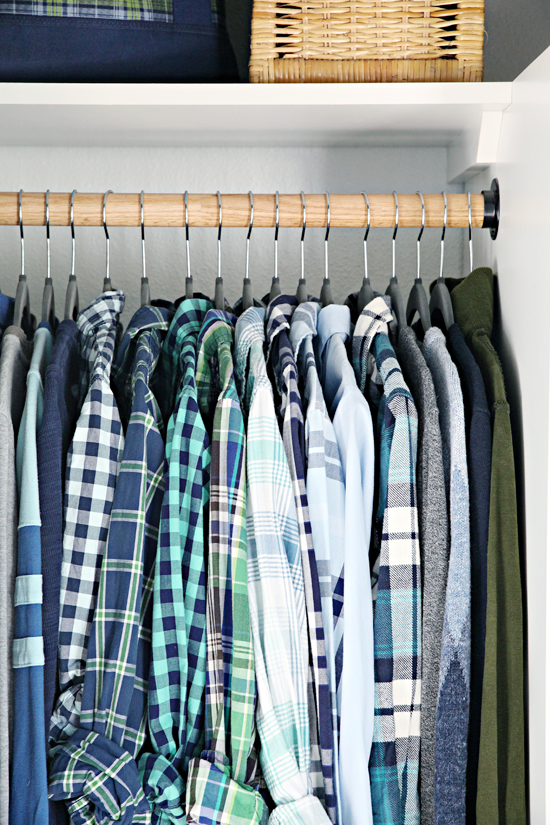

And these slim, no-slip hangers have been really great for the price.

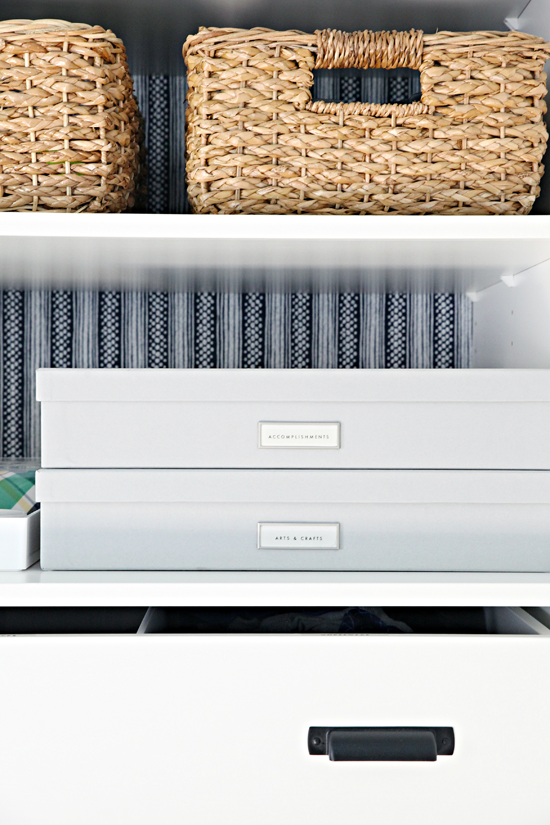
Both the drawers and the shelves in the tower are quite deep, almost two feet in fact. This is great for the drawers, he has plenty of spare space to continue to grow. The shelves, of course, prove to be a little more difficult to utilize. But, the top shelf holds some heavier throw blankets that we use for sleepovers/guests, the next shelf holds a couple of light-weight woven baskets to conceal his everyday clutter (nerf guns, tech gadgets, etc...), and the lower shelf has a few document boxes for memorabilia and arts & crafts.

I also added a small "valet" type tray to hold his daily items and act as a drop zone.
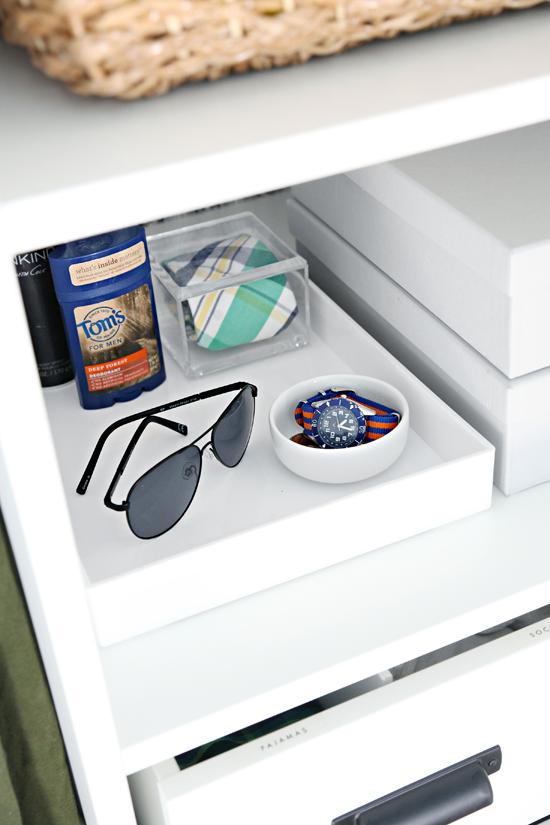

It's funny that this was one of his favorite details, I guess it made him feel a bit more "adult" to have a place for his wallet, change, watch, sunglasses, and deodorant.

And that completes the closet tour!
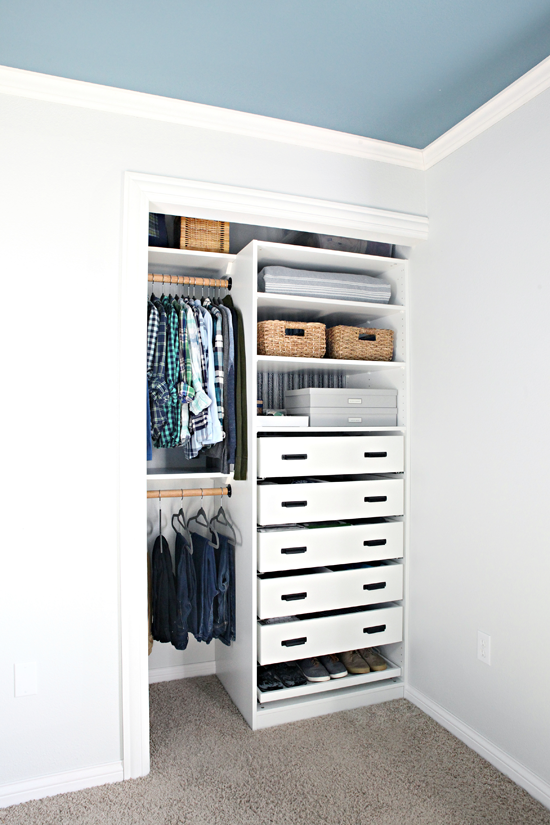

With our boy entering high-school this coming fall, this closet project came at the perfect time! The previous closet functioned so well for so long when the boys were much smaller, but this is definitely an upgrade fit for a teenager.

A few more notes:

  • I love that the IKEA tower is versatile and customizable. We added the pull-out shoe tray, five large clothing drawers, and three shelves to put together this configuration.
  • I added this hardware to the drawers, which I sprayed in a flat black finish.
  • All of the drawers are soft close! So nice!
  • This is the paper I used to line the back of the tower (I just adhered it to the back panel with double-sided carpet tape before tacking it to the back of the frame).
  • Although we designed this closet for a teen boy, it is versatile enough to work for anyone of any age! Always a bonus.
  • We plan to add a sliding door next to conceal everything, which almost makes me sad because I love how it turned out so much! But also, teenage boy.
  • I considered adding a small step stool under his pants, but the boy is officially as tall as me and has no problem reaching his everyday items. Sigh....

This install has also sold us on updating our own closet with the PAX system down the road. It was so easy and versatile and the quality is really great. Not to mention, I love that there are so many ways to customize it to make it look unique, even though it is off-the-shelf at IKEA (they are not sponsoring me by the way, just my honest thoughts).


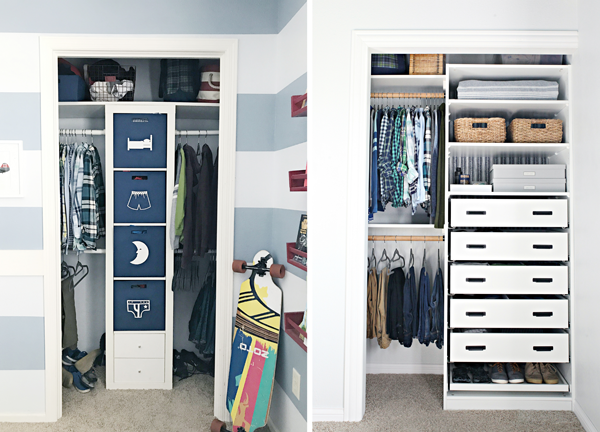
Let's end the post with a fun before and after to see how much was gained by removing the wing wall and installing a fully functional closet system.

For reference, I rounded up all of the closet sources below.


You can also catch up on all of the other room posts here:

Teen Boy Closet Planning

Patching the Walls and Carpet

Bedroom Progress: A Blank Slate

Quick & Easy DIY Drawer Organizers

Teen Workspace with DIY Wall Shelf


Tuesday, May 9, 2017

41 Before & After: Organized Girl's Bedroom Closet

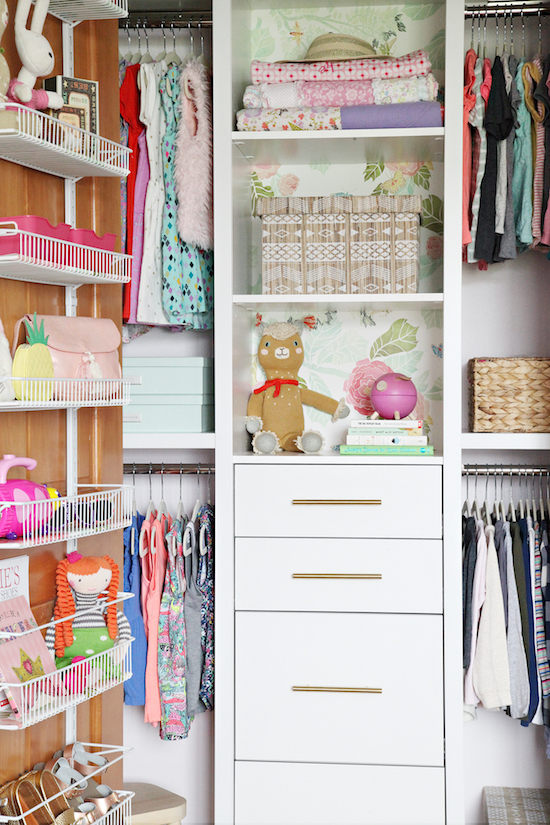
Just over a year ago, my girlfriend and I began discussing her daughter's closet situation and came up with some plans for putting in a true storage system. Her little lady was going to transition from a nursery to a big girl bedroom and her closet had become a bit of a catch-all in the process. Being a mom of three boys, it is rare that I have the opportunity to work on a girl space in any form, and I was really excited about the opportunity to put something fun together for her daughter.


Although we had a general idea and plan for the closet, the project stalled and life happened. But as we began coming up with plans for our son's closet, we decided to revisit this closet as well. I pulled up the initial design and checked in with my friend and her daughter to see if any of their needs had changed. We decided to stick with many of the original plans, making only a few small tweaks. The girl's bedroom also has a nearby dresser to hold pajamas, undergarments, pants, shorts, etc... so this closet was going to be used specifically for any hanging items, accessories, memorabilia, clothes she has yet to grow into, shoes and bedroom linens.

Here is the closet before (which wasn't necessarily a true before since it was holding hand-me-downs and items prepping for a thrift sale during the room transition. But it does show the general layout with the existing shelving and closet rod).


I have always advised against settling for a standard and generic closet setup. Most homes are installed with closets about as basic as can be because storage is so personal and closets should be customized to people and their living arrangements. A single shelf and a rail will never fully maximize the height and potential of any closet. Add a dresser, or bookshelves, or a tower and multiple hanging rods. I always encourage folks to get creative and look at how every inch is being utilized. I also always recommend starting out with a blank slate.


In this case, everything was removed and sorted and the walls were given a fresh coat of pretty pink paint. The doors and trim will be white eventually, so the inside of the closet was also trimmed out now to make things easier down the road.

I really love to combine drawers and hanging space in any closet installation. Keeping the drawers down the middle of the opening allows them to open and be accessed without any problems, while adding shelves and rods on either side creates some division for categories. Also, two rows of hanging rods are always better than one.


I decided that it would be really great to show one closet two ways. We had always planned on doing a ClosetMaid closet in this space from the start, so while designing out son's new closet, I went ahead and put together something similar for my friend. Same amazing system; one designed for a young boy and another put together for a little girl. So. Much. Fun!!

Although ClosetMaid offers an assortment of closet components and systems at a variety of price points, my current favorites come from their SpaceCreations line. The quality is amazing, I can't rave enough about the hardware and soft-close drawers, I swoon over the fact that it comes with decorative trim, and the entire concept is flexible and customizable. It is simple enough to install on our own, and if needs change down the road it is also easy enough to remove a shelf and rod to create long hanging storage or to add a rod in the tower and remove shelves or to swap out the drawer sizes. This is a huge win when installing systems in a space for growing kiddos. Above you can see I was able to use the closet design tool to input the specific closet dimensions and customize our desired setup. I was able to select from towers that range in width from 18" to 30" and the side shelves and rails can easily be cut to size. There are also two drawer sizes to select from and I prefer to utilize a couple of both.


Bryan and I assembled and installed the closet onsite over the course of a weekend day. The tools needed to complete the project were a cordless drill, level, wall anchors, pipe cutter (for the rods) and a saw (for the shelves and trim). We had some wallpaper remnants that I wanted to sprinkle throughout the closet for that extra special touch. In our son's closet, we wallpapered the walls and left the system all white. For this closet, the walls were painted and I added the decorative paper to the tower backing. Both options worked out really well in giving the closets some character and joining them to the adjoining bedrooms.

We began the project by assembling and installing the center tower, then cut the side shelves and rails to size. The image above doesn't have any of the decorative molding attached yet, but below you can see the difference it really makes!


The homeowners still haven't decided on a final plan for the door; they may keep the existing door and paint it or swap it someday for a French door style. I still wanted to give them some versatile storage on the door without spending a lot on something that might not work a few years from now. I found a ClosetMaid organizer on Amazon that covered the entire height of the door, had a variety of baskets in two sizes that could be adjusted as needed, and it was under $40. Oh! And it will work on any of their other interior doors down the road if this one changes.


You know me though, I can't leave well enough alone. I generally prefer to add a liner to any wire basket or shelf to ensure nothing falls through or sits crooked. My favorite solution for doing this is to find foam board from a dollar store and cut it to size. I then wrap it with shelf liner or pretty paper and tuck it in the baskets or on the shelves.


Again, details really do make a difference and go a long way with these types of projects.


My girlfriend had the homework of sorting and purging and leaving me with everything that she wanted to go back into the closet.


Ready to see how it all came together?


This little girl absolutely loves to dance and twirl and dress up and try on socks and shoes and play with her princess dolls and stuffed animals, yet she equally loves to keep up with her big brother and play outside and get messy with arts and crafts. I really wanted her closet to reflect all of those things and to fill her with excitement and joy every time she opens the door.


There were quite a few things that I did very similarly to our son's closet because they worked out so well for us. First, slim hangers! Always! They save space and they glide like butter on the shiny steel closet rods.


Secondly, sock organizers! I love these not just for socks, but for organizing anything small in these types of drawers. This little girl looooves bright and playful socks and will wear a couple of different pairs per day, so we decided to add a specific drawer to highlight those for her. But this drawer can also hold tights, hair accessories, scarves, etc...


Another item that I duplicated in each closet were the tall, adjustable acrylic drawer organizers. These organizers are designed to fit the ClosetMaid drawers specifically, and they worked great in our son's closet to hold his rolled shorts. In this closet we opted to use them for darling little lady shoes!


Something that doesn't cost a thing but also worked for both setups, is folding clothes so they stand and file. This method makes it much easier to open a drawer and find just what you are looking for, and it is also quite easy to put things away (vs. stacking in piles).


We added something a little different to the final drawer in the form of a tiered jewelry organizer! I had the hardest time photographing all of the wonderful interior dividers and earring/ring grooves, but it will be really great as she grows older and moves from costume jewelry to acquiring special pieces.


Something that may seem obvious, yet I see closets without all of the time, is adding shelves above each clothing rod. It offers a place to add some boxes, bins or baskets, or line up some extra accessories or shoes. We made sure that there would be plenty of space for changes in clothing length, and the bins can easily move to other shelves or areas of the closet as needed.


 A stack of labeled boxes holds completed art projects and special mementos.


And on the opposite shelf I added a basket dedicated to all of her dance class attire.


I found some coordinating decorative boxes from HomeGoods that ended up working well for holding clothing that is out of rotation.


A small stool tucks below the hanging items so that her daughter can easily reach anything on the shelves and rods. And the drawer pulls can double as a place to hang her adorable little outfit for the day.


My sweet tooth is hurting.


The door organizer doubles as storage for accessories like sunglasses, headbands, clutches, hair clips and dress shoes. Some of her favorite books and toys are sprinkled throughout as well.


I always love organizing and a good before and after project, but this project was especially near and dear to my heart for a few reasons. It was really wonderful to work on a project outside of our home, not only making a little girl's bedroom more functional but also knowing how excited she will be when she looks inside of her closet every day. Secondly, I love everything about having boys but I am a girly girl and really enjoyed the opportunity to organize with flowers and pink. Lastly, everything added here should be really easy for this little girl to maintain. There was plenty of extra room on the very top shelf for bulky bedding and linens and another shelf for favorite quilts and blankets. When my girlfriend spots clothing on clearance or at a thrift sale, she can purchase clothing up a size or two and tuck it away until her daughter grows taller. Everything is easy for everyone to see and access with a great mix of open and concealed storage. The door organizer is affixed to the door so it doesn't shift at all when opening and closing, and the small stool gives her daughter some height to reach her favorite things. A little pretty paper and gold hardware thrown in and you have the recipe for a closet that will grow right along with a very sweet and special young lady.


PRODUCT SOURCES:


A huge Thank You to ClosetMaid for partnering with me on this post and to my very dear friends for allowing me to makeover a space in their home.