Showing posts with label Printables. Show all posts

Tuesday, January 7, 2020

13 Happy New Year: Free Goal Setting Printable!

Happy New Year everyone! I sincerely hope that your holidays were full of warmth and love and happiness!

A new year means different things to different people, and although all of the highs and lows of years prior don't just disappear when the clock strikes midnight, January 1st does seem to signify a fresh start. I am here to say "cheers" to that!

Some years I set goals, and some I don't. There are times I worry about setting resolutions because of the fear of failure, or because I figure that they will all be forgotten by February. I also tend to over-analyze everything and can take goal setting too far. If goals become overly complicated, or out of touch, then I find I am less likely to feel motivated and encouraged. What I have found to work best for me is to:

  • Select 2-5 large scale goals for three areas of my life: Personal, Business, and Health. This is for the entire year! 
  • Use those goals to set smaller, bite-sized targets each week that ultimately correlate with my overall vision.


All of that said, I really want to give goal setting a real shot this year! Without specific goals, it can be easy to end up on a hamster wheel or to feel lost at sea. Using the method I find works best, I set out to create some printables to help organize my ideas. I am heading into this process with a mindset of why these goals are important to ME! It can be easy to select goals to fit a specific mold, or generic resolutions that have been set by society, but doing so doesn't ultimately aid in personal growth. I am also keeping in mind that I am not trying to give myself a total makeover, or change who I am at my core. The entire point of goal setting is to look at opportunities for improvement and to drive myself to succeed.


So while "getting more organized" and "go to the gym" and "budget" are all completely fine resolutions, I am going to challenge myself to think outside of the box, get specific about exactly what goals I am selecting (and why), and jotting down simple action plans to help me get there.


Tuesday, April 2, 2019

26 Gearing Up for Your Next Organizing Project with a FREE Printable Kit!

Hello, hello! I am excited to be dropping in with a small series I have been putting together for you all, which includes my all-time favorite organizing tips, tricks, advice, and products! It's been a long time coming to take everything I have learned over the years, whether it is working in my own home or working with others, and compiling it all in a single place here on the web.

The four-part series will include:

Gearing Up for Your Next Organizing Project with a FREE Printable Kit!

Need helping getting started or prioritizing where to begin? What is the plan of attack? What is currently working well and what isn't? What storage do you need? Trying to get rid of things, but finding it hard to decide what to keep and what to pass on?

I have put together a great printable kit to help you prioritize, sort, and navigate your way through your next organizing project(s), which includes a total of TEN free printables!


My Top Organizing Tips!

Instead of digging through years of my archives to find individual tips, I am going to compile the best of the best in a single, very informational post! It's going to be a whopper and a really great resource for projects of any size.


Labeling 101: Quick & Easy Labeling Techniques

I have tried almost every type of label on the market, from vinyl to label makers to stickers and chalk markers, and they all have their place. But what are my tried and true favorites? What do I reach for with almost any project due to time, cost, practicality, and ease? I will be sharing three labeling techniques that haven't failed me yet, and that you won't need any fancy tools to utilize.


Practical, Everyday Storage Solutions!

If I have learned anything from raising three boys and organizing along the way, it is that storage can be expensive and that our needs are constantly evolving. Gone are the days where I purchase pretty bins and baskets to decorate with. Although I will always appreciate beautiful storage, it has to be versatile and it has to last! With that in mind, there are a few storage products that I have found that continuously work hard for me in a variety of situations, so they end up being the types of products I gravitate toward when working on any new projects. For the final post in the series, I am putting together the ultimate storage source list with tips and products that I have fallen in love with over the years.


So let's dive in with the first of the four-part series: Gearing Up for Your Next Organizing Project with a Free Printable Kit!


Today I have for you all TEN free printables!


Wednesday, January 9, 2019

141 Catching Up and a Hello to 2019!

Happy New Year to you! I hope that the holidays have left you with a full love tank and that your 2019 is off to an incredible start!

Oh, how I have missed you all so very much!


It always feels a little awkward coming back from an extended break, especially when they are unplanned and much longer than ever anticipated.

Truth be told I have always had huge goals and amazing intentions for this small slice of the internet, but 2018 just wasn't meant to be my year (again, womp womp). For someone who is generally an energetic go-getter, learning to navigate the past few years has been a true personal challenge and journey. And having to do it online has been flat out tough, especially when I am trying to walk the line of personal and professional in front of an audience. If I have learned anything, it's that no matter how much you plan, life can change those plans in an instant. And as a self-proclaimed planning obsessed girl, that has been a hard pill to swallow.

I am not 100% ready to dive into my absence, although I hope to someday down the road. Just know that your support is deeply cherished and I appreciate those of you who continue to check-in. The outpouring of love, comments, emails, DM's, etc, has been so overwhelming over the past couple of months, and for that, I am eternally grateful. They continue to uplift and encourage and I truly hope that THIS IS THE YEAR that I can give that back to you.


Thursday, September 20, 2018

54 Let's Chat! School Lunches and a Free Printable!

We are officially a couple of weeks into the new school season, and with that, all of us are re-finding our routines and putting a few systems into place that correlate with this busy season of life.

This year I have a senior in high school (!), a freshman, and a 6th grader. By now, we have done the back-to-school organizing and routine changes quite a few times, and most things continue to get easier and easier. LOVE that! And over the years, I have shared quite a few of the things we do to prep, but this year I realized I haven't really posted about school lunches. So today is the day because they are a huge part of our daily life!


A few things I want to mention right off of the bat; lunch and food is a personal parenting decision that I never judge and hope that we can definitely keep this conversation helpful and encouraging. There have been times that I have felt bad that I wasn't making bear shaped sandwiches for my boys, and I definitely have my kids eat school-prepared lunches as well. That shouldn't make me feel bad and I know that now. We all do the best we can for our kids, period. I know that some people truly enjoy making art out of food, that some kids are vegetarian, have food allergies, only eat organic, or don't do sugar. This post isn't about that, it's just a few really quick and simple tips for how I handle the lunch prep/making process around here. So let's dive in.


TIP #1

The first thing I did this year is sit down with my boys and figure out what each of them enjoys most. My biggest problems leading into this year have been over-purchasing foods, trying to over-cater to their specific taste buds, then ending up in a hamster wheel of packing the same things on repeat with very little variety.

So, I sat with the boys and asked them what their favorite foods are, and wrote down all of the items that they could all agree on. We took some time to look for quick ideas online together to come up with 15-20 different lunch options as well as a variety of quick and tasty sides.


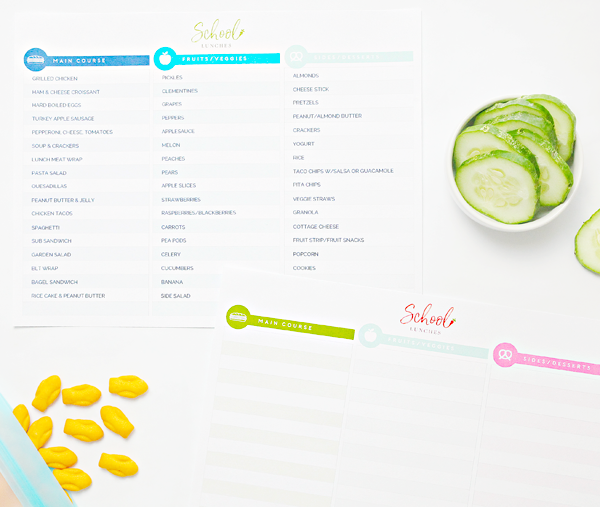
You know me, I couldn't miss an opportunity to whip up a free printable for you all, and I am SO glad I did. I made it editable so that we could type in all of our lunch ideas (which are broken down into categories: main course, fruits/veggies, sides/desserts), and then print it off and keep it inside of our pantry with our shopping/meal planning items. You can also just save it filled in digitally and access it from your phone or computer.

CLICK HERE TO DOWNLOAD THE FREE & FILLABLE SCHOOL LUNCH PLANNING PRINTABLE


CLICK HERE TO DOWNLOAD THE FREE & FILLABLE SCHOOL LUNCH PLANNING PRINTABLE


Now when I am grocery shopping/meal planning for the week, I can glance at their list and be sure to stock up accordingly. This list has items they will all eat, so I can now quickly put together lunch ideas without over purchasing food while offering some variety from week to week.


TIP #2

Keep it simple! One of the primary goals is to be speedy about lunch making. Whether in the morning or the night before, I don't want to have to invest much time in putting everything together. And really, the best case scenario is that I give the boys the tools they need to be able to do everything themselves.


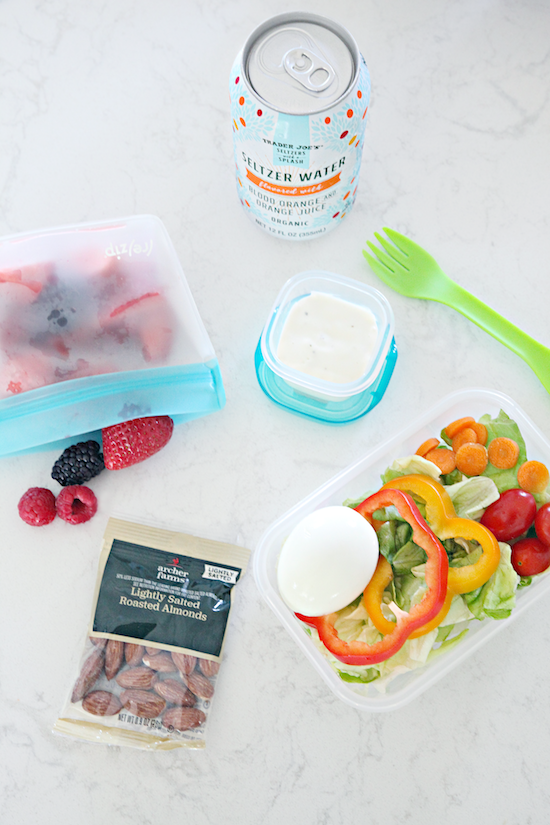
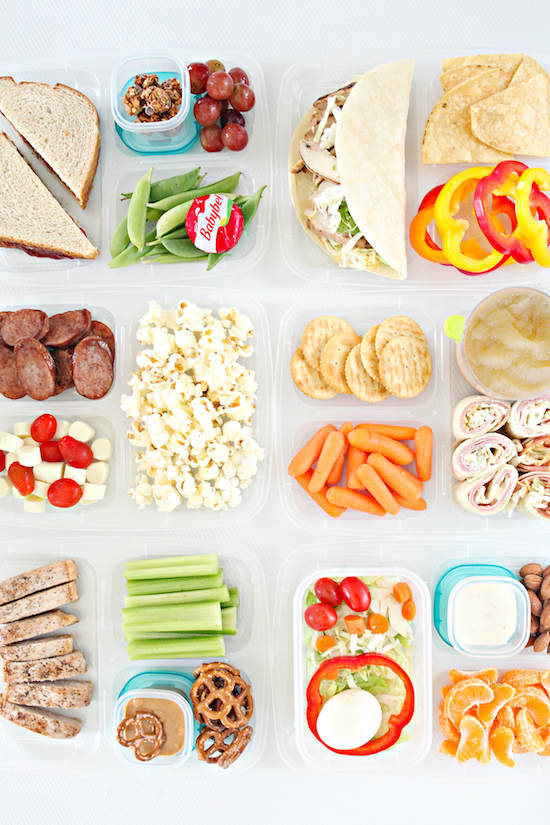
So, that might mean giving into some pre-packaged items or creating my own quick snack packs that we can all just grab-n-go. Typically I portion off crackers, popcorn, fruits, veggies, protein bites, etc... Whenever I can, I select fruits and veggies that I know I will get the longest life from (I have found that grapes, carrots, celery, cucumbers, pea pods, oranges, peppers, melon, and apples will typically stay fresh throughout the course of the week without concern of spoiling, and are easy to portion out). This is HUGELY important and probably my biggest tip.

I will also purchase individual meat snacks, cheeses, nuts, yogurts, granola, etc... if the price is right for the time I am willing to invest. If I have more time on a given week, I might opt to purchase in bulk and create those portions myself.


TIP #3

OK, so basically the first step was to select the simple sides that can easily be tossed into a lunch, and next, I like to do a little prep. Again, I am putting groceries away anyway, why not just put them away in individual grab-n-go packages to make the entire week go smoother?

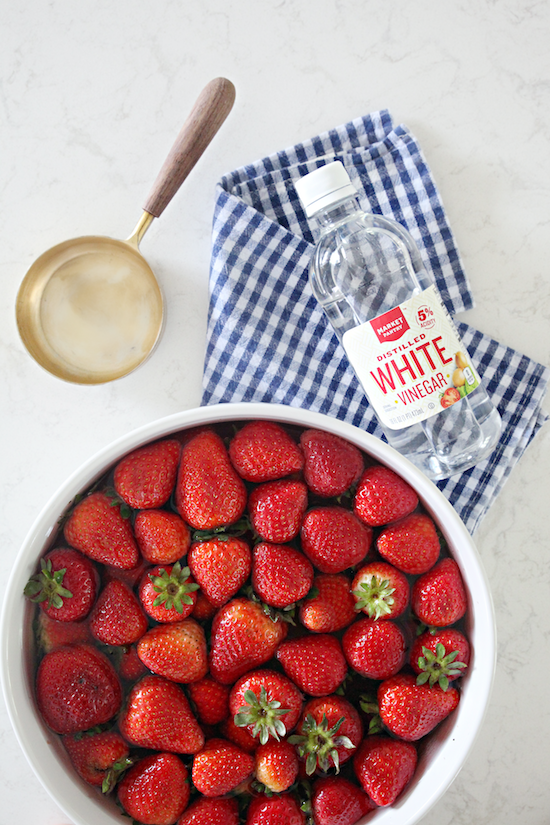
Aside from the fast fruits and veggies mentioned above, we all really love berries as well. So, while putting groceries away and doing my weekly meal prep I will soak/rinse them in a bowl of water and vinegar for a couple of minutes. They seem to last longest if I do a quick soak and then let them air dry before refrigerating. This is one more step, but if I multitask during other meal prep, then it isn't too bad and I know I will prolong the freshness for a few extra days. I do this with all berries, not just strawberries.


Also fresh from the grocery store, I will cook up chicken to create grilled chicken strips that I will put in wraps, tacos, on salad, etc... And every couple of weeks I will freeze sandwiches in a few varieties in bulk.


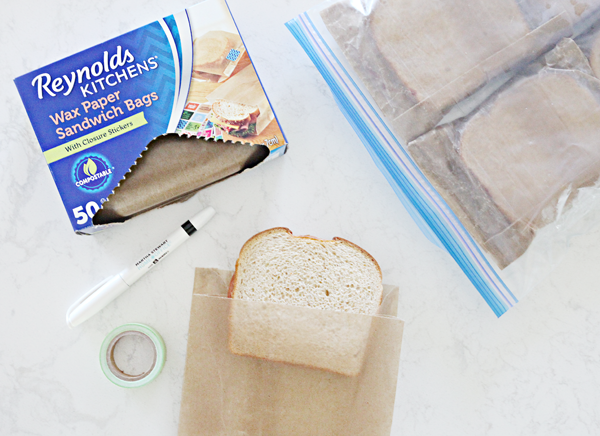
I recently switched to these wax paper bags because they are compostable and keep the sandwiches fresh in the freezer. I will make a few loaves of bread worth of sandwiches at a time (I will also use rolls/croissants with meats/cheeses, etc...) and I find they work best if I don't use spreads other than peanut butter and jelly directly on the bread. I will put together a few sandwich varieties to select from, and just label the sandwich type on the wax paper bag.

The bulk sandwiches go into freezer zipper bags (which I just keep reusing) and into the freezer until a school morning when they are transferred directly to the lunchbox and they are ready to eat by lunch.

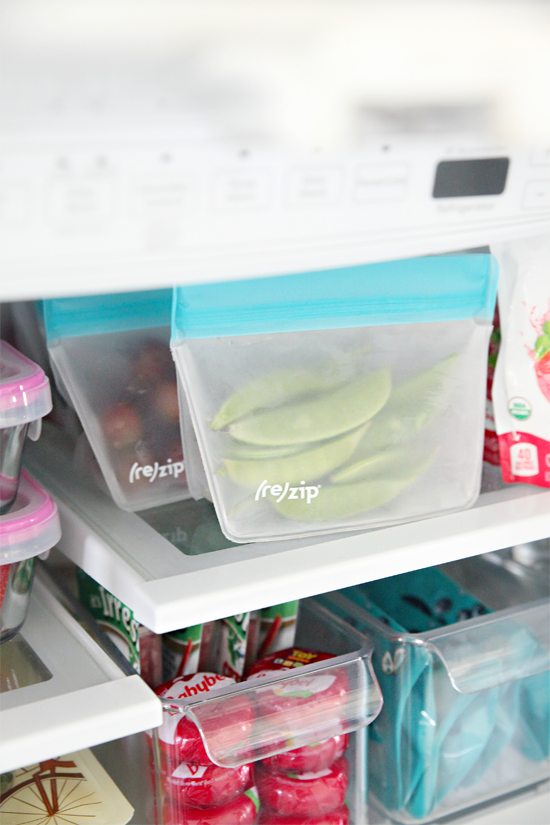
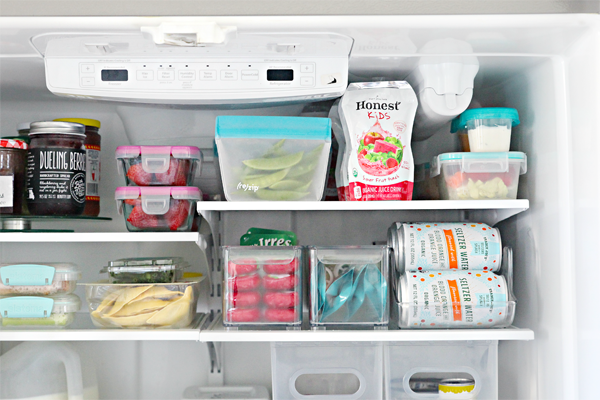
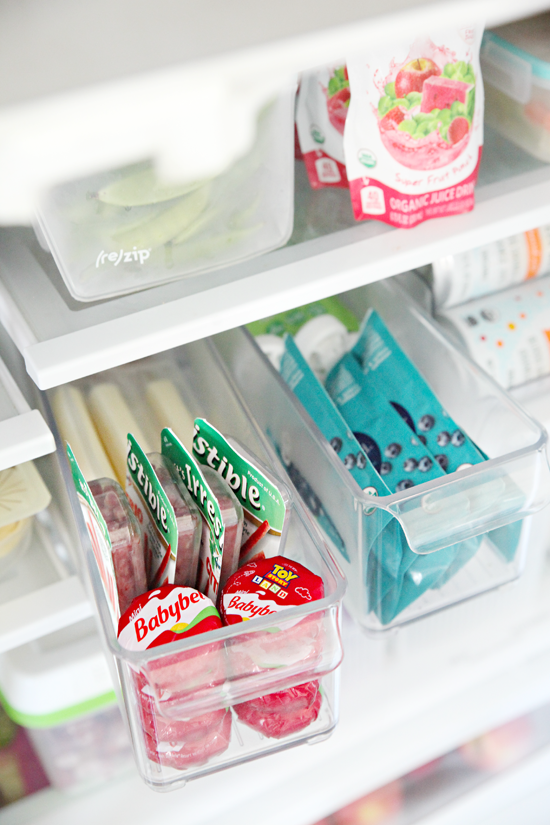
All of the pre-prepped snacks and sides are put together in a section of the fridge that the boy's love to grab from.


TIP #4

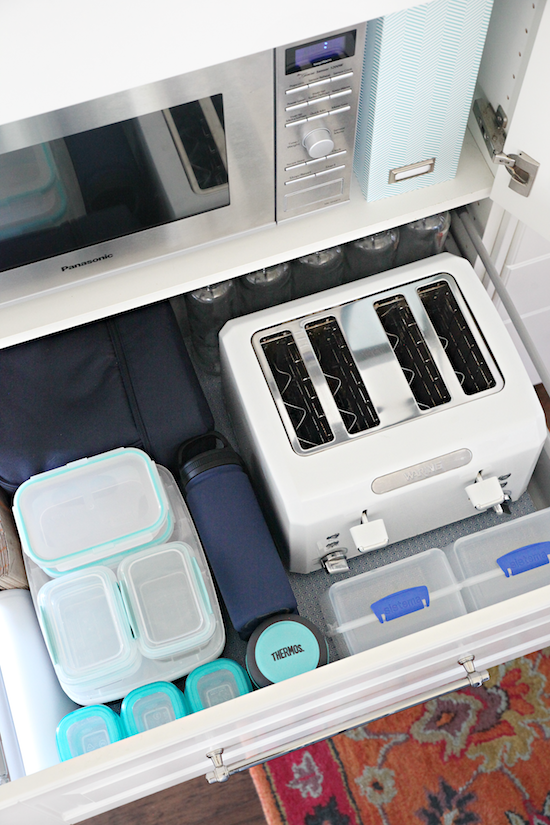
If you have the space for it, I recommend storing all lunch related containers together. That way everything is quick and easy to pick from during the lunch making sessions.


We have a nice deep drawer in our pantry and it holds all of the lunch boxes/bags, containers, water bottles, thermos, reusable bags, etc.... It has become a pretty popular drawer!


TIP #5

Tip five isn't as much of a tip as it is just some of our favorite lunch products.


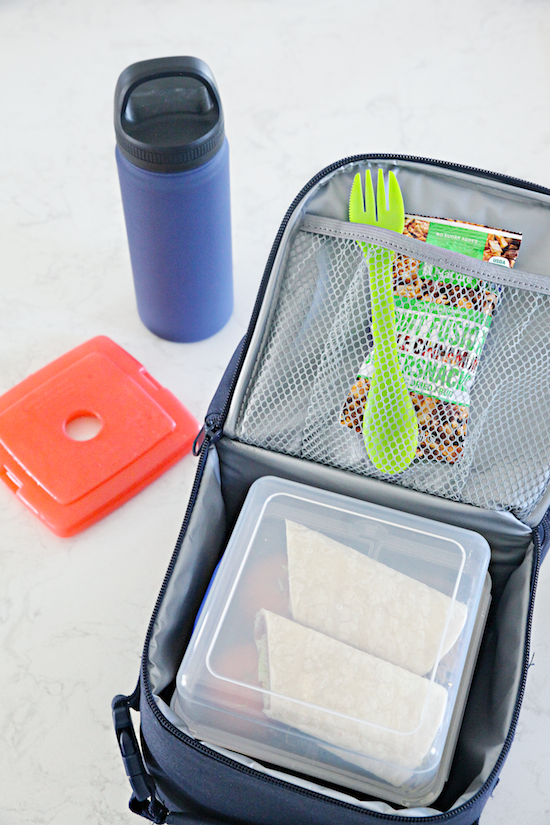
We have done bento-type containers and boxes in the past, but now that the boys are bigger, they have outgrown many of those. We prefer containers that will hold a full-size sandwich or wrap without having to turn it into bite-sized finger food.


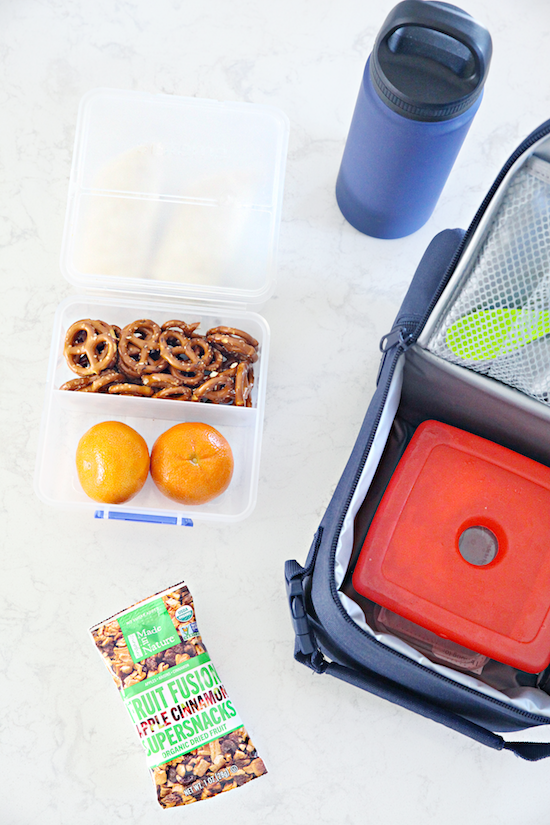
These sandwich boxes are our new favorite and I appreciate that they are dishwasher safe! They can hold the main course as well as two adequately sized side items. They are also really handy for sending snacks to school to get the boys by between classes and their extracurricular activities.


With all of the fruits/veggies/sides, and my quest to eliminate our use of plastic sandwich bags, I invested in some reusable options and so far I have been really happy with them.


I went with both the snack and sandwich sizes and they are great for keeping a variety of snacks ready to go and fresh in the fridge, and the rest stay on hand for the dry goods. They can be washed in the dishwasher, but I usually just wash them out with this dish brush in an attempt to prolong their number of uses even more.

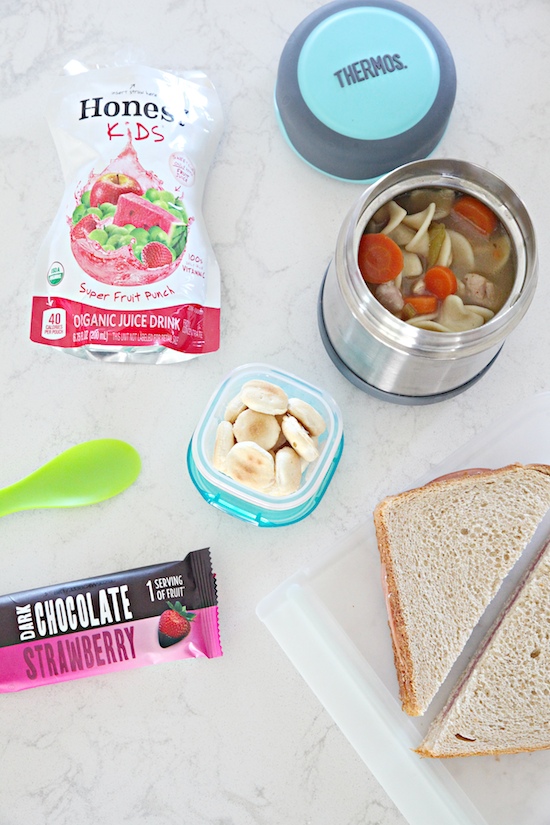
Above you can also see the containers I am smitten with for dressings and condiments. They are typically used for baby food storage, but they are completely leak proof and durable and reusable so we give them major thumbs up for lunch boxes.


An insulated food jar is also high on our list because it allows us to really expand on what we send to school. We can quickly heat up items in the morning, pop them in the insulated Thermos and everything stays nice and warm until lunchtime (think leftovers, rice, pasta, soup, etc...).


An insulated Thermos can also keep items cold, but we don't find ourselves using it for that purpose as often (but love that we can if we would like to). We do have these ice packs on constant rotation to help with keeping items fresh and cool for the few hours they are packed up.

As you can see in the lunch drawer above, we also have a few airtight snap containers that work well for bulkier items and salads (similar). In general, I looked for containers and products that can be reused, are durable, and are dishwasher safe, all of which keep our day-to-day process running quickly and smoothly.


Finally, these fridge bins (similar) rank so high on our list, they are wonderful for corralling all of the individual servings of our lunch and snack sides and act like a deep drawer in the fridge.


If you are looking for a couple of easy peasy ideas, here are the lunches we currently have on our list that all of our boys are willing to eat and are pretty simple to assemble or prep at the beginning of the week:


M A I N  C O U R S E S

Grilled Chicken, Ham & Cheese Croissant, Hard Boiled Eggs, Turkey Apple Sausage, Pepperoni/Cheese/Tomatoes, Soup & Crackers, Lunch Meat Wrap, Pasta Salad, Quesadilla, Peanut Butter & Jelly, Chicken Taco, Spaghetti/Pasta, Sub Sandwich, Salad, BLT Pita Pocket, Bagel Sandwich, Rice Cake w/Peanut Butter


F R U I T S / V E G G I E S 

Pickles, Clementines, Grapes, Peppers, Applesauce, Melon, Peaches, Pears, Apple Slices, Strawberries, Raspberries/Blackberries, Carrots, Pea Pods, Celery, Cucumbers, Bananas, Side Salad


S I D E S 

Almonds/Nuts, Cheese Sticks, Pretzels, Peanut/Almond Butters, Crackers, Yogurt, Rice, Taco Chips w/Salsa or Guacamole, Pita Chips, Veggie Straws, Granola, Cottage Cheese, Fruit Strips/Snacks, Popcorn, Cookies, Trail Mix, Beef Sticks


And because you all educate me just as much as I try to share what is working for us, I would love to hear more lunch ideas that are a hit in your households. It could be a quick meal, a quick tip, a favorite product, a helpful website/app, anything! Please take a moment to chime in below!


Tuesday, June 5, 2018

41 An Organized Teen Boy Closet

Our son's closet came together even better than I could have imagined! I love every last detail, and the best part is that all it took was some simple DIY and a few off-the-shelf organizers to create a whole lot of storage.


Our almost 14-year-old son currently has the smallest room in the house. But we don't want it to feel that way so we have been making a lot of changes to open it up and add smart storage.


I think two different actions accomplished that feeling of openness we were after; painting the walls a solid light blue-gray (almost white color - Sherwin William's Nebulous White) and widening the closet opening to create more storage that will ultimately live behind a closed door (see that post here).


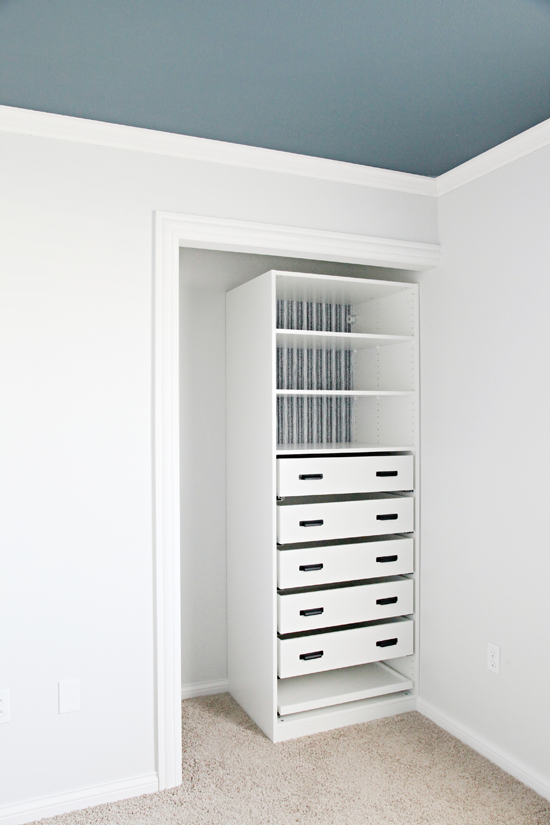
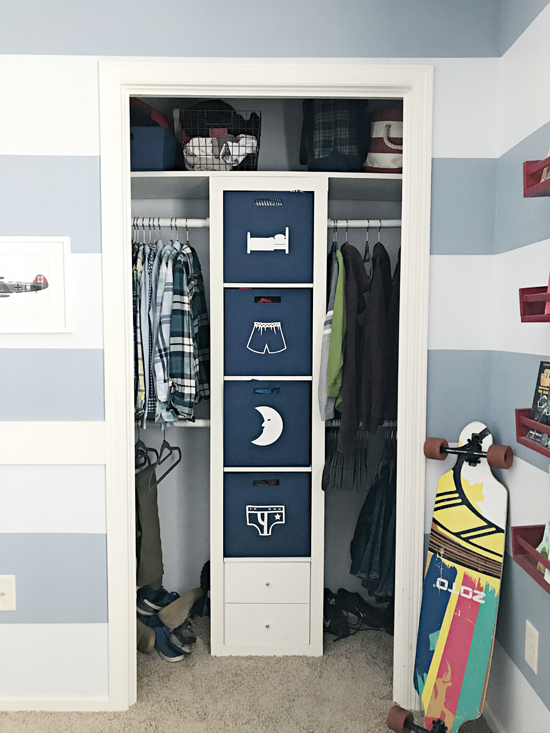
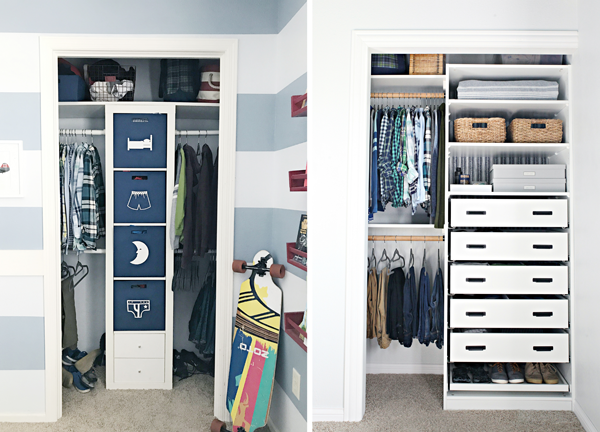
And a quick reminder of the closet the day before we cleared it out for a makeover:


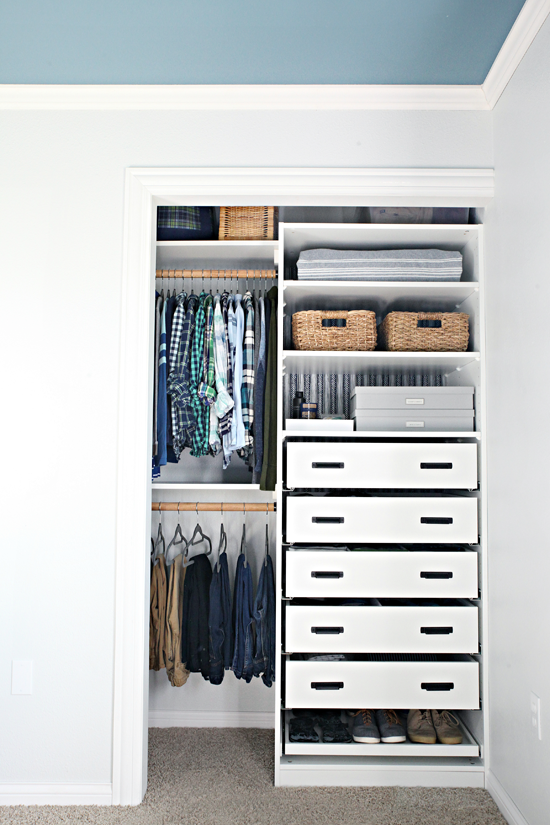
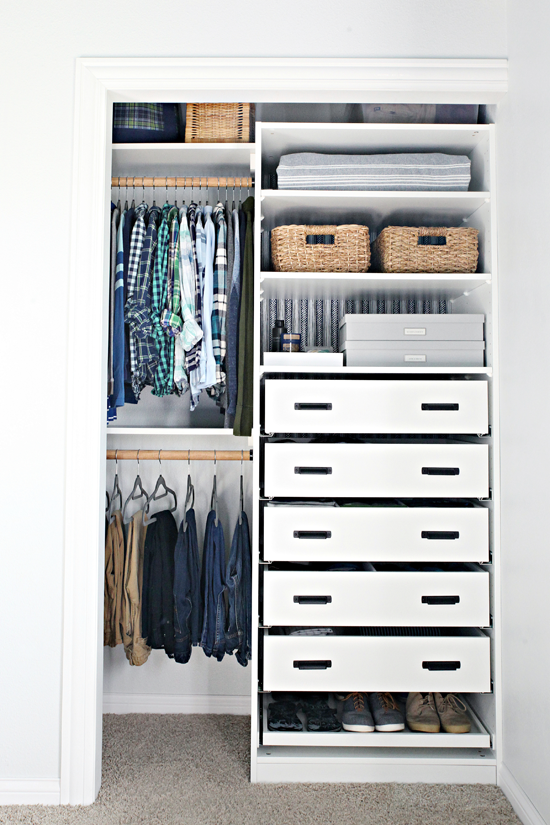
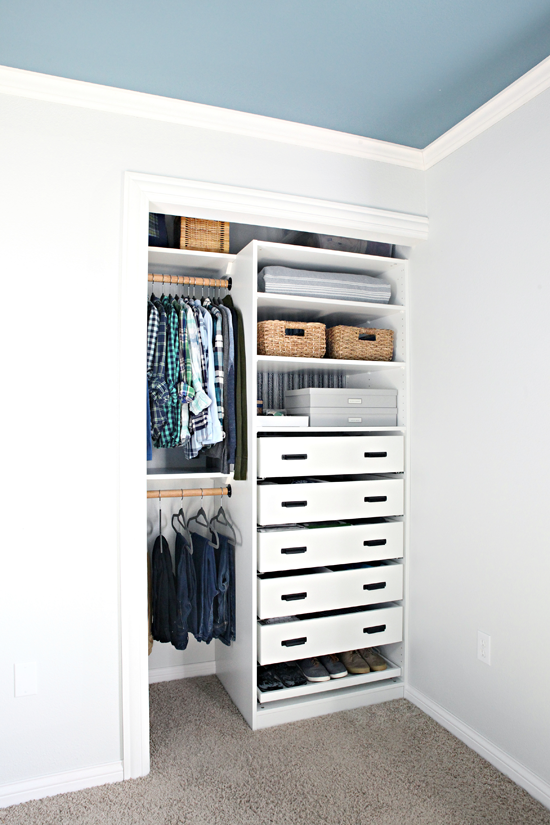
And here it is today!


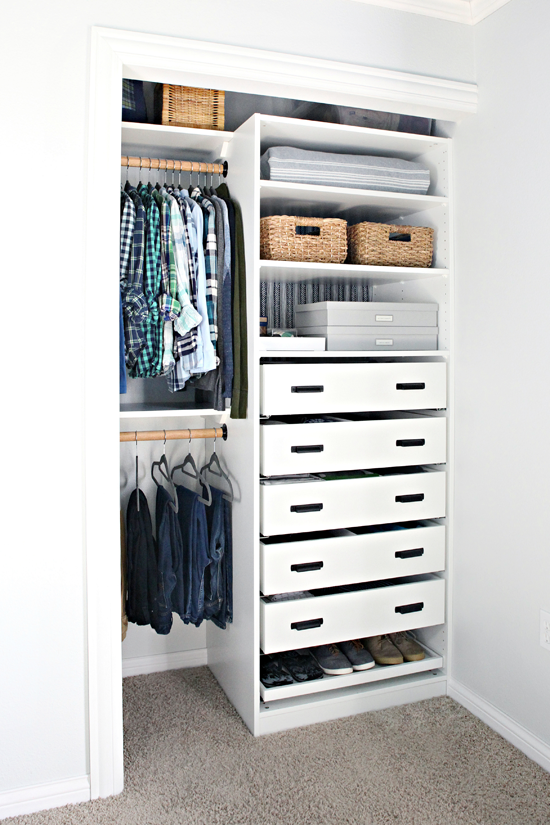
Although the last make-shift closet system served us well for quite some time, the biggest problem we all had is that our son had outgrown the bins and they were literally bursting at the seams. He needed some actual drawers and to keep his bedroom floor area nice and open, we wanted to add those drawers inside of the closet. I also wanted to be sure he had a place for his shoes off of the floor and that we made the most of the 8 feet of vertical space, so after looking at a variety of options, I decided on the IKEA PAX wardrobe frame (measuring in at 29 1/2" wide x 22 7/8" deep x 79 1/4" tall). This unit offers more than enough space and I appreciate that there is plenty of room for him as he continues to grow.


This kiddo is the beneficiary of a lot of hand-me-down items. Not only does he have an older brother that has always taken pretty good care of his belongings, but we have a few friends with older boys that like to pass on their clothes as well. We try to limit the number of clothing items we keep in general, but it is also nice to have some options. The updated closet not only provides adequate storage for his current wardrobe, but also for the plethora of hand-me-downs waiting for when he goes through another growth spurt.


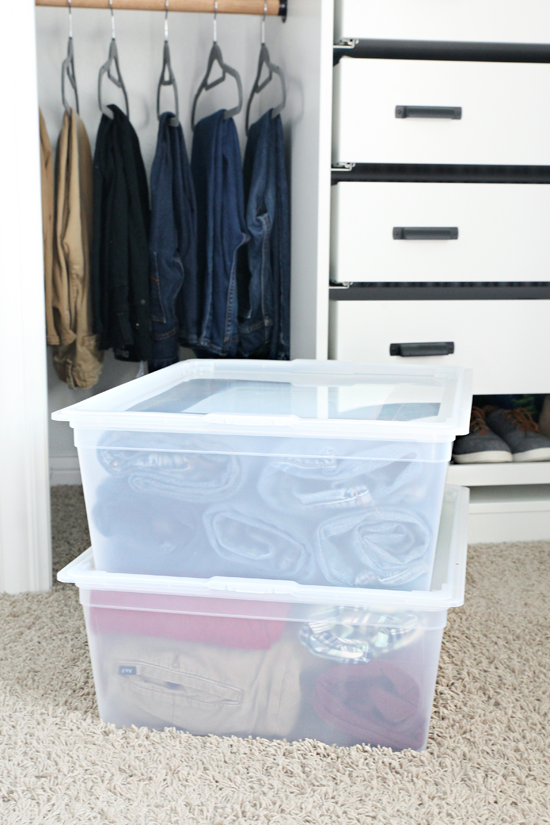
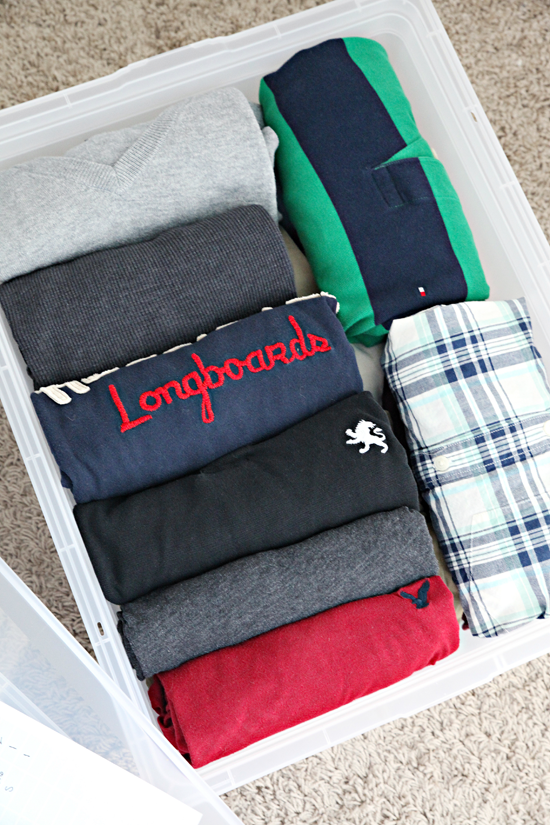
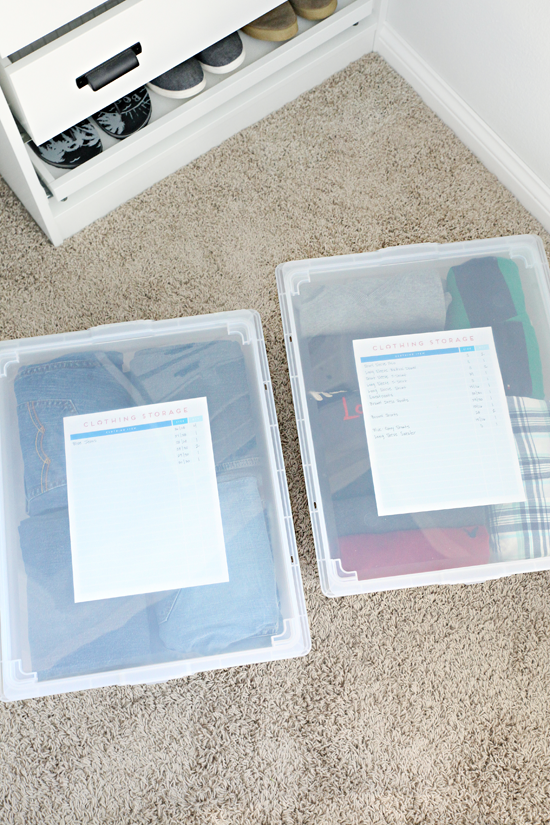
So let's talk about the hand-me-downs for a minute. We have three boys so we do our best to preserve and reuse clothes as much as possible. They grow at different rates and are always different sizes, so there are times we need to store those extra clothes that they just haven't grown into yet. Twice a year we do a quick closet purge and inventory and rotate out their closets (spring and fall). I prefer to keep their hand-me-downs stored on the top shelf of their closets, and in this room, these medium Elfa drawers were the perfect solution. Did you know that although they are meant to be used with the Elfa drawer system, they can also be used as stackable bins? Mind. Blown. I love that they are frosted and sturdy and come with slim lids that clip in. They are a really great size and by using two, we were able to easily fit them on top of the IKEA tower in our son's closet.


These two bins hold 10+ pairs of jeans in a variety of sizes, as well as dress shirts/pants, shorts, sweats, t-shirts, etc... I found that I had plenty of room to roll and stack the items inside.


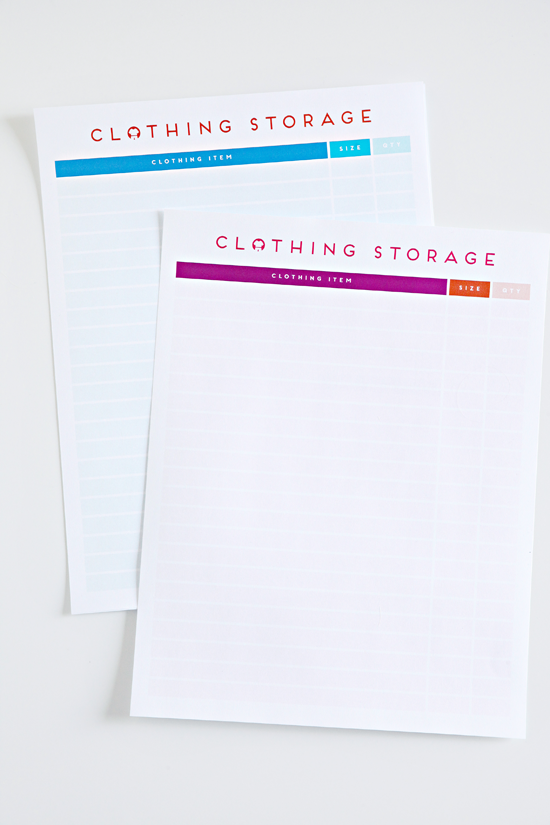
To keep track of the contents, I created and printed out a quick inventory tracker that I filled out and tucked under the lid. I am able to see through the lid just enough that this worked out perfectly, but the sheet could also slide into a clear plastic sleeve on top of a solid bin as well.


You can also download the trackers for free if you would like!

DOWNLOAD FREE CLOTHING INVENTORY PRINTABLE HERE

DOWNLOAD FREE CLOTHING INVENTORY PRINTABLE HERE


Now, back to his current clothing...

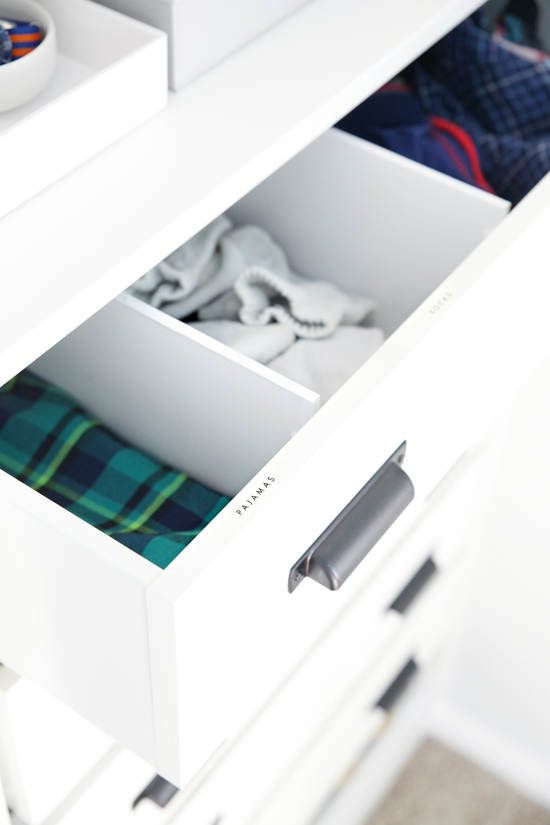
Remember how we DIY'd the easiest custom drawer dividers ever? I can't rave about them enough! They worked out so well in these drawers and offered us a lot of flexibility.


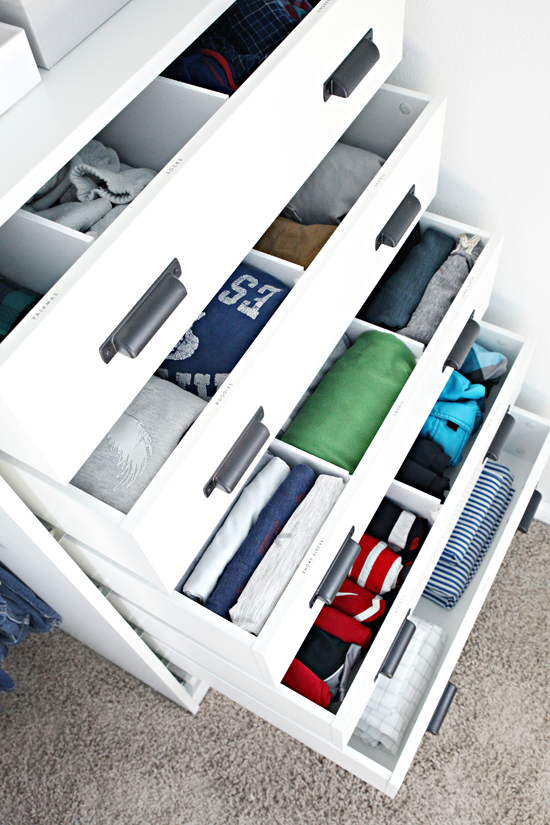
I divided the top drawer into three slots; one for pajamas, one for socks, and another for underwear.


Quick Tip: I typically purchase a different type of sock for each boy, one to two packages of white and one package of black. This makes it easy to identify which socks belong to which boy, and also allows them to just toss their socks into their drawer with no matching necessary. In the past, I have also used colored Sharpies to mark the bottoms which helped in identifying and quickly sorting all of their socks after washes (or when they are laying all over the house).

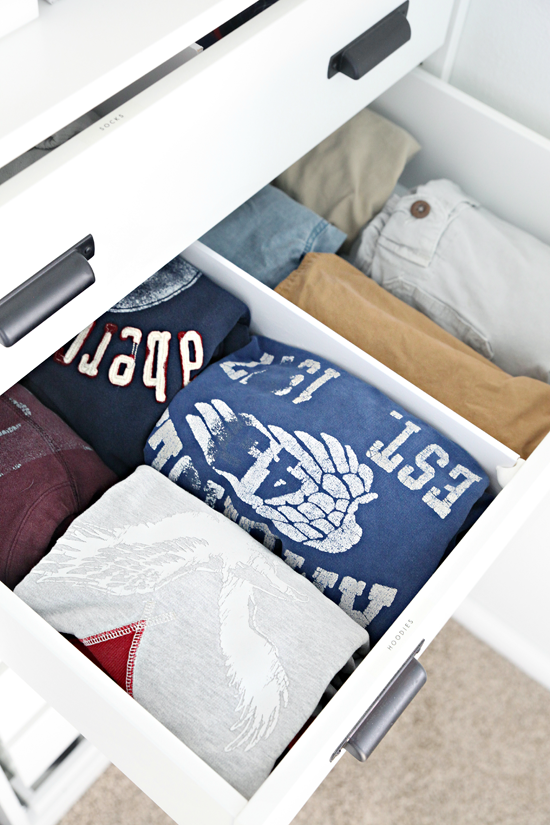
The next drawer down divides his bulky hooded sweatshirts and shorts.


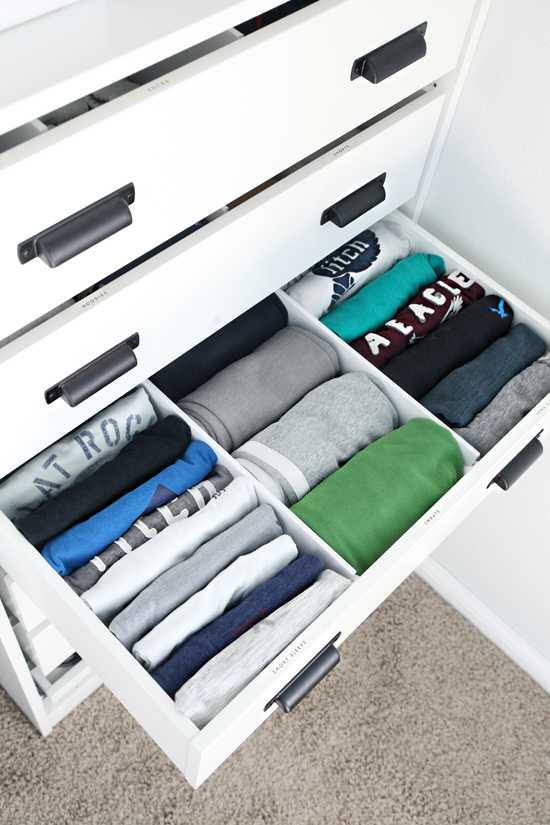
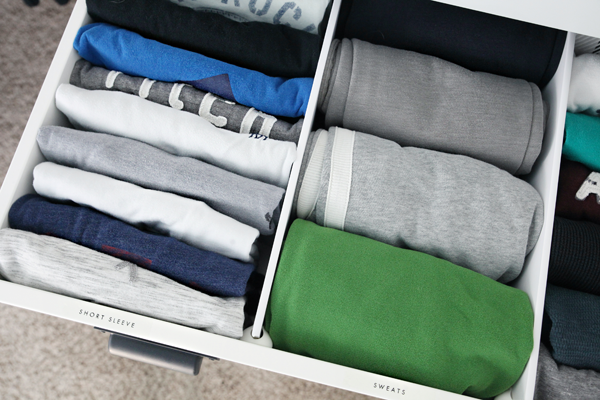
Then his short sleeved t-shirts, sweatpants and sweatshirts, and long sleeve t-shirts are divided into three narrower sections.


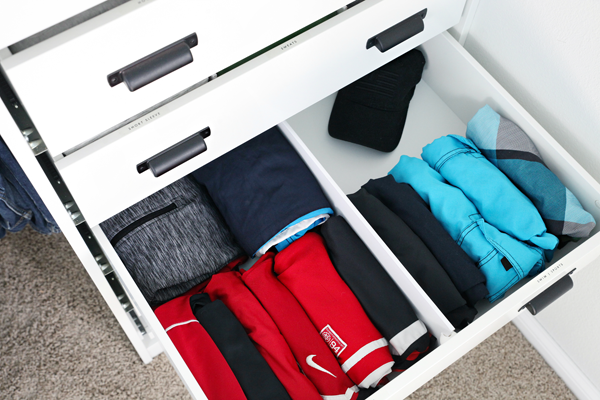
The following drawer is all of his athletic wear, swim and extra space for future sports uniforms.


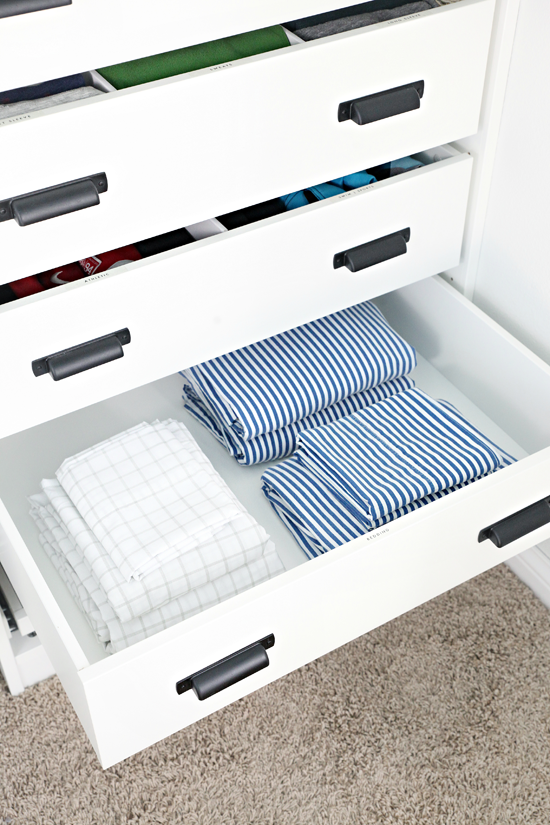
The bottom drawer has plenty of room for sheets and seasonal bedding.


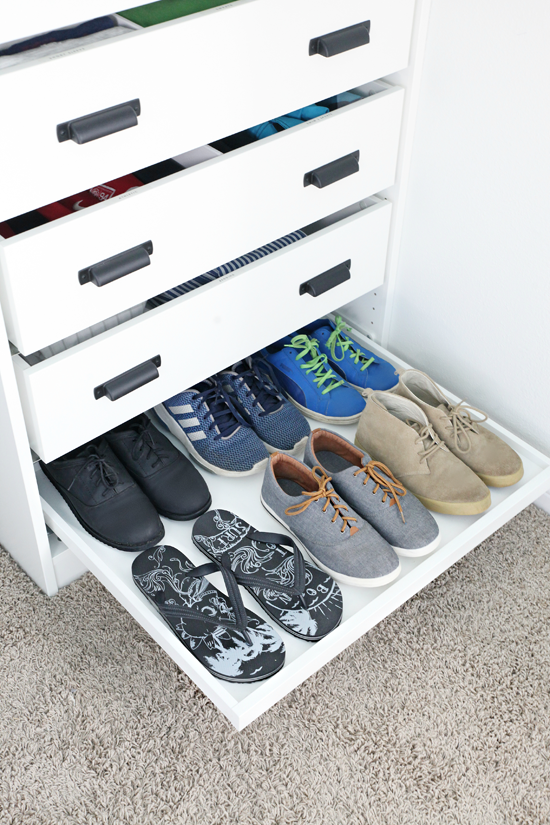
And the smaller pull-out at the bottom holds his shoes.


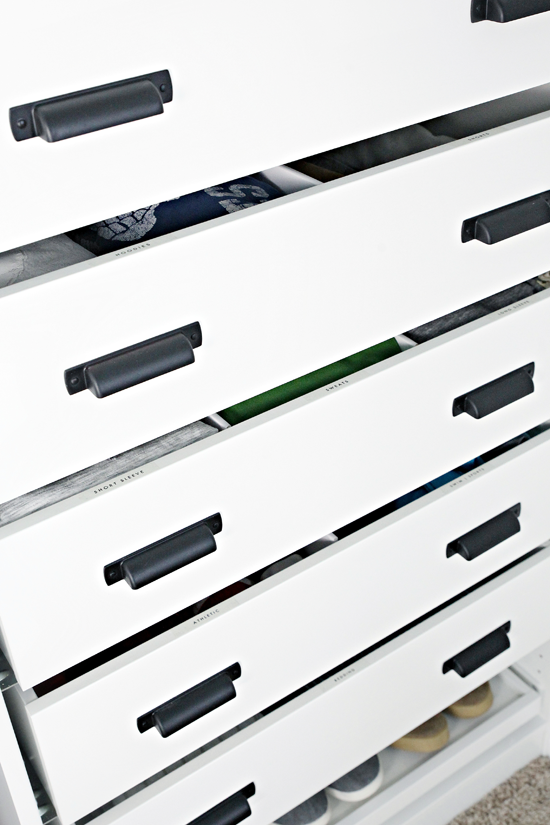
You may have also noticed that I added some labels to the top of each drawer, which can be seen when the drawer is both closed and open. I used this label maker with clear tape.


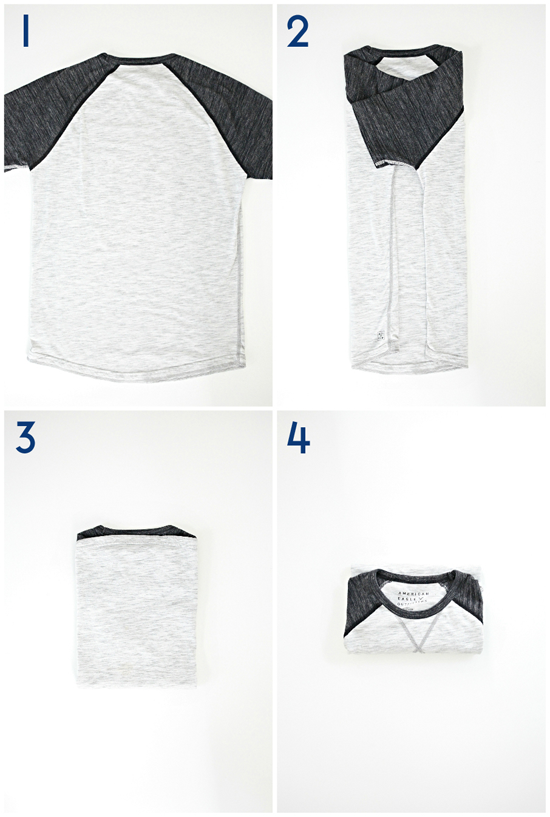
Our son prefers to fold his clothes vs. hanging them, and this folding method was so quick and easy for him to learn. He basically files his clothes so that everything is visible and compact.


Four easy steps, the shirts can be folded in just a few seconds each.


1. Shirt face down

2. Fold in both sleeves

3. Fold bottom up to the top (in half)

4. Repeat and fold the bottom up again (in half)


Everything else is just rolled or folded to best fit in each divided section.


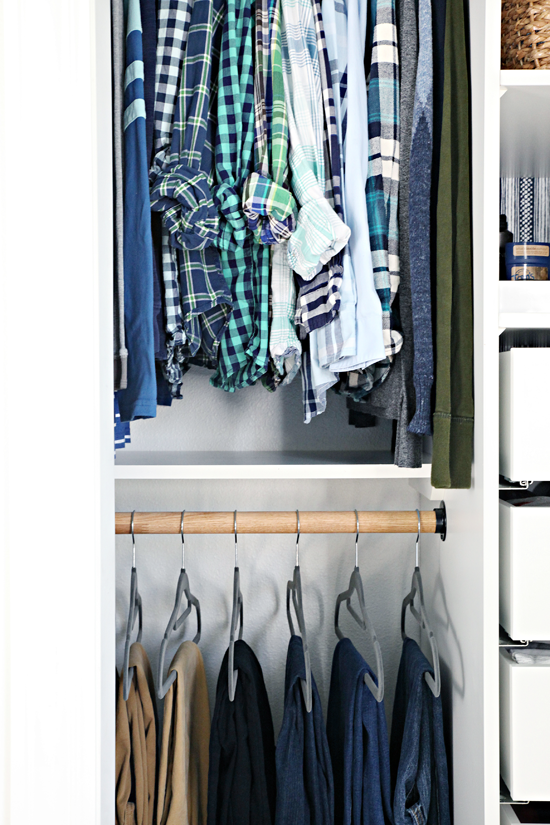
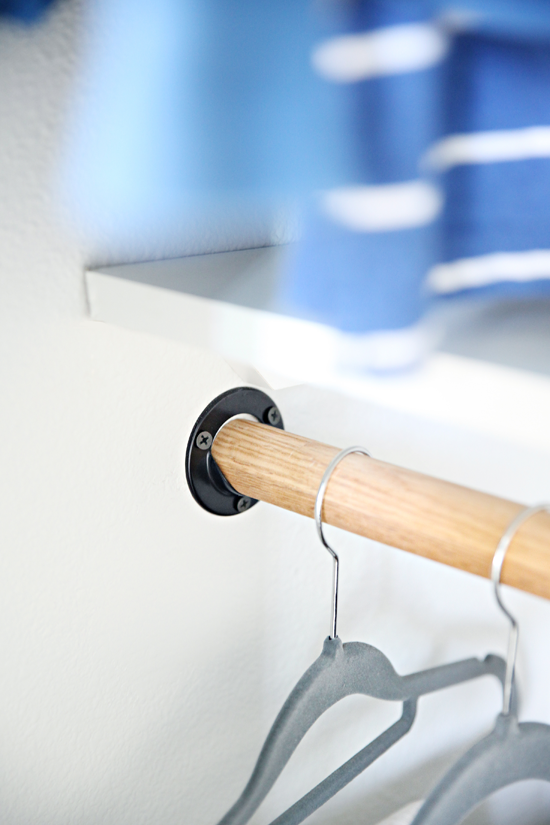
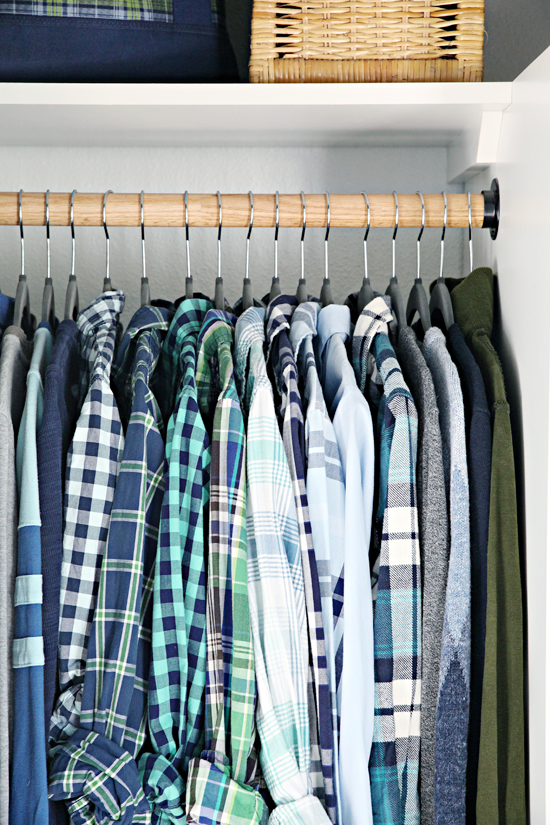
For the clothes that he does hang (essentially anything a little dressier with a collar or buttons), we installed a solid oak closet rod which I stained a warm wood tone. And as always, I recommend doubling up on the rods whenever possible.


And used black closet rod sockets to compliment the other black hardware in the closet.


We also added two solid white shelves above each rod to offer a little extra storage if needed. We recessed them back a bit so that we could place the hand-me-down bins up top without any issue.


And these slim, no-slip hangers have been really great for the price.

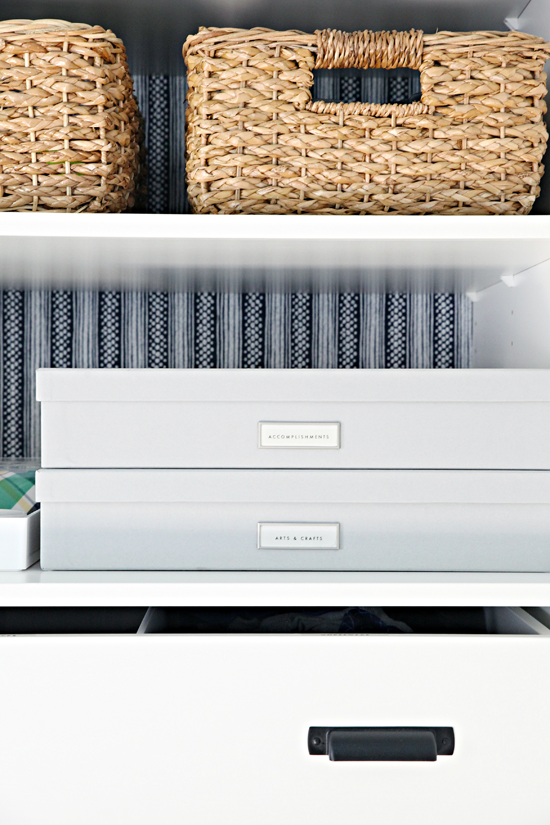
Both the drawers and the shelves in the tower are quite deep, almost two feet in fact. This is great for the drawers, he has plenty of spare space to continue to grow. The shelves, of course, prove to be a little more difficult to utilize. But, the top shelf holds some heavier throw blankets that we use for sleepovers/guests, the next shelf holds a couple of light-weight woven baskets to conceal his everyday clutter (nerf guns, tech gadgets, etc...), and the lower shelf has a few document boxes for memorabilia and arts & crafts.


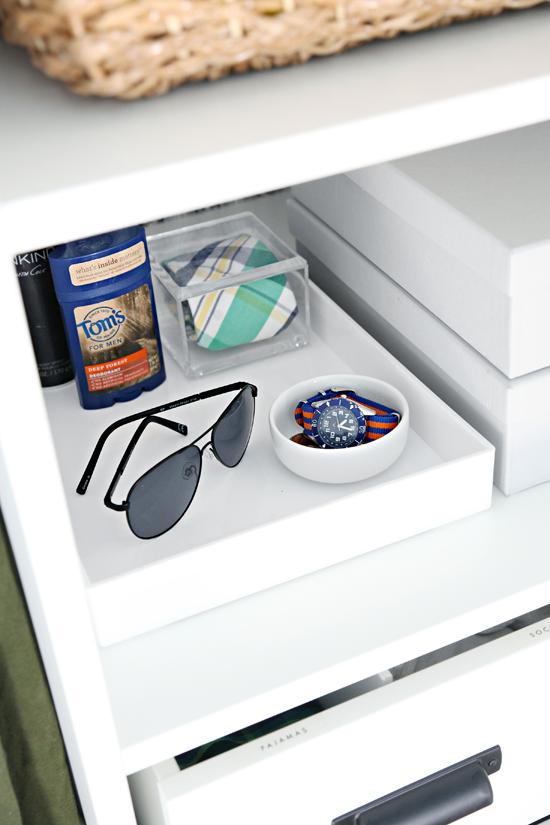
I also added a small "valet" type tray to hold his daily items and act as a drop zone.


It's funny that this was one of his favorite details, I guess it made him feel a bit more "adult" to have a place for his wallet, change, watch, sunglasses, and deodorant.

And that completes the closet tour!


With our boy entering high-school this coming fall, this closet project came at the perfect time! The previous closet functioned so well for so long when the boys were much smaller, but this is definitely an upgrade fit for a teenager.

A few more notes:

  • I love that the IKEA tower is versatile and customizable. We added the pull-out shoe tray, five large clothing drawers, and three shelves to put together this configuration.
  • I added this hardware to the drawers, which I sprayed in a flat black finish.
  • All of the drawers are soft close! So nice!
  • This is the paper I used to line the back of the tower (I just adhered it to the back panel with double-sided carpet tape before tacking it to the back of the frame).
  • Although we designed this closet for a teen boy, it is versatile enough to work for anyone of any age! Always a bonus.
  • We plan to add a sliding door next to conceal everything, which almost makes me sad because I love how it turned out so much! But also, teenage boy.
  • I considered adding a small step stool under his pants, but the boy is officially as tall as me and has no problem reaching his everyday items. Sigh....

This install has also sold us on updating our own closet with the PAX system down the road. It was so easy and versatile and the quality is really great. Not to mention, I love that there are so many ways to customize it to make it look unique, even though it is off-the-shelf at IKEA (they are not sponsoring me by the way, just my honest thoughts).


Let's end the post with a fun before and after to see how much was gained by removing the wing wall and installing a fully functional closet system.


For reference, I rounded up all of the closet sources below.


You can also catch up on all of the other room posts here:

Teen Boy Closet Planning

Patching the Walls and Carpet

Bedroom Progress: A Blank Slate

Quick & Easy DIY Drawer Organizers

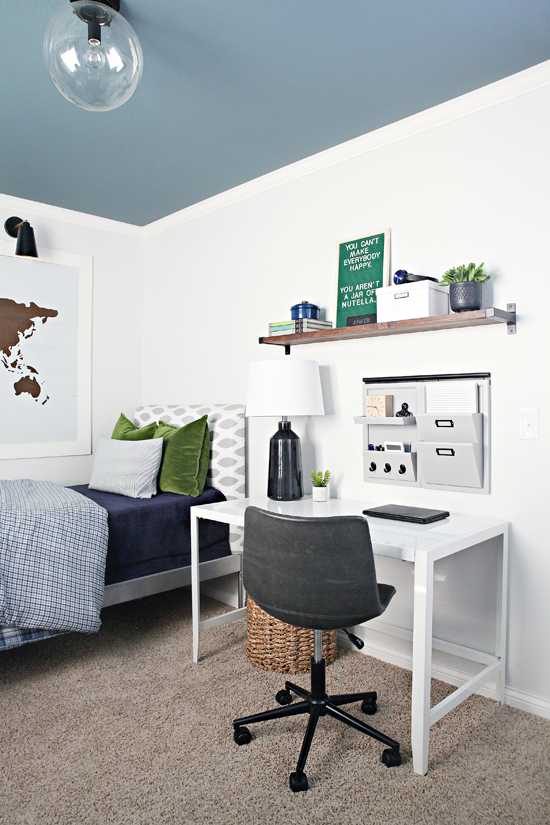
Teen Workspace with DIY Wall Shelf