Showing posts with label Labeling 101. Show all posts

Monday, May 6, 2019

29 Labeling 101: Quick & Easy Labeling Techniques

I am back with part three of a four post series I have put together with the best of the IHeart Organizing best. It's been a long time coming to take everything I have learned over the years, whether it is working in my own home or working with others, and compiling it all in a single place here on the web.

The four-part series will include:

Gearing Up for Your Next Organizing Project with a FREE Printable Kit!

Need helping getting started or prioritizing where to begin? What is the plan of attack? What is currently working well and what isn't? What storage do you need? Trying to get rid of things, but finding it hard to decide what to keep and what to pass on?

I have put together a great printable kit to help you prioritize, sort, and navigate your way through your next organizing project(s), which includes a total of TEN free printables!

FIND THAT POST HERE!


My Top Organizing Tips!

Instead of digging through years of my archives to find individual tips, I am going to compile the best of the best in a single, very informational post! It's going to be a whopper and a really great resource for projects of any size.

FIND THAT POST HERE!


Labeling 101: Quick & Easy Labeling Techniques

I have tried almost every type of label on the market, from vinyl to label makers to stickers and chalk markers, and they all have their place. But what are my tried and true favorites? What do I reach for with almost any project due to time, cost, practicality, and ease? I will be sharing three labeling techniques that haven't failed me yet, and that you won't need any fancy tools to utilize.


Practical, Everyday Storage Solutions!

If I have learned anything from raising three boys and organizing along the way, it is that storage can be expensive and that our needs are constantly evolving. Gone are the days where I purchase pretty bins and baskets to decorate with. Although I will always appreciate beautiful storage, it has to be versatile and it has to last! With that in mind, there are a few storage products that I have found that continuously work hard for me in a variety of situations, so they end up being the types of products I gravitate toward when working on any new projects. For the final post in the series, I am putting together the ultimate storage source list with tips and products that I have fallen in love with over the years.


So let's dive in with part three of the four-part series: Labeling 101: Quick & Easy Labeling Techniques.


I have always enjoyed the creative side of organizing, and labeling has really allowed me to play with a variety of craft tools, papers, vinyl, and embellishments. Labels can really add to the overall aesthetic of a project while being extremely useful at the same time!


Monday, June 6, 2016

9 Labeling 101: Print & Cut Stickers

This past weekend I tackled a project that has been on my list for months now!  And the funny thing is, I had zero excuse for putting it off.  In fact, I was able to completely re-organize our media cabinet without purchasing any storage, yet the result is a drastic night and day difference.  The act of pulling everything out, wiping things down, and relocating items that didn't belong was a huge part of the process, however, I am pretty convinced the labels I created played a major role in the fantastic transformation as well.


It is no secret that organizing and labeling go hand-in-hand. It is also no secret that I love to share my labeling tips with you. That is how the Labeling 101 series was born.

Does organizing have to be pretty to be effective? Absolutely not. But I always say, "Why not love it, have fun with it, and find ways to keep yourself motivated?" Any time that I have invested a little extra heart and attention to a project, it lasts much, much longer.

That said, when it comes to labeling, I prefer to add a little ooh, la la value. Whether it be a label made on our computer, or placed inside of a decorative bookplate or even created with my label maker, I want it to stick around for awhile and look the part.  Labels keep everyone on the same page and really are a crucial part to most organizing projects.

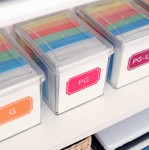
For our media cabinet project, we needed a few new labels for our movie bins (purchased from the Container Store here).  We recently added a fifth bin and have been in the process of re-sorting our movies by rating (in the past they were sorted by genres).  It has been a bit of a time consuming process, and the cabinet has been hiding the clutter in-between sorting sessions.  Yikes.


It was time to finish things once and for all, so while Bryan completed the sorting and documenting of our media, I whipped up some darling new labels.

There are a variety of options for creating labels, especially with a Silhouette die cutting machine, but one of my favorite ways is the Print and Cut method.


This method can also be done without the Silhouette; I have personally created dozens of labels using Microsoft programs, printing them on paper or sticker sheets and cutting them to size with scissors. But the Silhouette machine has really made the process easier, and I thought I would share a quick tutorial since I have been known to use this type of label fairly frequently (see them in our craft cabinet here and in our storage room here).

Silhouette sells a variety of different of sticker papers; I have purchased clear, kraft, gold, silver and the white options.  Although I haven't personally used another brand for this specific purpose, I would guess most any brand of sticker paper would work just fine.

To get started, I measured the surface of one of our movie bins to give myself an idea of a good label size.


I then opened the Silhouette Studio software on my computer.


Before I begin designing, I like to get my page set to the correct dimensions.  This ensures I am creating something that will fit the media I am ultimately cutting, and staying within the guides.


With the sticker paper I find it works best with a cutting mat, so I also be sure to select the appropriate mat size (not shown above but added on prior to printing).

Now for the VERY important part of this process, adding the Registration Marks.


The registration marks will print on your design, and the Silhouette machine has the ability to read those marks and know just where to cut your labels.

Once I have the page and registration marks set, I begin designing.  I had previously purchased a label template from the Silhouette store, and imported it in to modify.  This is where I adjust the size and add in any text.


I was also able to update the shape color, as well as the line and font colors.


The next very important step is to update the cut settings for each graphic and font you plan to print and cut.  I only wanted the exterior of my shape to be cut by my machine, so I selected both the inside shape line and the font and clicked the 'no cut' option for those items.


Because I wanted all of my labels to be the same shape and size, I created one and then duplicated it for the remaining categories.  To duplicate my design, I highlighted all of the first label, right clicked and selected the 'Duplicate' option from the menu.


I ultimately created a total of five labels in a variety of colors.


Once I was complete with my designs, I double checked my page setup and then printed the labels to my home computer.


Now that the pages were printed, I double checked the blade setting recommendations in the software (which appear based on the material type selected).


Which prompted me to update the blade using the adjusting tool on the machine.


I then lined up the printed page on a sticky cutting mat and loaded it into my Silhouette.


(Hint: I later found that it worked better to line the mat up with the feed guide lines on the left, not the actual sticker paper).

The best part, sending the project to the Silhouette to cut!  Once you click the 'Sent to Silhouette' button, it will begin reading the registration marks.  I actually received an error the first couple of times until I loaded the mat in correctly.


When the machine is able to identify all of the registration marks, it will begin cutting the design along all of the specified cut edges.

Then, all that is left to do is peel and stick!


I added some ivory cardstock to the inside of the movie bins to give the faces a clean and simple look.


The similar labels create a dreamy, cohesive and colorful outcome for our movie cases!


And as I mentioned, the labels also played a huge part in the before and after transformation.  Just look at what some streamlining and labeling can do to a messy cabinet.


I removed the extra cases, electrical components and bins that no longer belonged in this cabinet, and put everything back in a fashion that made sense and should be simple to maintain moving forward.

Movies are now organized on the top shelf by rating, my old laptop (for the kids) and my husband's laptop both sit on the middle shelf with our chargers tucked inside of the basket, and the bottom shelf holds our video game bin, video game controllers and a box of our family movies.


I was able to use items I had right at home to update the cabinet; a few storage box swaps, shelf adjustments and labels made it feel fresh and new.


A few things I have learned about these stickers:

  • The Silhouette stickers are not repositionable; once they stick, they are there until it is time to remove them.
  • The stickers seem to print better with an ink jet printer, I noticed some smearing with my laser jet.
  • If your Silhouette can't recognize the registration marks, it may just require a little adjusting of the mat to the left or right.  
  • This type of labeling option offers endless varieties of colors, creativity and styles.  I love that I can quickly create something with the design program, print it and have it cut precisely.  This is especially nice with more intricate labels and designs.  I am definitely not a scissor wizard.

Isn't it amazing what a different an hour, some ambition and labels can create? If you are looking for more label inspiration, you can find all of the posts in this series shown below.


Monday, March 14, 2016

33 Labeling 101: Canvas Bins

I always find it amusing and interesting that as the seasons change, I tend to receive the same types of questions from multiple readers.  Recently, the question has been, "How do I label canvas bins?".

I have received this question here and there over my years of blogging, but canvas bins must be totally hot right now because the question has popped up multiple times in the last few weeks.  That's my sign to finally answer this common question with another chapter to my labeling 101 series.


It is no secret that organizing and labeling go hand-in-hand. It is also no secret that I love to share my labeling tips with you. That is how the Labeling 101 series was born.

Does organizing have to be pretty to be effective? Absolutely not. But I always say, "Why not love it, have fun with it, and find ways to keep yourself motivated?" Any time that I have invested a little extra heart and attention to a project, it lasts much, much longer.

That said, when it comes to labeling, I prefer to add a little ooh, la la value. Whether it be a label made on our computer, or placed inside of a decorative bookplate or even created with my label maker, I want it to stick around for awhile and look the part.  Labels keep everyone on the same page and really are a crucial part to most organizing projects.

So how do you label canvas bins?  And do it quickly, easily and with a little pizazz?  I am sharing four different darling options with you today, and with that I am only scratching the canvas surface.


To get started, I whipped up a few label options using my printer, and one cut with my Silhouette machine out of heat transfer material.


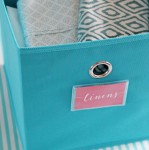
I picked up a standard canvas bin with a small grommet handle from Target.  Although there are an endless variety of canvas bins on the market, most of these techniques should be fairly universal.


First up, name badges!  I found a small pack of these at our local office supply store.  They are clear and this specific type had a safety pin affixed to the back.


I created a label on my printer, cut it to fit the holder and pinned it directly to the front of the canvas bin.


I really like this option due to the flexibility and the fact that it is couldn't be easier.  But I wouldn't recommend this option with littles, just given the fact that it is attached with a safety pin and I don't find those to really be all that safe.

__________


The next label I created using my print, cut and laminate tutorial, which is always a much more kid friendly version.


Canvas bins work great for children's toys, and so do picture labels.  For this label, I used a hole punch paired with a piece of baker's twine.  I then affixed it to the bin through the small handle by tying the twine into a simple knot.  


These print and cut labels tend to be my favorite because they are completely customizable and easy to make using supplies I always have on hand at home.

__________


You all know I am a long time fan of the Martha Stewart Adhesive Labels (which are now back!), so image my excitement when I spotted a similar version at Target.  


These holders are designed to slide over the edge of bins and boxes, creating a quick and non-permanent labeling solution.  And again, I opted to print the label using my printer (because I am not a fan of my handwriting), however, you can quickly write out your label or use a label maker paired with tape.  Whatever tickles your fancy folks.

(Alternative label holders in SilverBlackGold & White)


__________


Last but not least and the trickiest of them all; the iron-on heat transfer.  


I used this type of label in our boy's bedroom closet, and they are still going strong!  However, the application can be a bit of a hassle.  The iron-on heat transfer material is found online and at some craft stores, and cuts beautifully with the help of a die cutting machine.  However, if you don't have a craft machine, don't fret!  This material can easily be cut with a simple scissors as well.  I would just recommend keeping the outline/shape fairly basic.  For this pet bin example, I decided to do a cute cut-out of a balloon animal.  I followed the heat transfer directions and used my iron to adhere the label to the front of the bin.  


I have learned after doing this a few different times that not all canvas bins are created equal.  The inexpensive canvas bin shown above has a thin webbing finish, which can melt if you keep the iron on the canvas too long.  You definitely want to do this with a thin cloth as a buffer.  On the other hand, the transfer doesn't want to stick if you don't hold the iron down for long enough,  So it is all about striking that perfect balance.  But gosh darn it, I had to include this method because it does create a stinkin' adorable label and you may find it worth the little extra time.  And if you use a canvas bin that does not have a webbing finish (similar to this one or this one), then you shouldn't have too hard of a time with this method at all.

__________


So there you have it, my favorite four ways to label a canvas bin.  Working on this post made me realize just what a label lovin' fanatic I am.  OK, so I already knew, but it was so much fun to get back into the label-making game.  And if you are looking for more label inspiration, you can find all of the posts in this series shown below.

Tuesday, January 26, 2016

43 Labeling 101: Silhouette Vinyl

It is no secret that organizing and labeling go hand-in-hand.  It is also no secret that I love to share my labeling tips with you.  That is how the Labeling 101 series was born.

Does organizing have to be pretty to be effective?  Absolutely not.  But I always say, "Why not love it, have fun with it, and find ways to keep yourself motivated?"  Any time that I have invested a little extra heart and attention to a project, it lasts much, much longer.

That said, when it comes to labeling, I prefer to add a little ooh, la la value.  Whether it be a label made on our computer, or placed inside of a decorative bookplate or even created with my label maker, I want it to stick around for awhile and look the part.


Over the years I have shared a variety of projects that include vinyl labels created with the help of my Silhouette die cutting machine.  Below are a few popular examples:


As you can see, my Silhouette has helped me label countless bins, organizers and containers in a variety of darling ways.  And when I recently named it as one of my top recommended tools, I received quite a few requests for some Silhouette specific tutorials.

I admit, pulling the Silhouette straight out of the box was extremely exciting until the moment came to figure out how to use the thing.  Then, the sweaty palms and overwhelming butterfly belly set in.

My biggest tip for learning how to use your machine is to watch a few YouTube tutorials and to always read the directions on the Silhouette media packaging (the packaging for the vinyl, sticker paper, gold foil paper, fabric transfer material, etc. It generally has easy to follow step-by-step directions).

I recently had a couple of new vinyl labels to create, so I thought I would dust off my ol' pal and put it back to work.  Remembering your requests, I decided to also post the steps I take to whip up those fancy pants labels time and time again.

Let's dive right in.

The first step is to plug in your machine, open the Silhouette Studio program loaded on your computer and make sure the software is up to date (it will tell you if it is not).


I always begin in Design mode, which pulls up a blank canvas for your project.


I like to think of the Silhouette as a printer and the Design Page Settings are similar to setting up typical printer page settings; selecting media/page size and orientation.  When working with vinyl, you will also want to be sure that you select None for the Cutting Mat option.  I like to Show Cut Boarder as the red line ensures I don't place any graphics in a "no cut" zone.

Now it is time to design the label.  The lovely thing about the Silhouette Studio is that it imports all of the fonts on your computer.  Creating a design is quite similar to working in Microsoft and Photoshop programs.  But before you can get too crazy with your design, you will want to take a measurement of the area you plan to label.  For this example, I was labeling a glass bottle that I use for making and storing our homemade fabric softener.


Knowing how much space I had to work with, I created the label design using the Silhouette Studio program.  I used the Text tool, which opened a Text Style menu on the right hand side of the screen when selected.


Using the available settings, I was able to play around with a few different font styles and text sizes while also having the ability to change the character spacing.  I generally design in the center of the screen and move things for cutting once my design is complete.  The grid allows me to easily align and space my text.

Quick Tip: Select fonts that are thick/bold for a cleaner outcome.  Thin and small fonts tend to be more delicate and run a risk of snagging during the cutting process.


Once you have your font(s) determined, you can select each font box to see how wide the cut area is (small measurements will appear on the screen when any object or font is selected).  This is also the time when you will want to be sure that any connected cursive type font is welded together into a single cut.  To do this, I select the word box, click Ungroup Selected Shapes and then click the Weld Selected Shapes button.  You will see your word go from a choppy multi-cut font to a solid welded single cut font.


Now that the cursive font is sized and welded, you can select all of the label design elements and pull them to the area you wish for it to cut in your vinyl.  I usually go for the top left corner to try and preserve my vinyl to reuse for future projects.

Prior to sending the job to the Silhouette, you will want to confirm your cut settings in the Cut Settings menu.  Anything shown on the screen with a pink outline will cut into the vinyl.  Here you can also select the type of material (in this case Vinyl) and the program will give you the proper settings for your blade based on the material selected.  Above, you can see it recommended that I set my Ratchet Blade to a #1.  You can adjust the number on your blade right within the machine itself.  Shown below is the small arrow pointing to the number 1 on my blade.  Once selected, back into the blade holder it goes for cutting.


On the Silhouette machine, you should see the option to "Load Cutting Mat" or "Load Media".  Load Media is the option you will want when cutting vinyl.


Use the blue guides on the machine to line up the vinyl, lift the bar with the lever, tuck the vinyl under the rollers and press the Load Media option on your screen.  You may need to straighten the vinyl a bit prior to lowering the roller bar down to hold the vinyl in place.


Now you are ready!  Nervous?  Don't be!  You got this!  Click that Start button and watch the machine work its magic!


A few minutes later and you will have yourself some freshly cut vinyl.  Not quite as fragrant as fresh cut flowers, but equally as exciting!


There were a few little spots that didn't cut 100% perfectly which might be the sign of a dull blade or an off-brand of vinyl or maybe not having the blade set to the right level.  I don't get too worried about small imperfections because they usually smooth out during the transfer process.

Speaking of transfer, now that the label is designed and cut, it needs to be transferred to the desired container.


To quickly and easily transfer the vinyl, you will need to use transfer paper (I typically prefer the lined/grid version but didn't have any on hand for this tutorial).  I also use a card, a hook tool and scissors or a paper slicer.

Cut your labeled area from the roll of vinyl with the scissors or slicer.


Peel back the blank area of the vinyl to expose your label.


You will notice that the smaller areas inside of the letters also need to be removed from the vinyl backing; this is where the hook tool comes in very handy.


Next, place your vinyl face down onto the transfer paper.  If I don't have a grid, I try to find a straight edge to pair up to.  Use the card to press and smooth the transfer paper to the vinyl label.


Peel back the vinyl backing; the vinyl should now be on the sticky side of the transfer paper.


Stick the transfer paper to the surface to be labeled.  If you lightly press the outer edges, you should have some ability to adjust it until it is right where you like it.


And when you are ready to commit, use the card again to rub and transfer the vinyl to your final surface.


Slowly peel back the transfer paper; the vinyl should remain on your surface.  I have found that the tighter I bend the transfer paper back, the less likely the vinyl will pull away with it.


And you now have a surface beautifully labeled with vinyl!


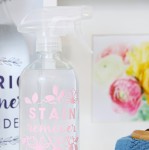
The bottle was still feeling a little bare, so I added a floral embellishment that I downloaded from the Silhouette Online Store.


I also created a second label for our stain remover as well.


Why select vinyl for labeling?  Here are a few reasons why vinyl is one of my favorite ways to label:

  • Endless creativity!  Vinyl gives me a lot of freedom to select a color, font, size, shape, pattern, etc. 
  • It is temporary!  If I ever want to reuse a container or bin down the road, the vinyl just peels off like it had never been there to begin with. 
  • But it also stays put!  Although vinyl is intended to be a temporary solution, it will stay put until you are ready to peel it away.  
  • It is washable!  When I label items like my cleaning caddy, cleaning supplies and food storage bins, they tend to get dirty and need frequent washing.  Vinyl is durable enough to be washed with soap and water without wearing away (I typically wash by hand but have thrown a food container through the dishwasher a time or two).
  • It is easy!  Although it feels like a lot of info and steps in this post, now that I know what I am doing, it only takes me a few minutes to whip up something snazzy.


Any other questions regarding how to cut vinyl with a Silhouette?  If you are not looking to invest in the Silhouette machine, you can also cut vinyl with an X-Acto knife or paper punch!  Check out an example of easy labels made with a decorative punch here.


I also can't wait to also share how to use the Silhouette Print and Cut feature!  It ranks right up there as a favorite way to use the Silhouette to create superfab labels for around the abode.

Are you now in the mood to label everything in sight?  Check out more labeling tips and tricks shared in the rest of the Labeling 101 series below.


Fonts used for labels in this post: C Avant Garde Std Bold | Dessert Menu Script | Futura
Floral Graphics use: Leaf & Flower Border | Floral Branch