Showing posts with label School. Show all posts

Friday, July 26, 2019

12 Charging Cabinet Organization Check-In

One thing you all ask for more of is just a simple update or check-in on past organizing projects, and how they have maintained or held up. I have been thinking a lot about how we tend to blog about our projects instantly as we do them, whether it be DIY or organization, and we may really love something right after it is complete, but find ourselves changing things down the road for various reasons. Knowing that, I would like to be better about either waiting to post about something until we have lived with it for a short while and worked out any kinks, or just be sure to be better about following up on things as they evolve or change over time.

When I posted about my all-time favorite organizing tips, I received a lot of emails about our docking/charging station. It seemed like the perfect opportunity to do another post for anyone newer around here, or for those wondering how it has worked for us over the years.


We have a cabinet located in a sideboard in our dining area that we dedicate to all things technology and school. I am a really big fan of creating zones in our home dedicated to specific tasks, and because we go through schedules and homework and do school-related projects at our dining table, this cabinet has been so very valuable and handy to us over the years.


Thursday, September 20, 2018

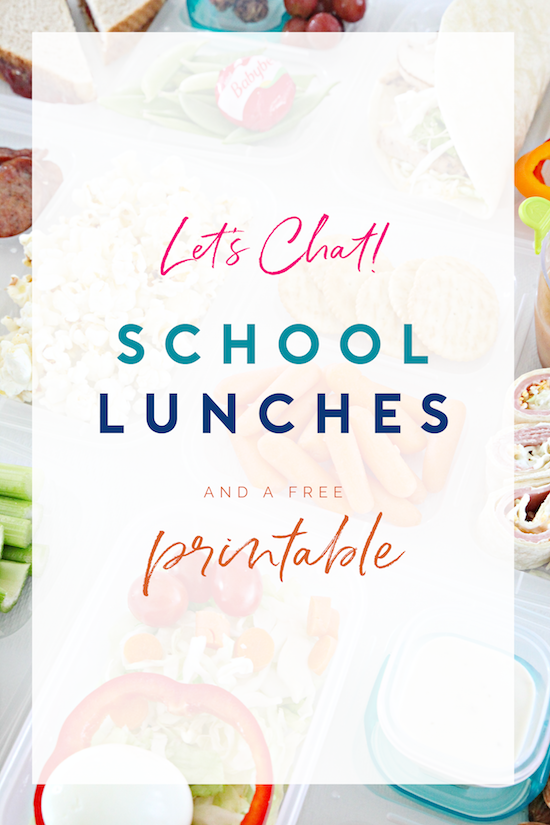
54 Let's Chat! School Lunches and a Free Printable!

We are officially a couple of weeks into the new school season, and with that, all of us are re-finding our routines and putting a few systems into place that correlate with this busy season of life.

This year I have a senior in high school (!), a freshman, and a 6th grader. By now, we have done the back-to-school organizing and routine changes quite a few times, and most things continue to get easier and easier. LOVE that! And over the years, I have shared quite a few of the things we do to prep, but this year I realized I haven't really posted about school lunches. So today is the day because they are a huge part of our daily life!


A few things I want to mention right off of the bat; lunch and food is a personal parenting decision that I never judge and hope that we can definitely keep this conversation helpful and encouraging. There have been times that I have felt bad that I wasn't making bear shaped sandwiches for my boys, and I definitely have my kids eat school-prepared lunches as well. That shouldn't make me feel bad and I know that now. We all do the best we can for our kids, period. I know that some people truly enjoy making art out of food, that some kids are vegetarian, have food allergies, only eat organic, or don't do sugar. This post isn't about that, it's just a few really quick and simple tips for how I handle the lunch prep/making process around here. So let's dive in.


TIP #1

The first thing I did this year is sit down with my boys and figure out what each of them enjoys most. My biggest problems leading into this year have been over-purchasing foods, trying to over-cater to their specific taste buds, then ending up in a hamster wheel of packing the same things on repeat with very little variety.

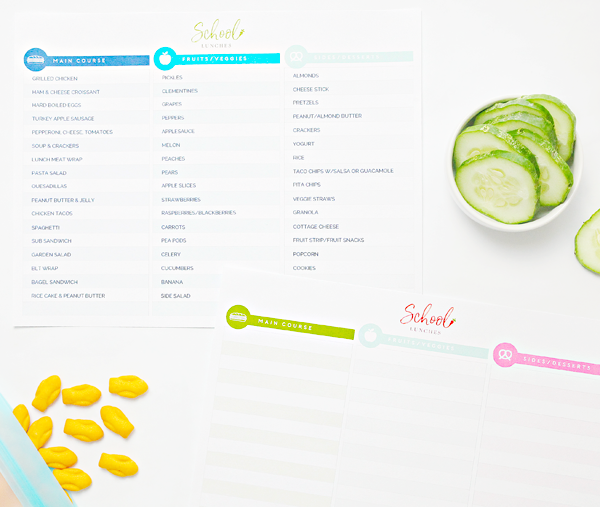
So, I sat with the boys and asked them what their favorite foods are, and wrote down all of the items that they could all agree on. We took some time to look for quick ideas online together to come up with 15-20 different lunch options as well as a variety of quick and tasty sides.


You know me, I couldn't miss an opportunity to whip up a free printable for you all, and I am SO glad I did. I made it editable so that we could type in all of our lunch ideas (which are broken down into categories: main course, fruits/veggies, sides/desserts), and then print it off and keep it inside of our pantry with our shopping/meal planning items. You can also just save it filled in digitally and access it from your phone or computer.

CLICK HERE TO DOWNLOAD THE FREE & FILLABLE SCHOOL LUNCH PLANNING PRINTABLE


CLICK HERE TO DOWNLOAD THE FREE & FILLABLE SCHOOL LUNCH PLANNING PRINTABLE


Now when I am grocery shopping/meal planning for the week, I can glance at their list and be sure to stock up accordingly. This list has items they will all eat, so I can now quickly put together lunch ideas without over purchasing food while offering some variety from week to week.


TIP #2

Keep it simple! One of the primary goals is to be speedy about lunch making. Whether in the morning or the night before, I don't want to have to invest much time in putting everything together. And really, the best case scenario is that I give the boys the tools they need to be able to do everything themselves.


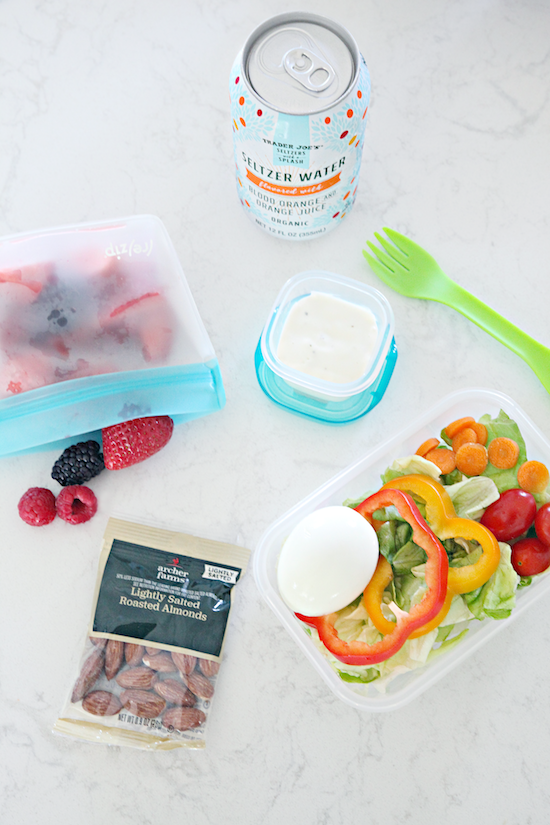
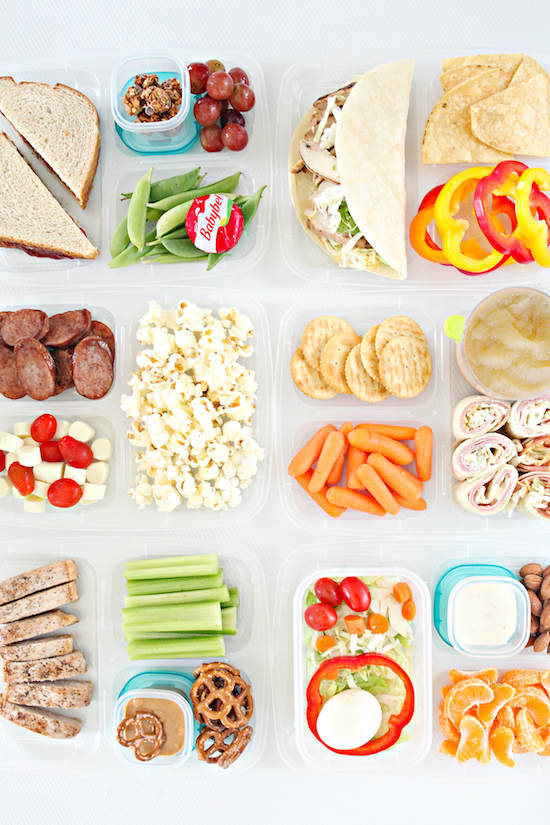
So, that might mean giving into some pre-packaged items or creating my own quick snack packs that we can all just grab-n-go. Typically I portion off crackers, popcorn, fruits, veggies, protein bites, etc... Whenever I can, I select fruits and veggies that I know I will get the longest life from (I have found that grapes, carrots, celery, cucumbers, pea pods, oranges, peppers, melon, and apples will typically stay fresh throughout the course of the week without concern of spoiling, and are easy to portion out). This is HUGELY important and probably my biggest tip.

I will also purchase individual meat snacks, cheeses, nuts, yogurts, granola, etc... if the price is right for the time I am willing to invest. If I have more time on a given week, I might opt to purchase in bulk and create those portions myself.


TIP #3

OK, so basically the first step was to select the simple sides that can easily be tossed into a lunch, and next, I like to do a little prep. Again, I am putting groceries away anyway, why not just put them away in individual grab-n-go packages to make the entire week go smoother?

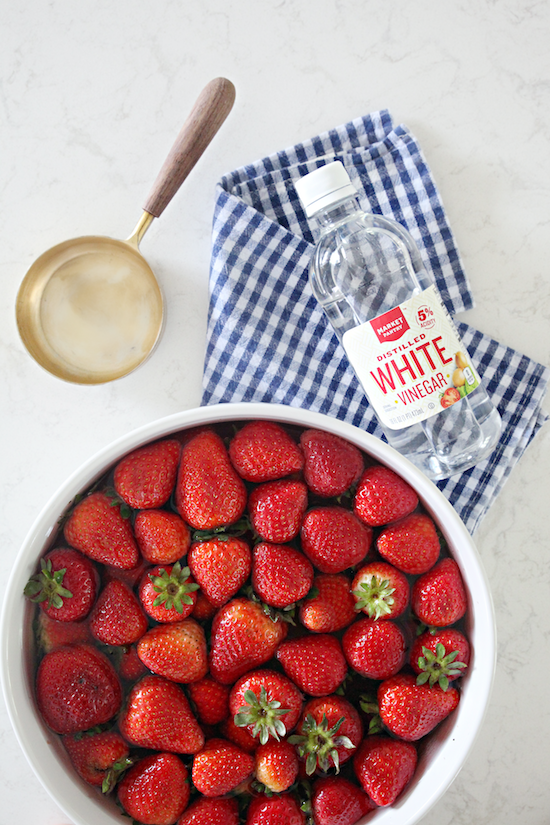
Aside from the fast fruits and veggies mentioned above, we all really love berries as well. So, while putting groceries away and doing my weekly meal prep I will soak/rinse them in a bowl of water and vinegar for a couple of minutes. They seem to last longest if I do a quick soak and then let them air dry before refrigerating. This is one more step, but if I multitask during other meal prep, then it isn't too bad and I know I will prolong the freshness for a few extra days. I do this with all berries, not just strawberries.


Also fresh from the grocery store, I will cook up chicken to create grilled chicken strips that I will put in wraps, tacos, on salad, etc... And every couple of weeks I will freeze sandwiches in a few varieties in bulk.


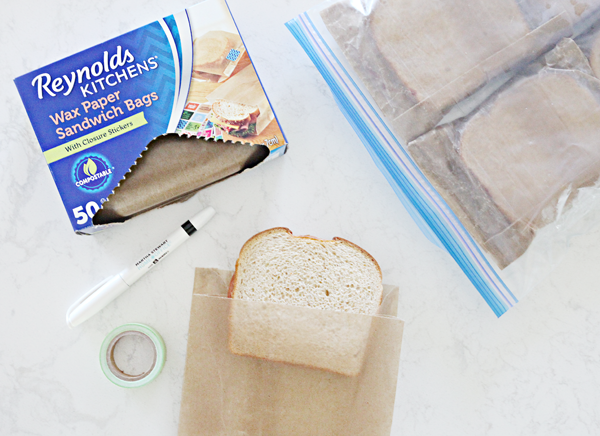
I recently switched to these wax paper bags because they are compostable and keep the sandwiches fresh in the freezer. I will make a few loaves of bread worth of sandwiches at a time (I will also use rolls/croissants with meats/cheeses, etc...) and I find they work best if I don't use spreads other than peanut butter and jelly directly on the bread. I will put together a few sandwich varieties to select from, and just label the sandwich type on the wax paper bag.

The bulk sandwiches go into freezer zipper bags (which I just keep reusing) and into the freezer until a school morning when they are transferred directly to the lunchbox and they are ready to eat by lunch.

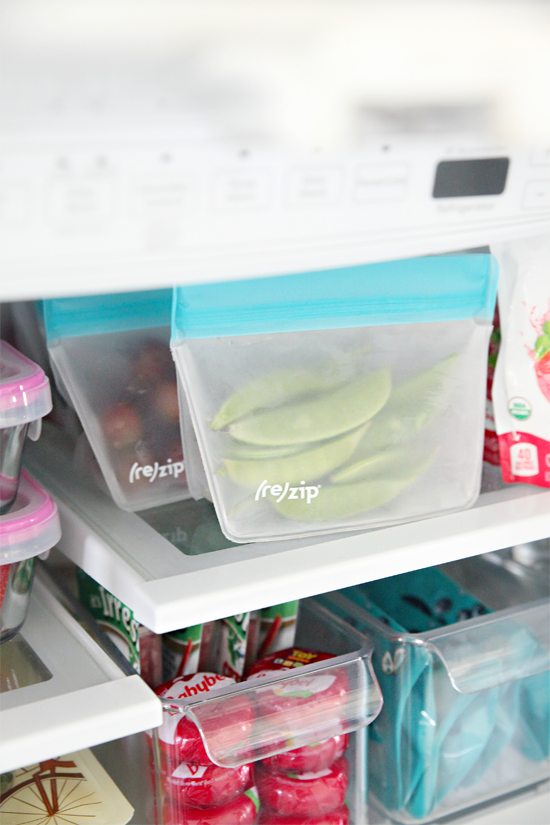
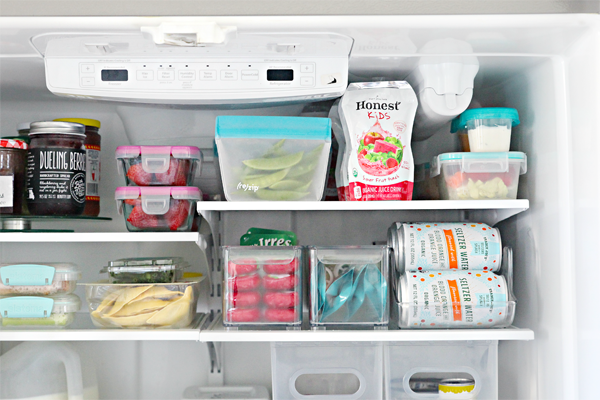
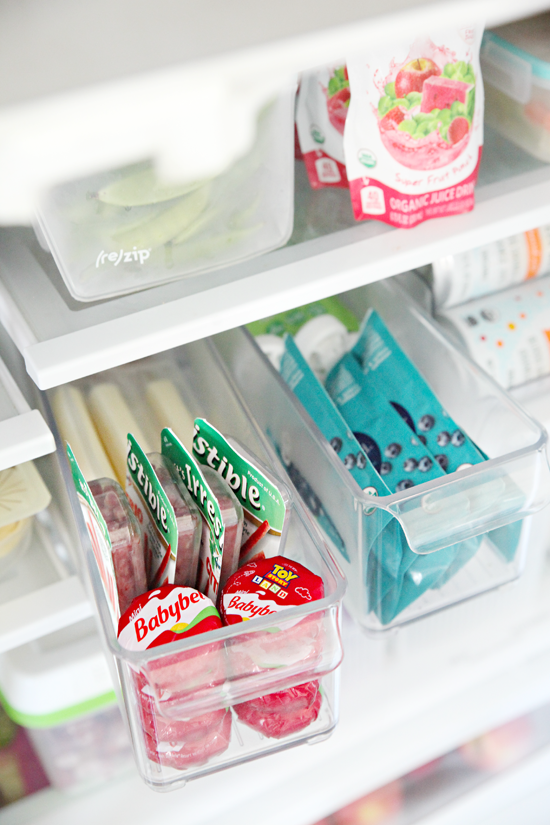
All of the pre-prepped snacks and sides are put together in a section of the fridge that the boy's love to grab from.


TIP #4

If you have the space for it, I recommend storing all lunch related containers together. That way everything is quick and easy to pick from during the lunch making sessions.


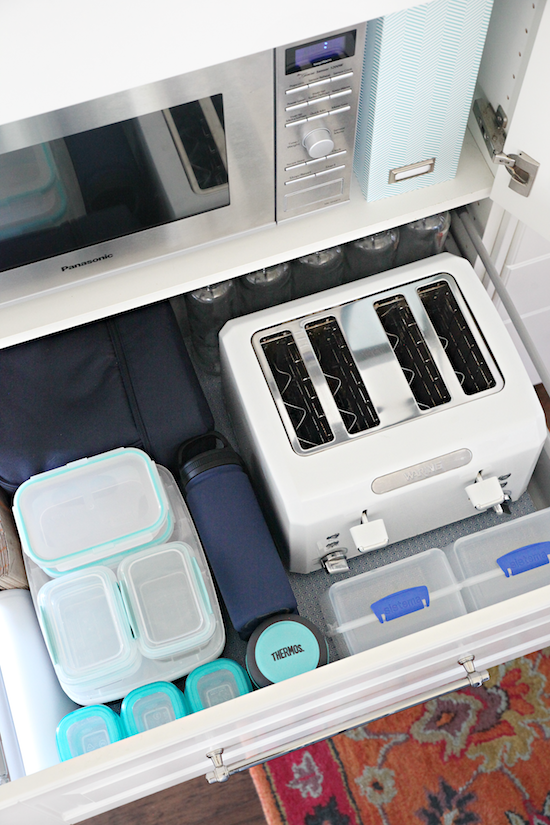
We have a nice deep drawer in our pantry and it holds all of the lunch boxes/bags, containers, water bottles, thermos, reusable bags, etc.... It has become a pretty popular drawer!


TIP #5

Tip five isn't as much of a tip as it is just some of our favorite lunch products.


We have done bento-type containers and boxes in the past, but now that the boys are bigger, they have outgrown many of those. We prefer containers that will hold a full-size sandwich or wrap without having to turn it into bite-sized finger food.


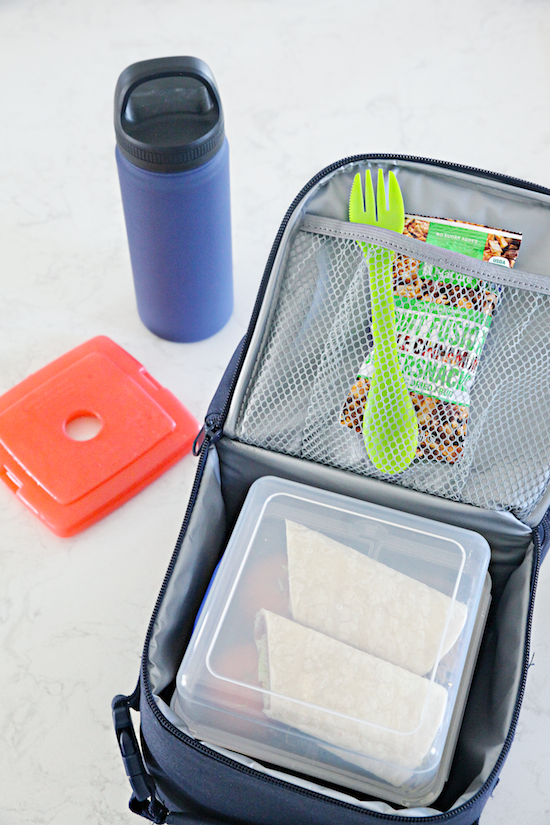
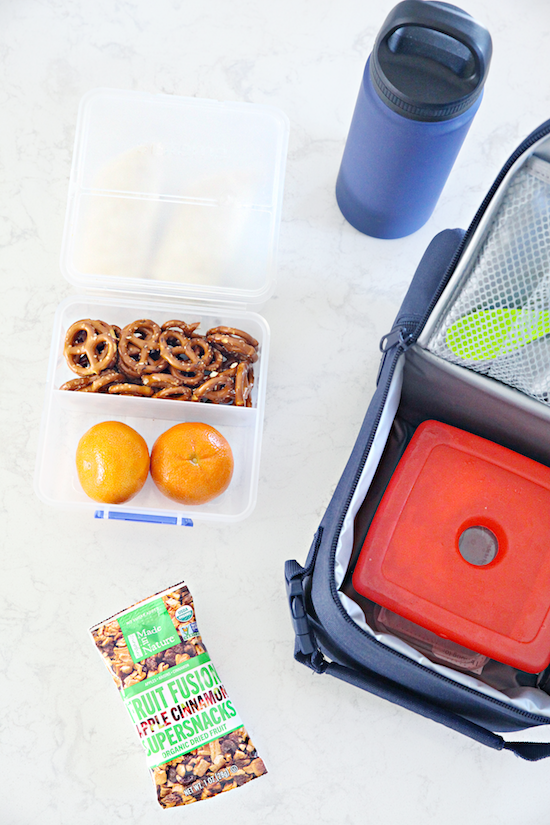
These sandwich boxes are our new favorite and I appreciate that they are dishwasher safe! They can hold the main course as well as two adequately sized side items. They are also really handy for sending snacks to school to get the boys by between classes and their extracurricular activities.


With all of the fruits/veggies/sides, and my quest to eliminate our use of plastic sandwich bags, I invested in some reusable options and so far I have been really happy with them.


I went with both the snack and sandwich sizes and they are great for keeping a variety of snacks ready to go and fresh in the fridge, and the rest stay on hand for the dry goods. They can be washed in the dishwasher, but I usually just wash them out with this dish brush in an attempt to prolong their number of uses even more.

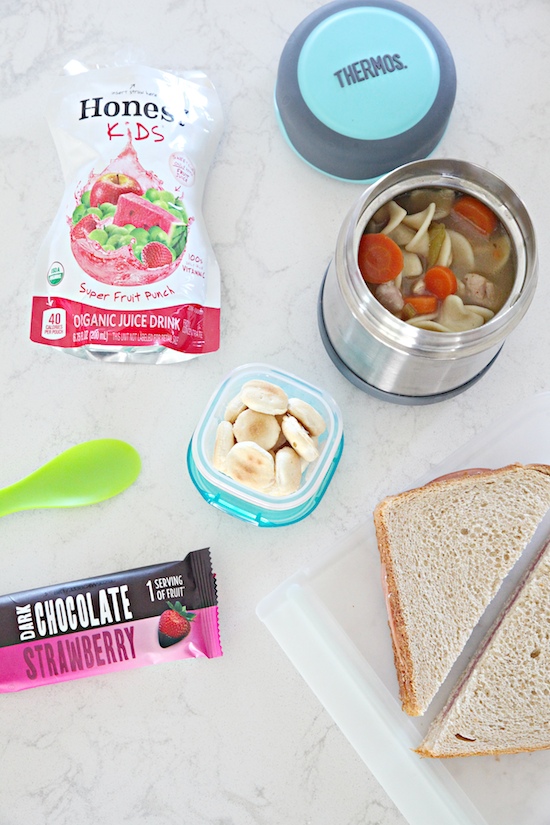
Above you can also see the containers I am smitten with for dressings and condiments. They are typically used for baby food storage, but they are completely leak proof and durable and reusable so we give them major thumbs up for lunch boxes.


An insulated food jar is also high on our list because it allows us to really expand on what we send to school. We can quickly heat up items in the morning, pop them in the insulated Thermos and everything stays nice and warm until lunchtime (think leftovers, rice, pasta, soup, etc...).


An insulated Thermos can also keep items cold, but we don't find ourselves using it for that purpose as often (but love that we can if we would like to). We do have these ice packs on constant rotation to help with keeping items fresh and cool for the few hours they are packed up.

As you can see in the lunch drawer above, we also have a few airtight snap containers that work well for bulkier items and salads (similar). In general, I looked for containers and products that can be reused, are durable, and are dishwasher safe, all of which keep our day-to-day process running quickly and smoothly.


Finally, these fridge bins (similar) rank so high on our list, they are wonderful for corralling all of the individual servings of our lunch and snack sides and act like a deep drawer in the fridge.


If you are looking for a couple of easy peasy ideas, here are the lunches we currently have on our list that all of our boys are willing to eat and are pretty simple to assemble or prep at the beginning of the week:


M A I N  C O U R S E S

Grilled Chicken, Ham & Cheese Croissant, Hard Boiled Eggs, Turkey Apple Sausage, Pepperoni/Cheese/Tomatoes, Soup & Crackers, Lunch Meat Wrap, Pasta Salad, Quesadilla, Peanut Butter & Jelly, Chicken Taco, Spaghetti/Pasta, Sub Sandwich, Salad, BLT Pita Pocket, Bagel Sandwich, Rice Cake w/Peanut Butter


F R U I T S / V E G G I E S 

Pickles, Clementines, Grapes, Peppers, Applesauce, Melon, Peaches, Pears, Apple Slices, Strawberries, Raspberries/Blackberries, Carrots, Pea Pods, Celery, Cucumbers, Bananas, Side Salad


S I D E S 

Almonds/Nuts, Cheese Sticks, Pretzels, Peanut/Almond Butters, Crackers, Yogurt, Rice, Taco Chips w/Salsa or Guacamole, Pita Chips, Veggie Straws, Granola, Cottage Cheese, Fruit Strips/Snacks, Popcorn, Cookies, Trail Mix, Beef Sticks


And because you all educate me just as much as I try to share what is working for us, I would love to hear more lunch ideas that are a hit in your households. It could be a quick meal, a quick tip, a favorite product, a helpful website/app, anything! Please take a moment to chime in below!


Wednesday, September 20, 2017

27 School Paperwork Organization & Printables!

School has been back in session for a few days, weeks, even a month or two for some, and it is always a bittersweet thing. It is a sign that warm summer days are numbered but daily routines are back and welcomed.

My boys have all been attending school full time for quite a few years now; my oldest is a junior (I can't even) and my youngest just started fifth grade. We have done the back-to-school organizing thing enough now that it has become easier and smoother and we all stress less and less. So instead of throwing everything at you in a single post, I thought that over the next few weeks I would focus on a few different "organizing with kids" tricks, and cover what has worked and what we are still working on.

To get started, I am revisiting one of my very first posts which is also the most popular in all of my eight years of blogging. Organizing school paperwork!


That's right! As of today, the original post has been pinned over 697,000 times! Clearly, school paperwork is a topic that so many of us have to deal with on a daily basis, and any help we can get is always appreciated.

However, since I originally created the printables and wrote the post, a couple of things have changed. Our process has been streamlined, I have learned better labeling methods and my printable style has evolved. In fact, those oldie printables didn't even print correctly for all of my readers (which is the worst) and the labels were designed for address labels instead of file folder labels (what was I thinking!?).

So I finally did something about it for you all! New printables and a few new tips to go with them.


Our school district has been making a lot of progress in their attempts to go paperless. Over the years I have noticed fewer papers coming home and more communications happening via online newsletters and websites. So good! And since my original post, I have also discovered document scanners, so there is that.

But we still need to have a process and flow for the papers and homework that do make it home.


T I P   O N E


Create a workflow for the paper, and keep it as easy as you possibly can. When the boys bring home something that requires my attention, I ask they create a pile for me right on the kitchen table. This ensures I will see it and that I will touch it before serving dinner. If I don't give the papers back directly to the boys right away, I have gotten myself into the habit of leaving forms at their breakfast spot so they see them first thing in the morning.

Think about your routine and how you can be sure to always see the papers and return the papers. I stopped using an inbox for immediate action items because I found they would instantly get lost in a stack. If they are sitting out where we need to eat, I am sure to touch them and take action at some point before the kids go back to school the following day (and because I don't like any table/counter clutter I know the pile will be taken care of quickly). If a form comes home with important dates, I either stick the form into my planner or write down the details and recycle/file it away.


T I P   T W O


Create a spot for charts and study guides. Each of our boys has a personal workspace with a bulletin board or wall pocket. This is where they store their weekly reading logs and study guides because this is where they do their homework. When a new form comes home, they know to either turn in or recycle the previous documents.


T I P   T H R E E


Assign a holding zone. Each boy has a slot in a cabinet in our dining area, and it holds everything that needs to be referenced or dealt with until a certain time frame expires or until I have the time to deal with it for good. Examples may be forms with sports details or hard copies of long-term activity notes and schedules or those extra special assignments and works of art that I just can't let myself part with. Anything that requires some thought or that may need to be referenced again at a later date.

(We have a similar method for our bills/personal paperwork. When the mail comes in, it is promptly sorted into two piles; to-do/to-pay and recycle. We have an inbox that any actionable items go into and then we manage those items once per week).


T I P   F O U R


File away the memories.

Let me preface this tip with the understanding that what you decide is important to keep is most likely different than what I find important. I am a sentimentalist, and I have learned that time is short, milestones are valued and my memory isn't the best. I love to look back at things my kids wrote at certain ages or documents showing their test results and grades for certain periods of their lives. This is important to me, but I understand it isn't important to everyone. There is no right or wrong answer as to what you should keep and what you should toss. My general rules for the items I chose to keep and store are:

  • A reflection of a milestone (handwriting, new math skill, growth, etc...)
  • A story or piece of writing that wows me/takes me by surprise
  • Important tests/test results
  • Report cards
  • Awards/certificates
  • Letters home from teachers/staff (both the good and the bad)
  • Pieces of art that took time and effort

When it comes to art, only the very best/favorites are kept in their original form. Most are displayed on our walls, sitting on shelves or stored away inside of art boxes. Everything is photographed and stored virtually with the Artkive app. I love this app because it allows me to photograph the art, assign it to a specific kid, and stores the photo and the details (child, date, grade, etc...) to my account. I have been doing this for years now and I can still pull up art from when my boys were in Kindergarten. The best part is that it isn't taking up any extra space in our home. Artkive also has an online store that allows you to turn the artwork into memory books or canvases or calendars... This has been my chosen way to manage artwork, but there may be a variety of new and different apps available on the market that function in similar ways.

The rest of those documents are filed away into file folders by year.


And that is where the printables come in handy!


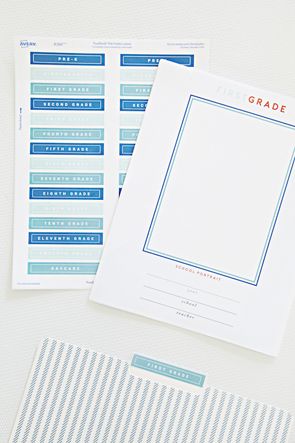
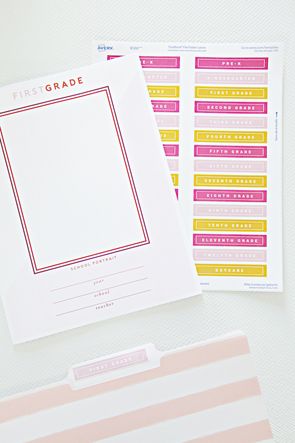
First, I created new templates for file folder labels that can be accessed and downloaded for anyone on a Windows machine or a Mac! They were designed to be downloaded and opened with Adobe Reader and printed on Avery File Folder Labels (8366).

CLICK HERE TO DOWNLOAD FREE MULTI-COLOR SCHOOL FILE FOLDER LABELS FOR AVERY 8366

CLICK HERE TO DOWNLOAD FREE PINK THEMED SCHOOL FILE FOLDER LABELS FOR AVERY 8366

CLICK HERE TO DOWNLOAD FREE BLUE THEMED SCHOOL FILE FOLDER LABELS FOR AVERY 8366

You can also label the file folders with any standard label maker, I have been using this one and I really love the variety of options that it offers.

As you can see above, I created a few different color schemes for the labels to offer some added variety.


Once all of the file folders are labeled, I like to add a coversheet to each folder with a place for the child's school portrait and details about each year.

CLICK HERE TO DOWNLOAD FREE PINK-THEMED PRE-K thru 12TH GRADE COVERSHEETS

CLICK HERE TO DOWNLOAD FREE BLUE-THEMED PRE-K thru 12TH GRADE COVERSHEETS

The coversheets simply tuck inside the front of each folder.


Quick Tip: I originally filed all of these folders inside of three very large document boxes, but quickly found they were too bulky and heavy to easily access and maintain. I recommend sticking to a standard desktop file box size or even a space-saving expandable 13-pocket folder.


The new coversheets were designed to fit a 5x7 portrait size or smaller.


S T E P   F I V E 


Backup everything digitally. The entire reason I fell in love with the idea of doing this for myself and my kids is that my parents held onto things from my childhood, as did my husband's parents from his. During many visits, these papers come out and we laugh, cry and share stories from our childhoods. I love looking back at my highs and lows and revisiting both the great accomplishments and not-so-proud moments that made me who I am today. And I have learned so much about Bryan as a kid, and especially enjoy finding similarities between him and our boys.

The thought of all of those memories and milestones and documents being lost or destroyed makes my heart crumble. And we all know that it can happen all too fast and completely unexpectedly. A number of years ago we added a document scanner to our office and it has made scanning in a stack of papers a breeze. The PDF's are then uploaded and stored online. We are big Dropbox users but Google Drive and Amazon Prime (free storage for Prime members) are also great options.


Once the systems are initially set up, they are pretty easy to maintain (and update) year after year. And I am so happy that someday my boys will have the opportunity to come back home with their families and look back at their folders and share their stories.


Tuesday, August 23, 2016

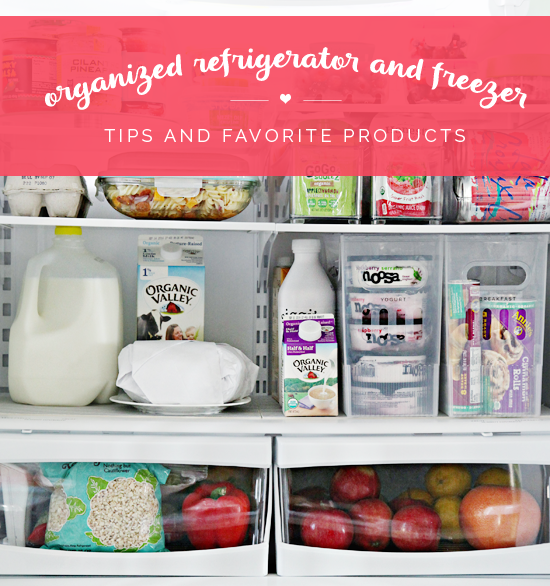
70 Organized Counter Depth Fridge & Freezer Drawer with Tips and Favorite Products

What is it about the back-to-school season that lights a fire to just get things done? I feel like I am nesting all over again, which is odd because I am actually prepping to send my kids off each day...


We typically do our grocery run on Sundays to shop and meal prep for the week ahead. We are typically weekly shoppers and stock up on sale items on occasion. This week when I returned home from the grocery store, Bryan and the kids helped to put away the recent grocery haul.


This sight really is not all that unusual for us over this past year.  We purchased a counter depth fridge (this one) as part of our kitchen renovation, and organizing it proved slightly more challenging than the regular depth options we have owned in the past. We did ditch our freezer chest in the garage, and replaced it with our previous kitchen side by side fridge and freezer (this one). Both needed a little organizational attention, but the one we actually use each and every day was first on my list.

My biggest dilemma was the freezer drawer.... In fact, it made me regret our purchase for far too long. Opening the drawer gave me literal chills, even though I liked to call it our hot mess express.


Yeah, I didn't even know those frozen berries and ice cubes were way back there until I went to take these before photos... #yikes

Most weeks I would open the fridge and think to myself, "I really should do something about this" and then I would convince myself that it is just a fridge and I had bigger fish to fry. But then I realized that I couldn't typically find the fish I wanted to fry, or that I accidentally over purchased the fish because I wasn't aware of what I had on hand.

With school on the horizon, I knew I had to finally take back control of the fridge and freezer situation (plus a few of you have been asking for this post which was another nice push, so thank you).

The one thing I loved most about our previous fridge and freezer situation, was the ability to use my favorite organizing bins. I tried to use them in this fridge as well, but with 6 less cubic feet to work with, only two of the bins fit. Those two bins were really the only part of the fridge that was organized and functioning properly. I later took my own advice and added a small lazy susan for some of our jars, and that was also a small organizational win. It was time to tackle the rest of the shelves and bins.


Prior to working on this project, I had taken measurements of our fridge and freezer and had been looking for new bin options. I prefer to organize with bins because it allows me to categorize food types which ultimately makes things easier to find. And in the freezer drawer, bins are helpful in preventing objects from being lost at the bottom.

After a lot of searching, I picked up a stack of bins from Target for just a few dollars each.


I was elated to see that I could fit a total of 7 of these bins in my two small freezer drawers!


In fact, elated doesn't even begin to describe my feelings. Remember, I live for this stuff. And now that I finally had organizers after a year of rummaging through expired and freezer burnt food, I couldn't wait to get things categorized.

As I removed items from the freezer onto the counter, I sorted them down into general categories. I also used this as an opportunity to check all dates and wipe down the interior of the freezer.  I then placed items into the bins, keeping categories a little general and flexible.


Remember, we have a second freezer in the garage, so the intent with this freezer is to store all of the foods we will reach for over the course of the week. The garage should only be used for anything much too bulky, massive plan-ahead-cooking and freezing sessions, and items we purchase in large quantities due to a good sale price. Prior to grocery shopping, I will restock the inside freezer with items from the garage freezer, and then continue to plan the rest of our meals for the week.

Inside the top three bins, I categorized out the following:


  • Gluten free bread and waffles
  • Frozen veggies
  • Frozen meats

The bottom four bins were categorized with the following:


  • Frozen treats 
  • Breakfast items (croissant, hash browns, sausage patties, etc...)
  • Frozen quick meals (chicken breast strips, breakfast burritos, etc...)
  • Add-on items/sides (rice, soup, etc...)

Again, the bins are pretty flexible in terms of their contents, their primary purpose is to prevent anything from becoming lost in never never freezer land. 


Just as I removed everything from the freezer, I took the same steps with our fridge. I also added some superfabulous grey stripe Fridge Coasters.


Are your heart shaped eyes increasing in size like mine?


The liners will help keep fridge cleanup easy breezy, while the stripes will make us smile every time we open the fridge.


The fact I can finally see and find everything only makes that smile bigger. I mean seriously, do you hear the fridge angels singing?


After a little research, I realized that I was storing a few things incorrectly. I found this darling infographic to be particularly helpful in where I returned items to the fridge.

via

The biggest "ah ha" was to store our meat and dairy in the center of the fridge.  But let's just take a quick tour of all of the shelves.


The upper left shelf holds our jarred condiments, and with a quick spin of the lazy susan, they are all easily accessible and nothing is becoming lost in the back. A few stacked tubs of sides also live on this shelf.

The next shelf holds our washed grapes and my version of fruit snacks. There are mixed feelings on washing and storing fruit, but I find we eat it so quickly that I have never had a problem with it going bad or becoming slimy.


Do your kids watch The Crazy Russian Hacker on You-Tube? My younger two boys are always giggling and learning something new, and I admit to being sucked in from time to time as well. Well, my boys were watching one day and informed me that I needed an onion chopper because I am always adding raw onions to my dishes (poor Bryan) and I cry every time I need to cut up the onion. The chopper makes it quick and easy to cut up an onion, and even allows me to store the onion for a few days in the fridge. I decided to give it a try and it really does chop an onion in a flash, but I had to be sure to add a box of baking soda to the fridge because that smell will try and linger.


The next small area of the fridge offers just enough room for leftover containers and eggs. And honestly, with three growing boys, we have very few leftovers. Sometimes I will make a salad of some sort to add to the kids lunches throughout the week. I do love these glass containers, which also allow me to use a dry erase marker on them to add the date of the meal.


Just below you can see that now our dairy and meat live right where they belong, in the middle of the fridge. And they are easy to find because everything else is out of the way organized in the other parts of the fridge! #calmdownjen #easilyexcited


Another shelf now holds two bins which are intended for school lunches and snacks. One corrals sides like yogurt, fruit squeezers and cheese sticks, while the other stores their juice boxes. By taking these items out of their original packaging, I am able to save space in our fridge and create a "drawer" that is easy to grab from while packing lunches each day.


We have used this can holder for a few years now, and really like that it prevents any cans from rolling around in the fridge while conserving a few inches as the same time.

As I mentioned, my favorite bins did find their way back into the fridge; again for breakfast items and our yogurt obsession. In this case, I didn't fix what wasn't broken. I just added a couple new labels and continued on.


Our fridge has a couple of drawers that are also labeled for specific tasks, one we use as a veggie crisper and another for fresh fruits.


For leafy veggies, such as herbs and lettuce, I remove the vegetable from its packaging and wrap it in a clean paper towel and place it inside of a zipper bag. The paper towel seems to prevent the vegetables from becoming soggy during the week.


Another trick I recently learned is that celery and carrots can be stored in water to keep their freshness and to prevent them from drying out. I picked up two of these tall bins and just be sure to switch out the water every day or two.


Because I also like to pre-wash my fruits (two reasons; I don't trust that my boys will remember to wash everything before they eat it and I just find it more convenient to reach for prepped fruit over the course of the week), these ventilated containers aid in maintaining their freshness for longer.

Below the fruit and veggie drawer, there is another drawer that we like to divide in half to use for our meats and cheeses. Again, meats and dairy are being stored in the central part of the fridge, and the divider easily slides to offer some flexibility.


Another weekly prep item I like to do from time to time, is whip up some pancake batter and store it in the fridge for a quick morning breakfast. This batter dispenser is fun for creating shapes and easy enough for my boys to make their own, however, I only trust the freshness for a day or two so we need to do pancakes early in the week.


The other door is pretty typical and does a good job holding our dressings and condiments, again very loosely categorized.


Are those liners still making you smile?


Who knew that organizing 20 cubic feet would require so many words and photos!? #whew

A few more quick talking points:

  • We don't store much food in the fridge in the garage, typically it is just used for extra beverages. However, it does come in handy when entertaining and looking to store larger bowls and dishes.
  • Speaking of the other fridge, I am sure we could find a way to make this one work all on its own if we had too, but having the old fridge as a back-up in the garage has really made this smaller counter-depth fridge more manageable for a family of five.
  • We opted to purchase the fridge with the water dispenser inside of the fridge vs. in the face of the door to save on storage space (and don't regret that decision one bit).
  • Frozen pizzas really didn't fit well in our freezer drawer, so we began utilizing either tortilla shells or pre-made pizza crust (which we store in our pantry) and making our own fresh pizzas instead. 
  • Our optimal fridge temp is 38 degrees and freezer temp is generally set to 0, however, it did rise while taking photos which is why you may have noticed the higher number.
  • I could have went on a labeling frenzy, but decided this should be easy enough for all of us to grasp and maintain. If anything starts to fall apart, I will add a label or two down the road.

And to finish up my ramblings, the glorious before and afters of this fun and rewarding organizing task:


*affiliate links used